Mini Means Less Work, Right?!
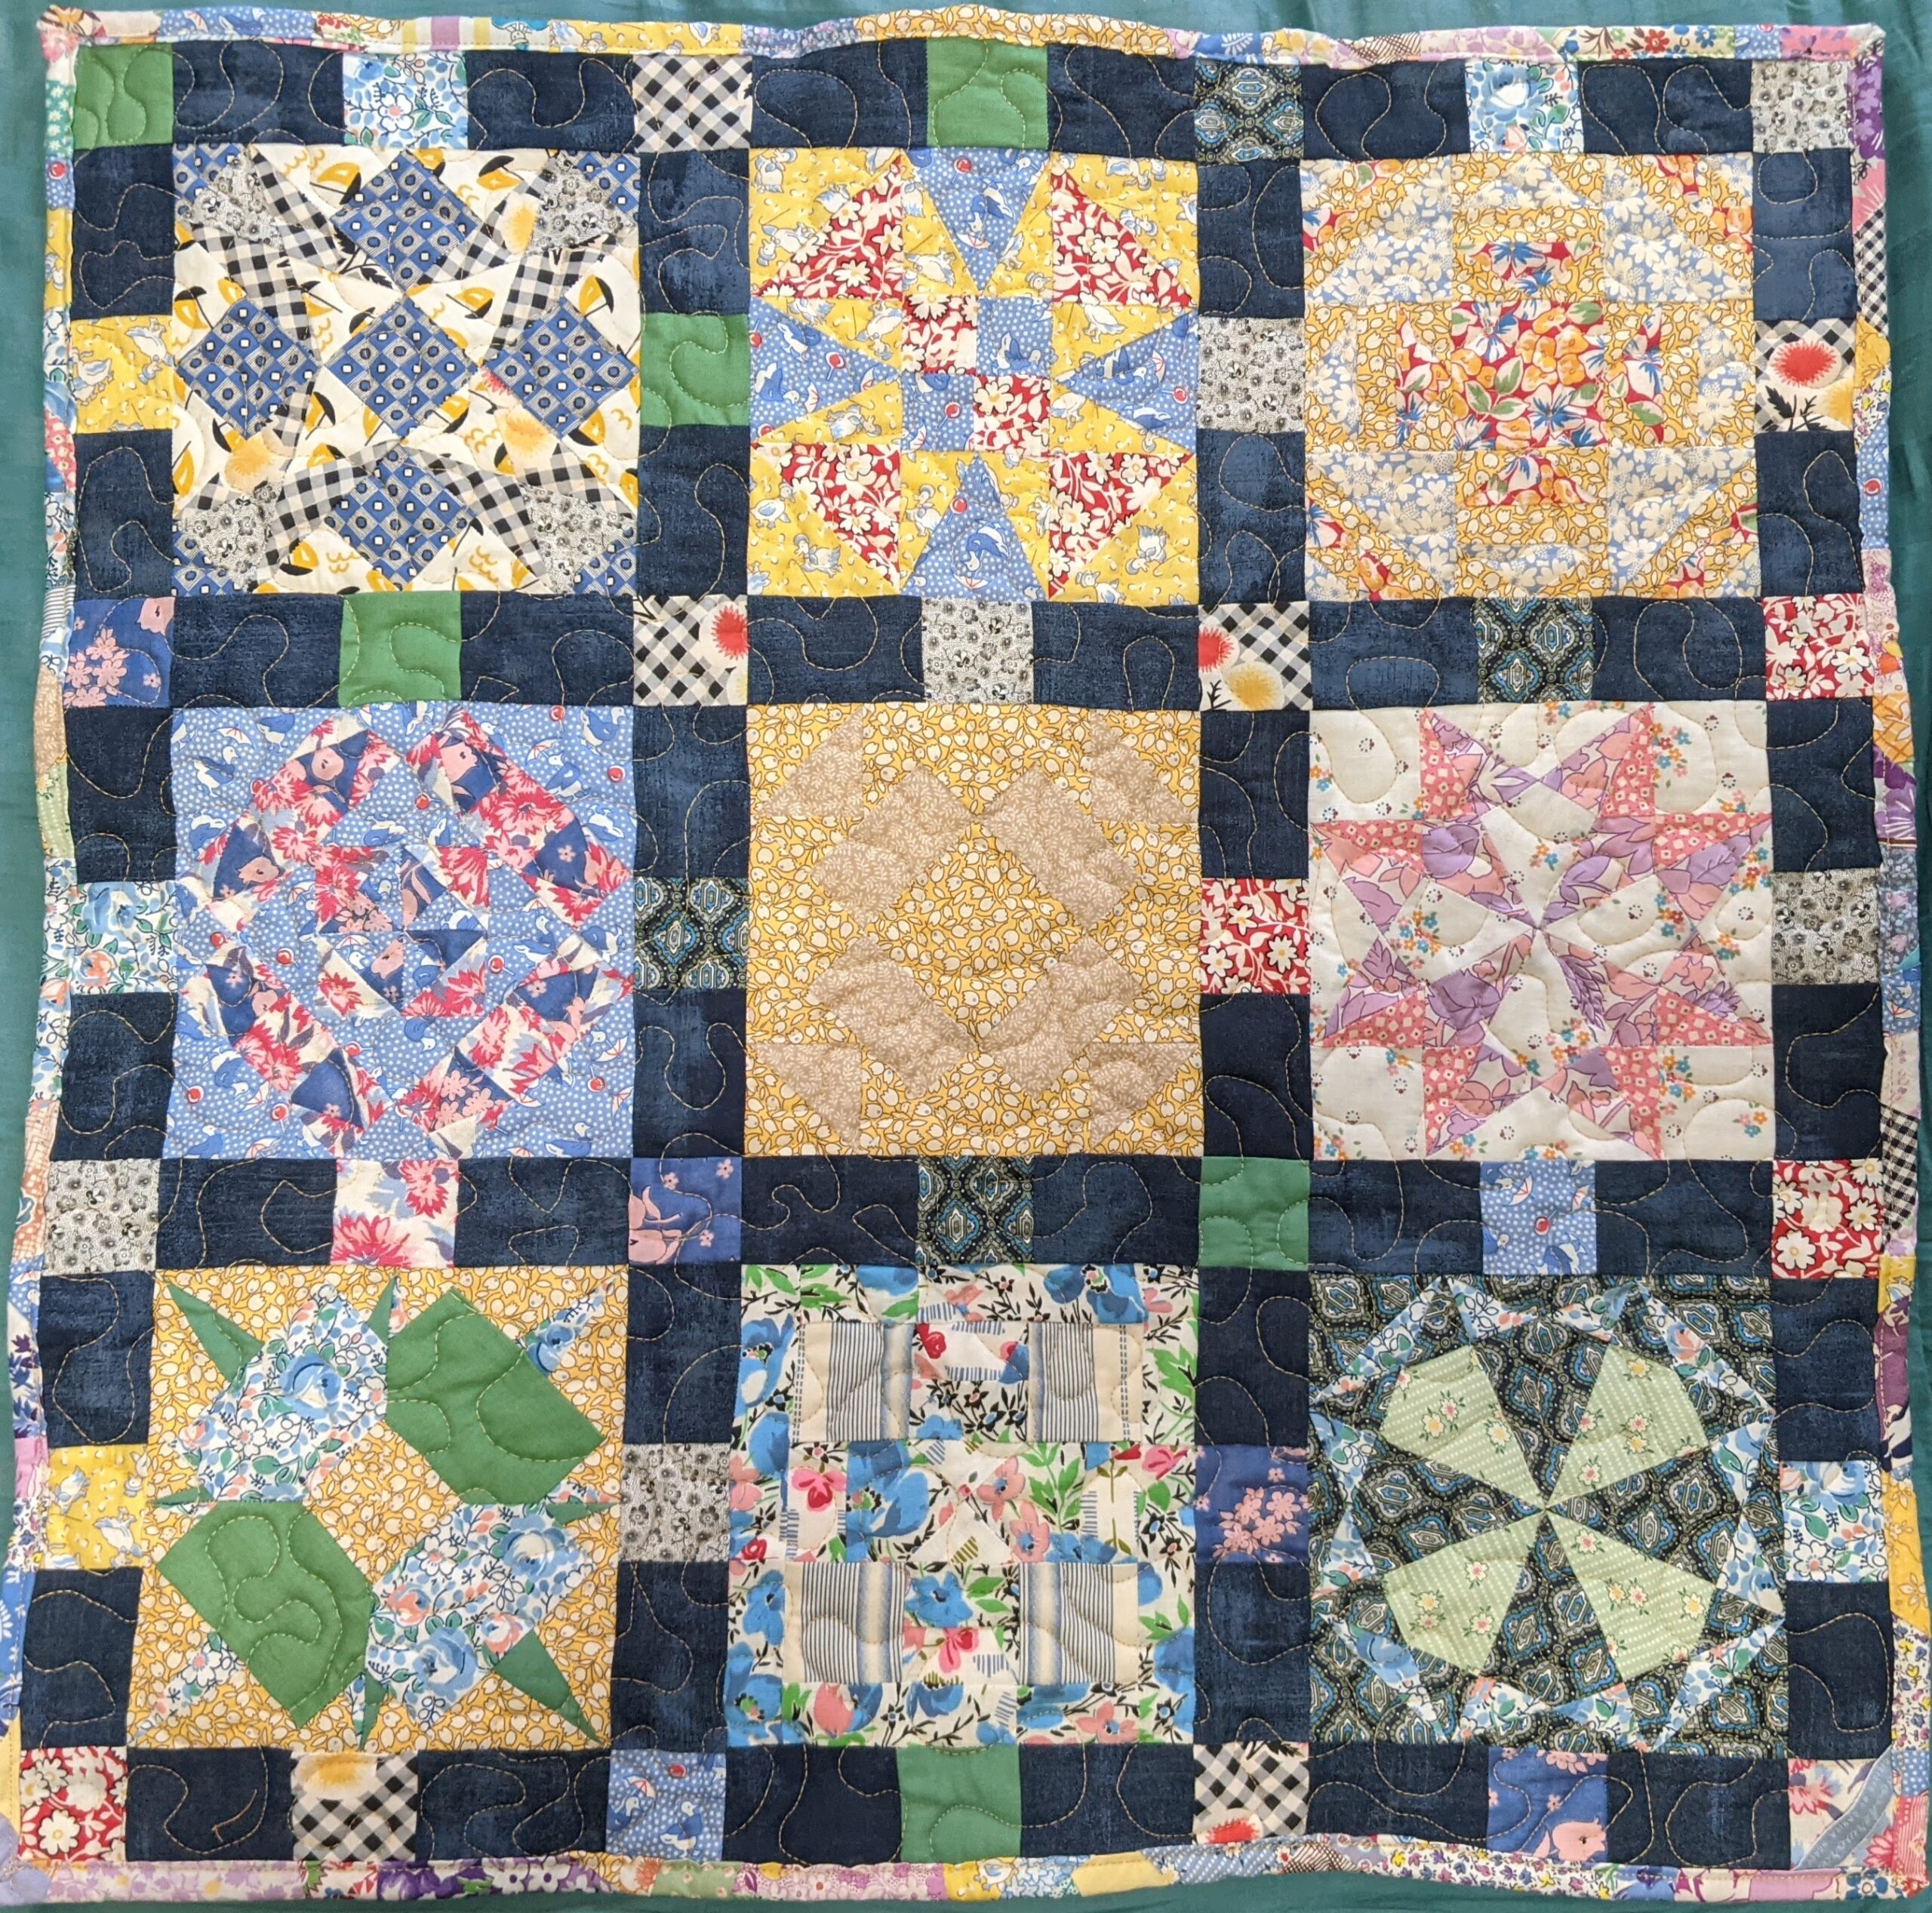
Nope. Nope. Nope!! A Miniature Quilt, in fact, means much more work in a teenier space! Here’s a quick glimpse of a Miniature Quilt I worked on for a Competition Show this May. The Competition was to create a Miniature Quilt that had no pieces larger than a 3 inch square…or basically any piece larger than nine square inches.
According to the Competition Rules, you were allowed to use a larger piece for the binding and back. I didn’t. I know….I’m such a rebel. Actually, I’m just a glutton for punishment.
As you know, I’ve been trying to de-stash, so, I had this great grab-bag of vintage 1930’s scraps I had picked up from a Quilt Show over a decade ago and as Luck would have it, (that sentence is even funnier if you know my husband’s nickname is Lucky) my husband got me a copy of The Farmer’s Wife, which is a sampler of 1930’s blocks that are paired with real letters from the wives of Farmer’s during the Depression. It was meant to be: a new Sampler book of tiny blocks meets a bag of vintage scraps I need to de-stash…Voila! A Miniature Quilt design!
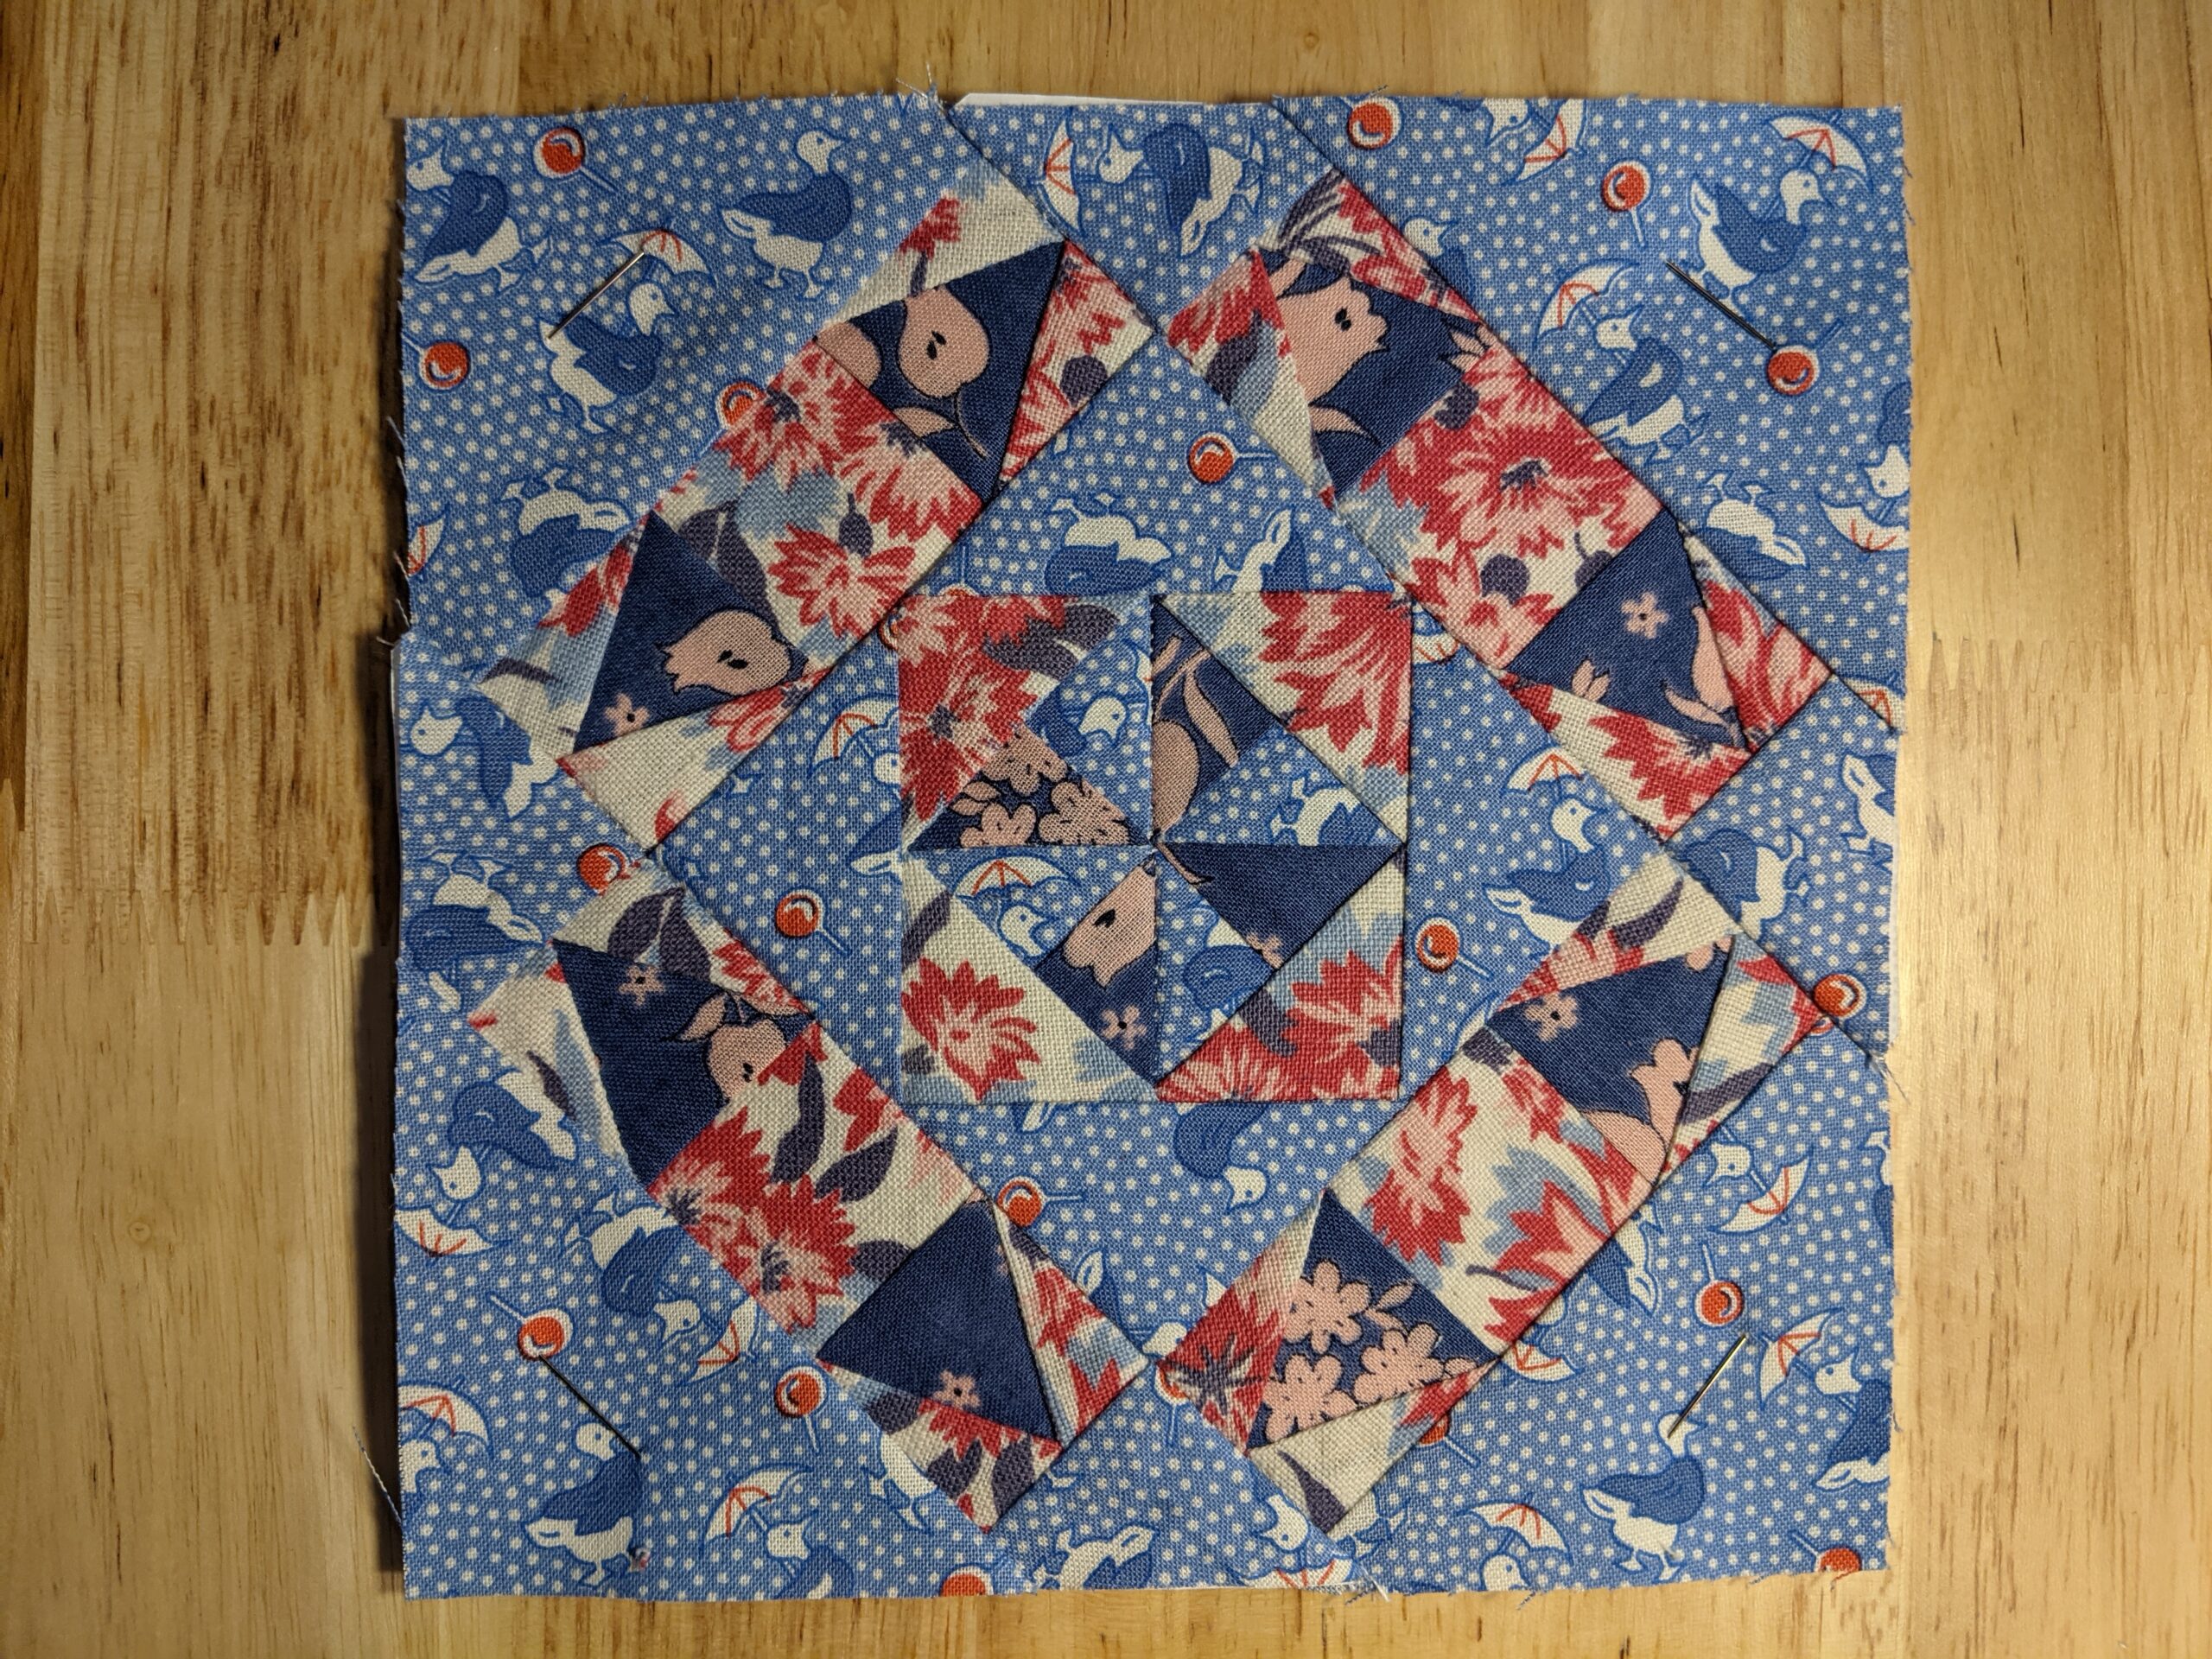
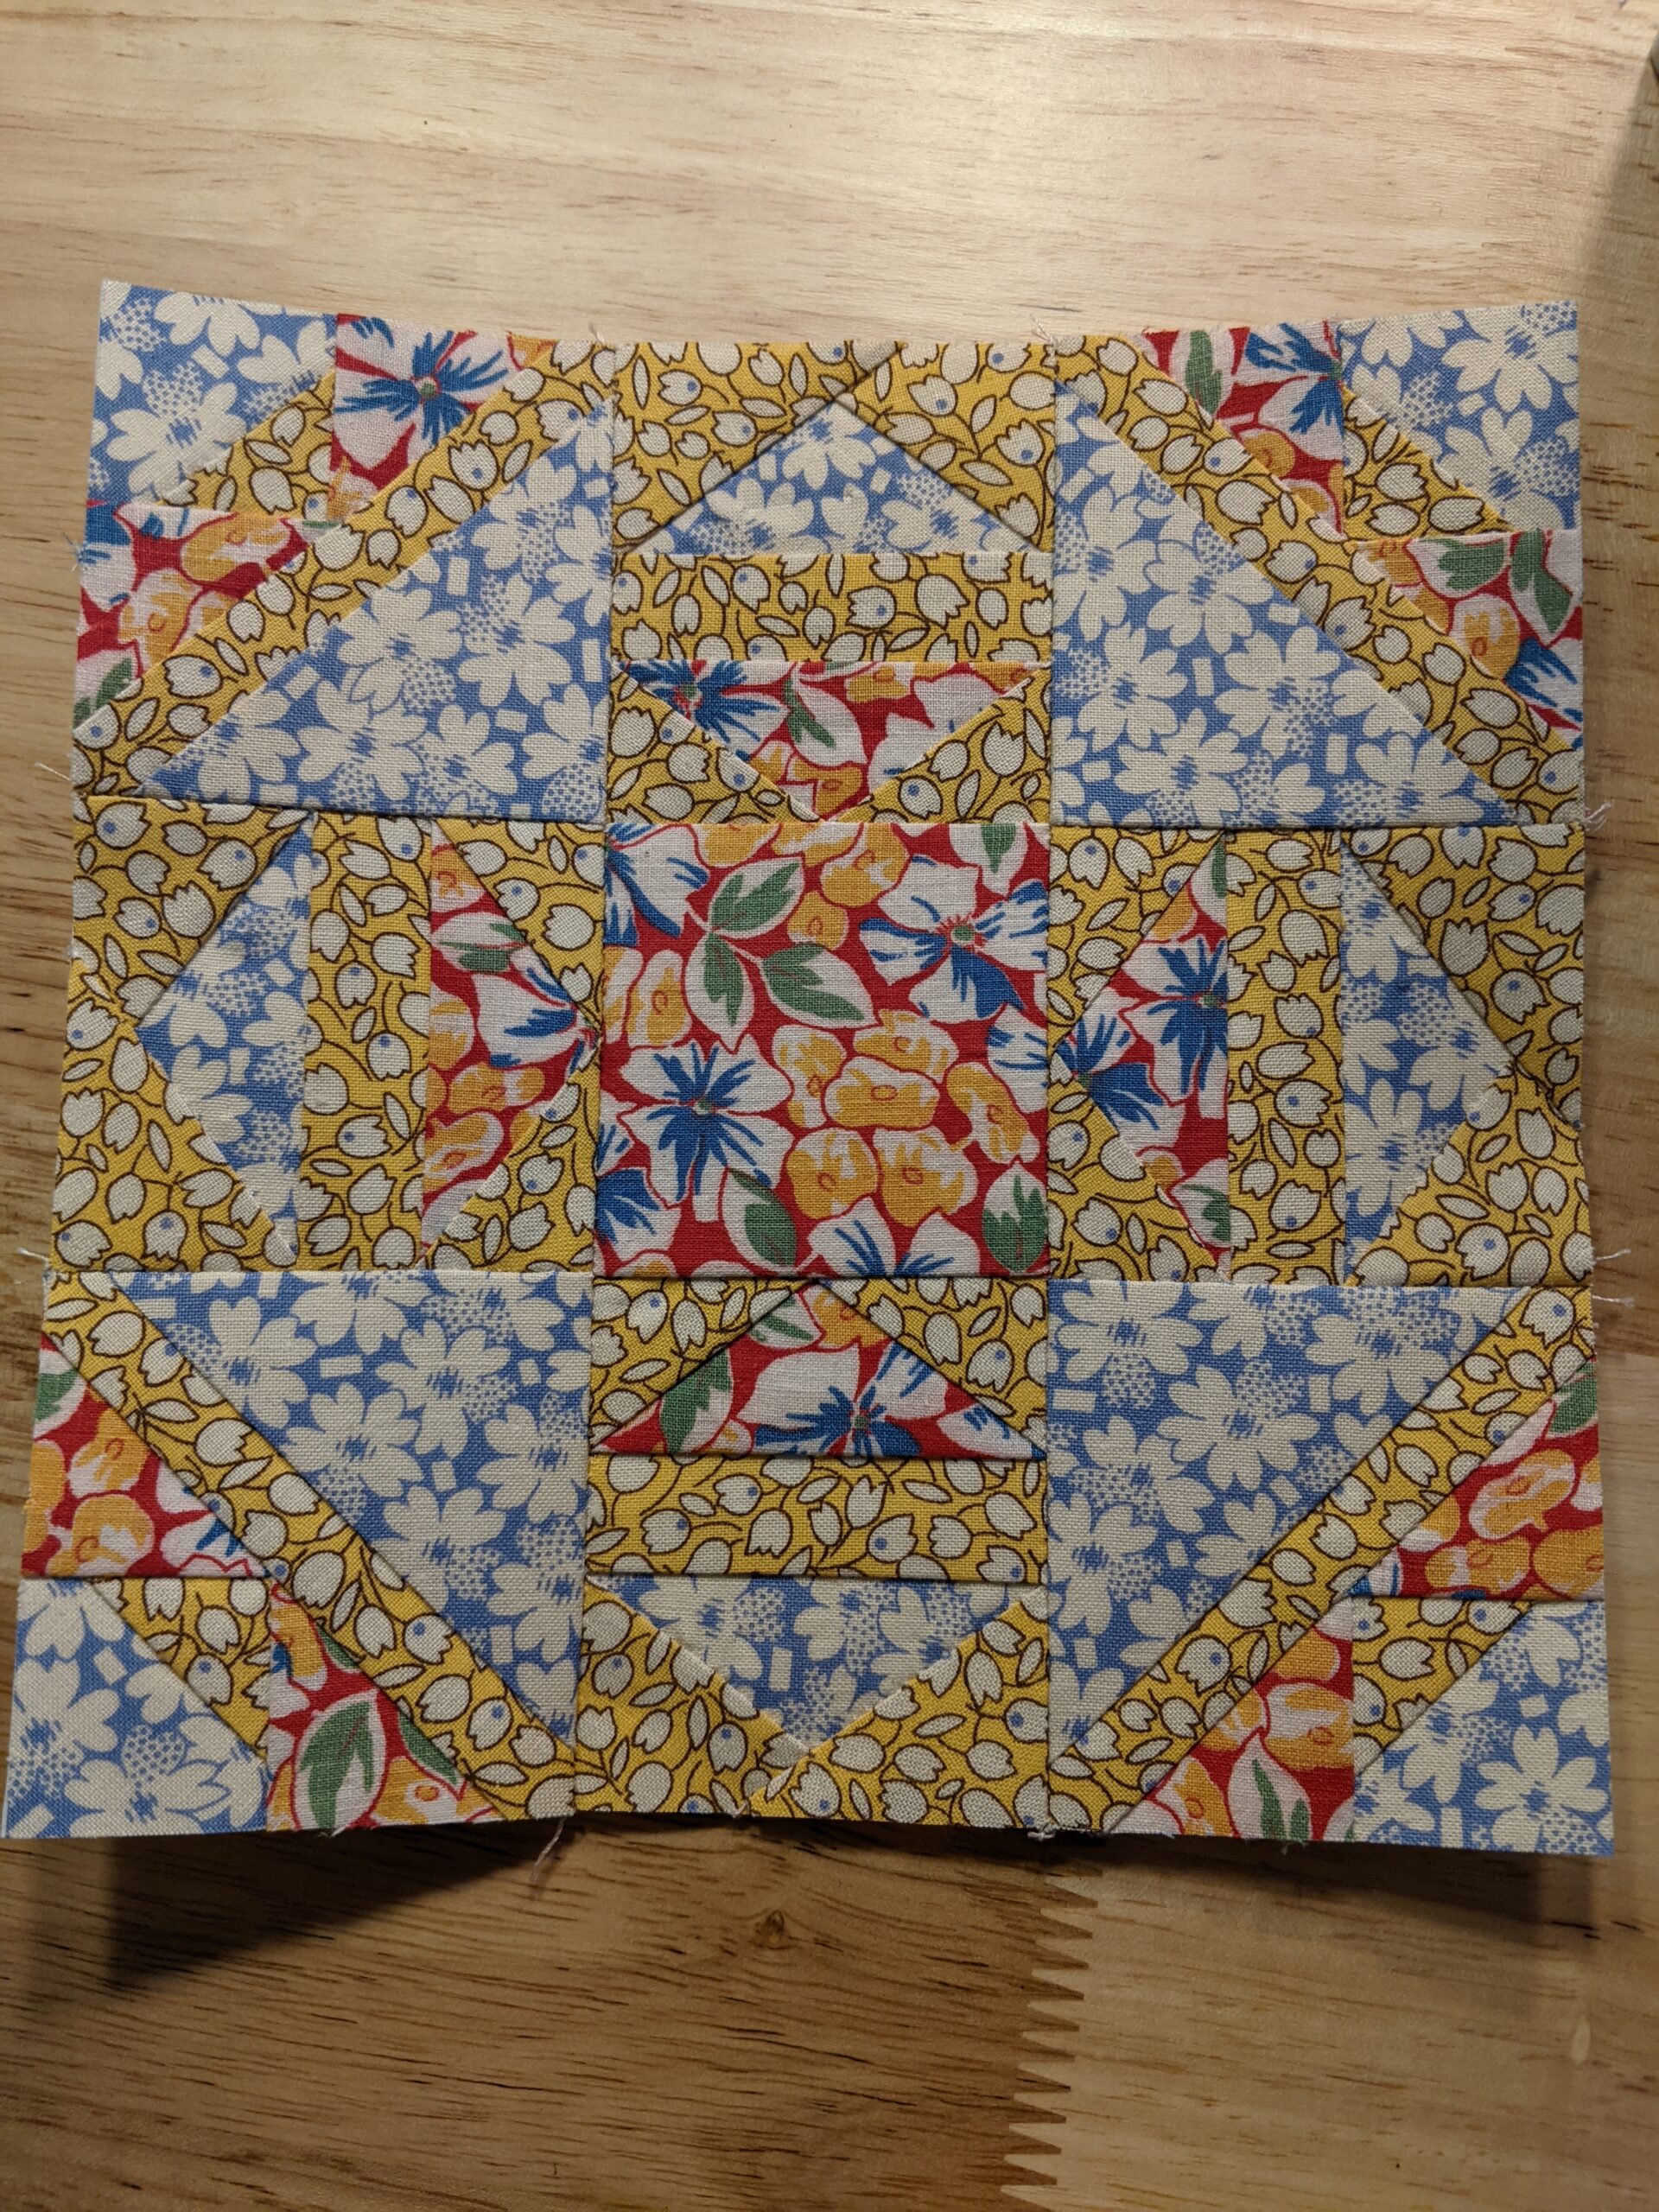
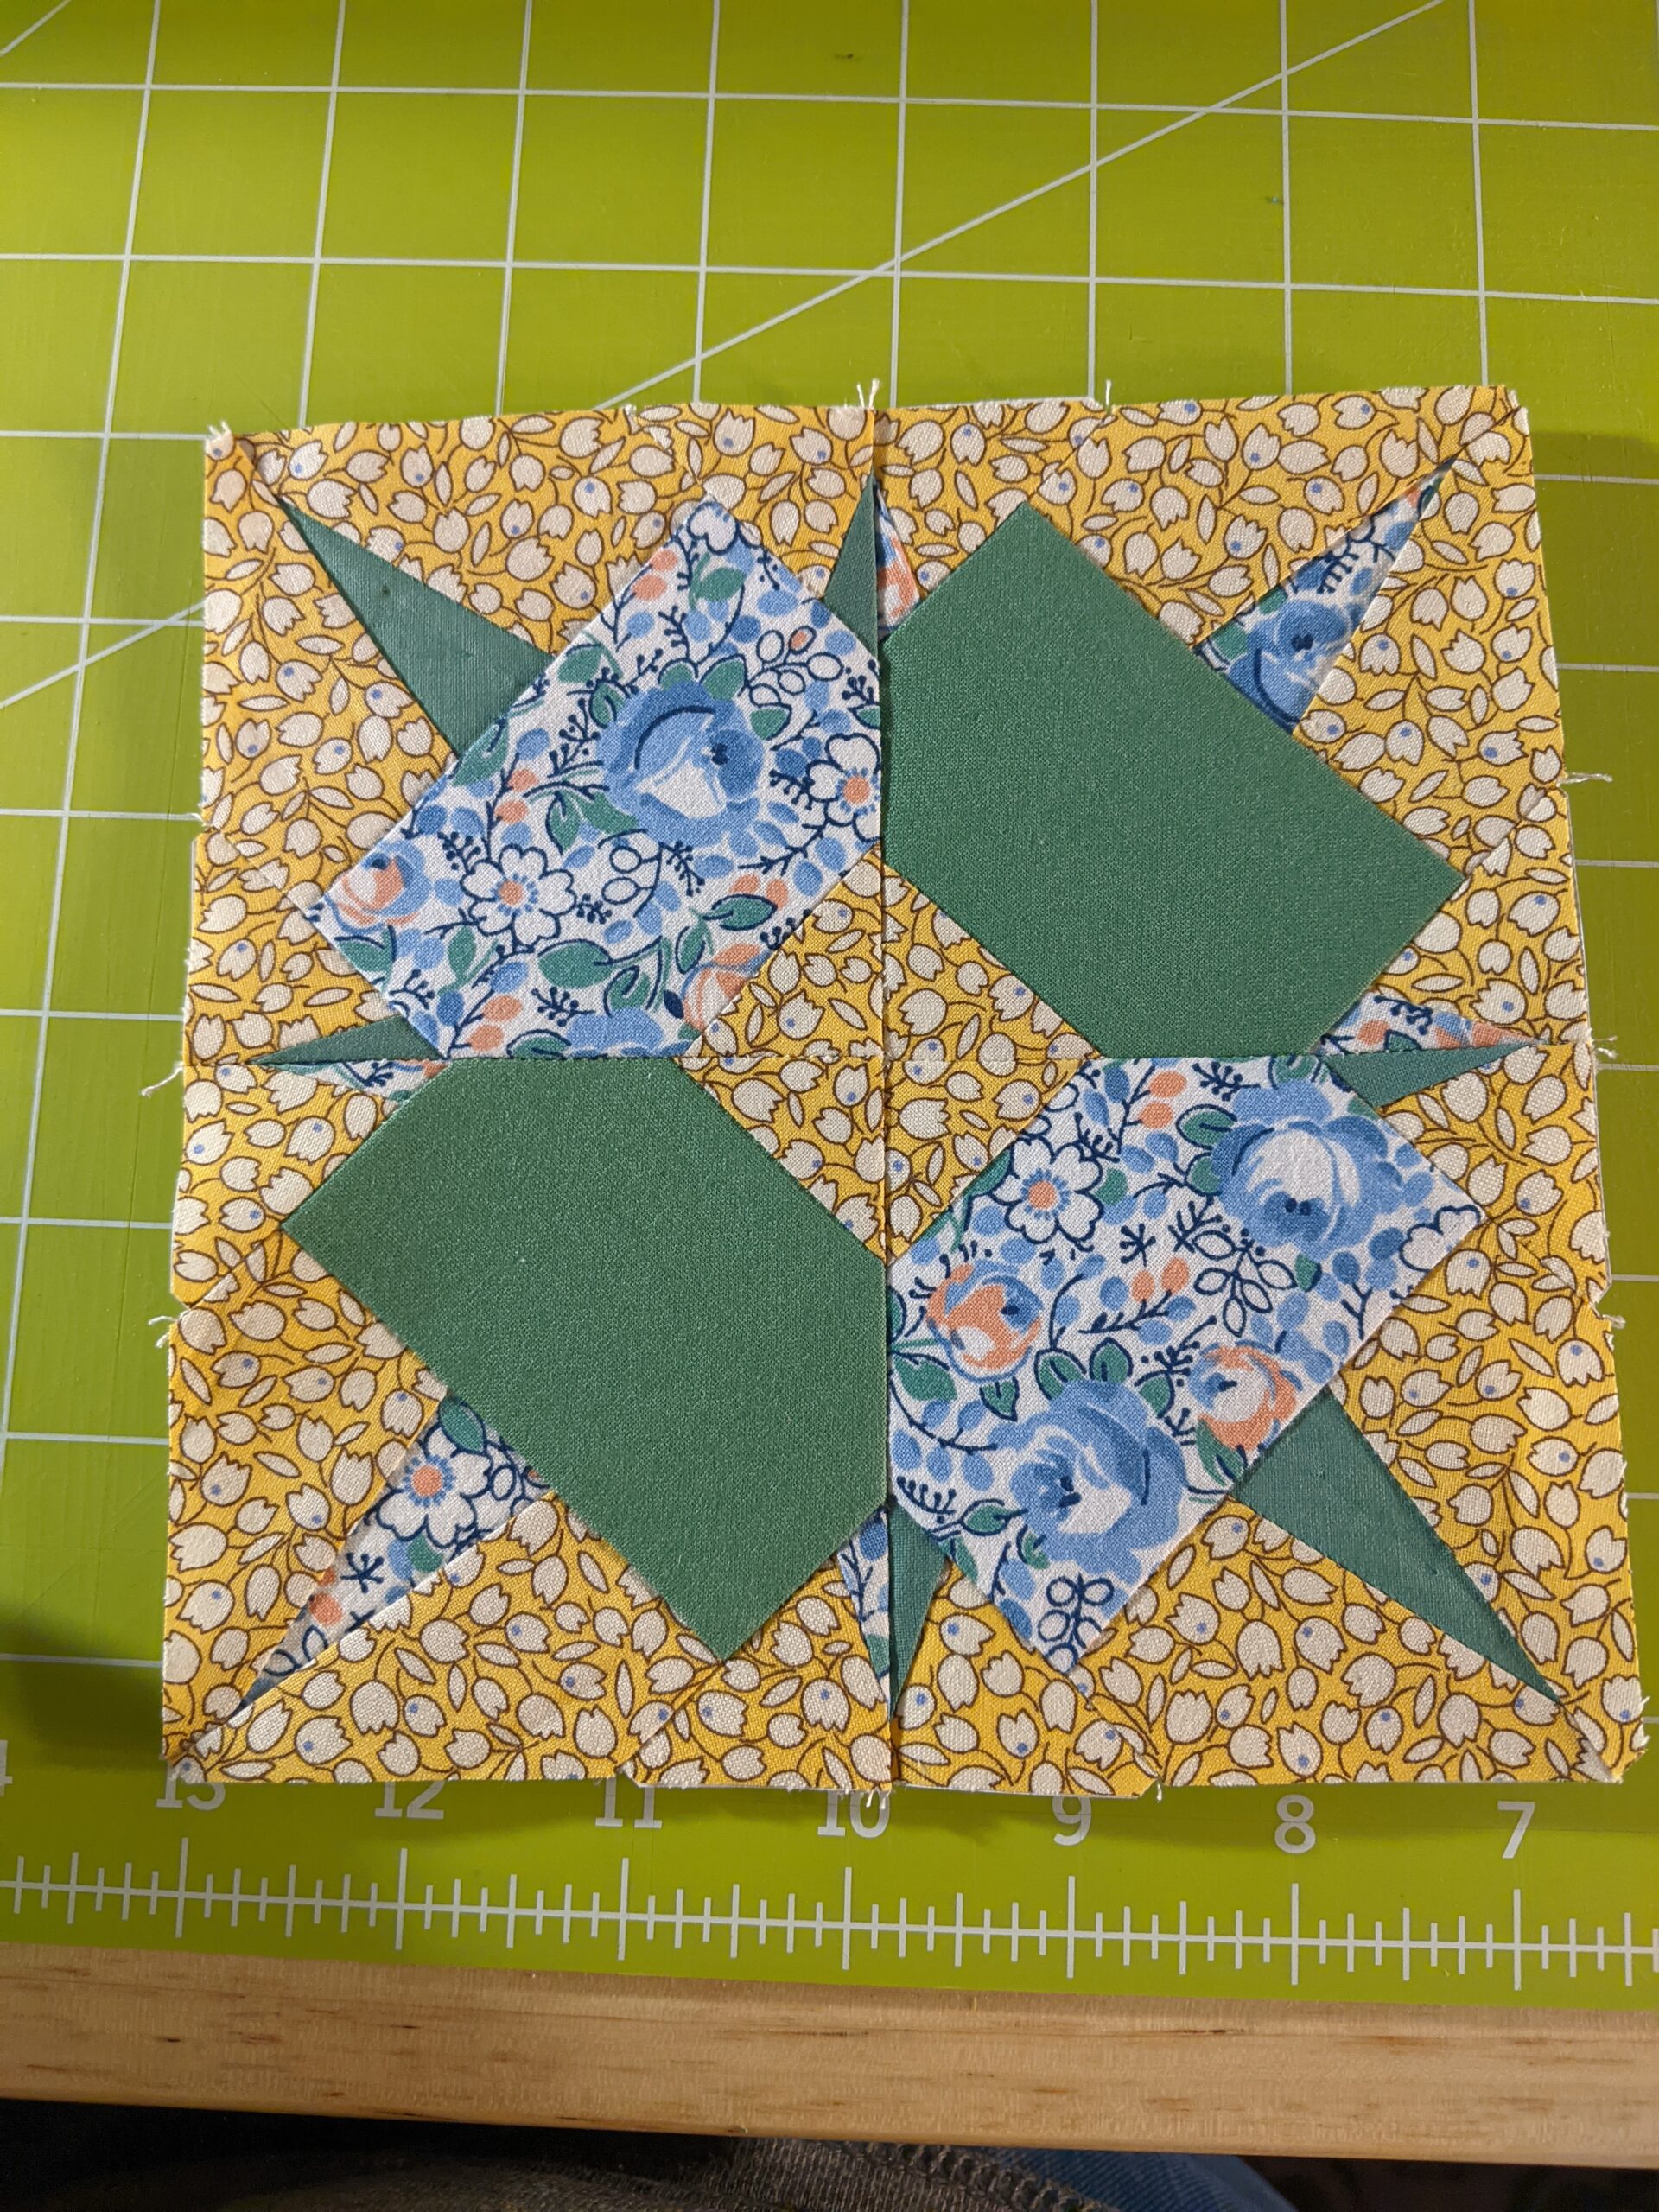
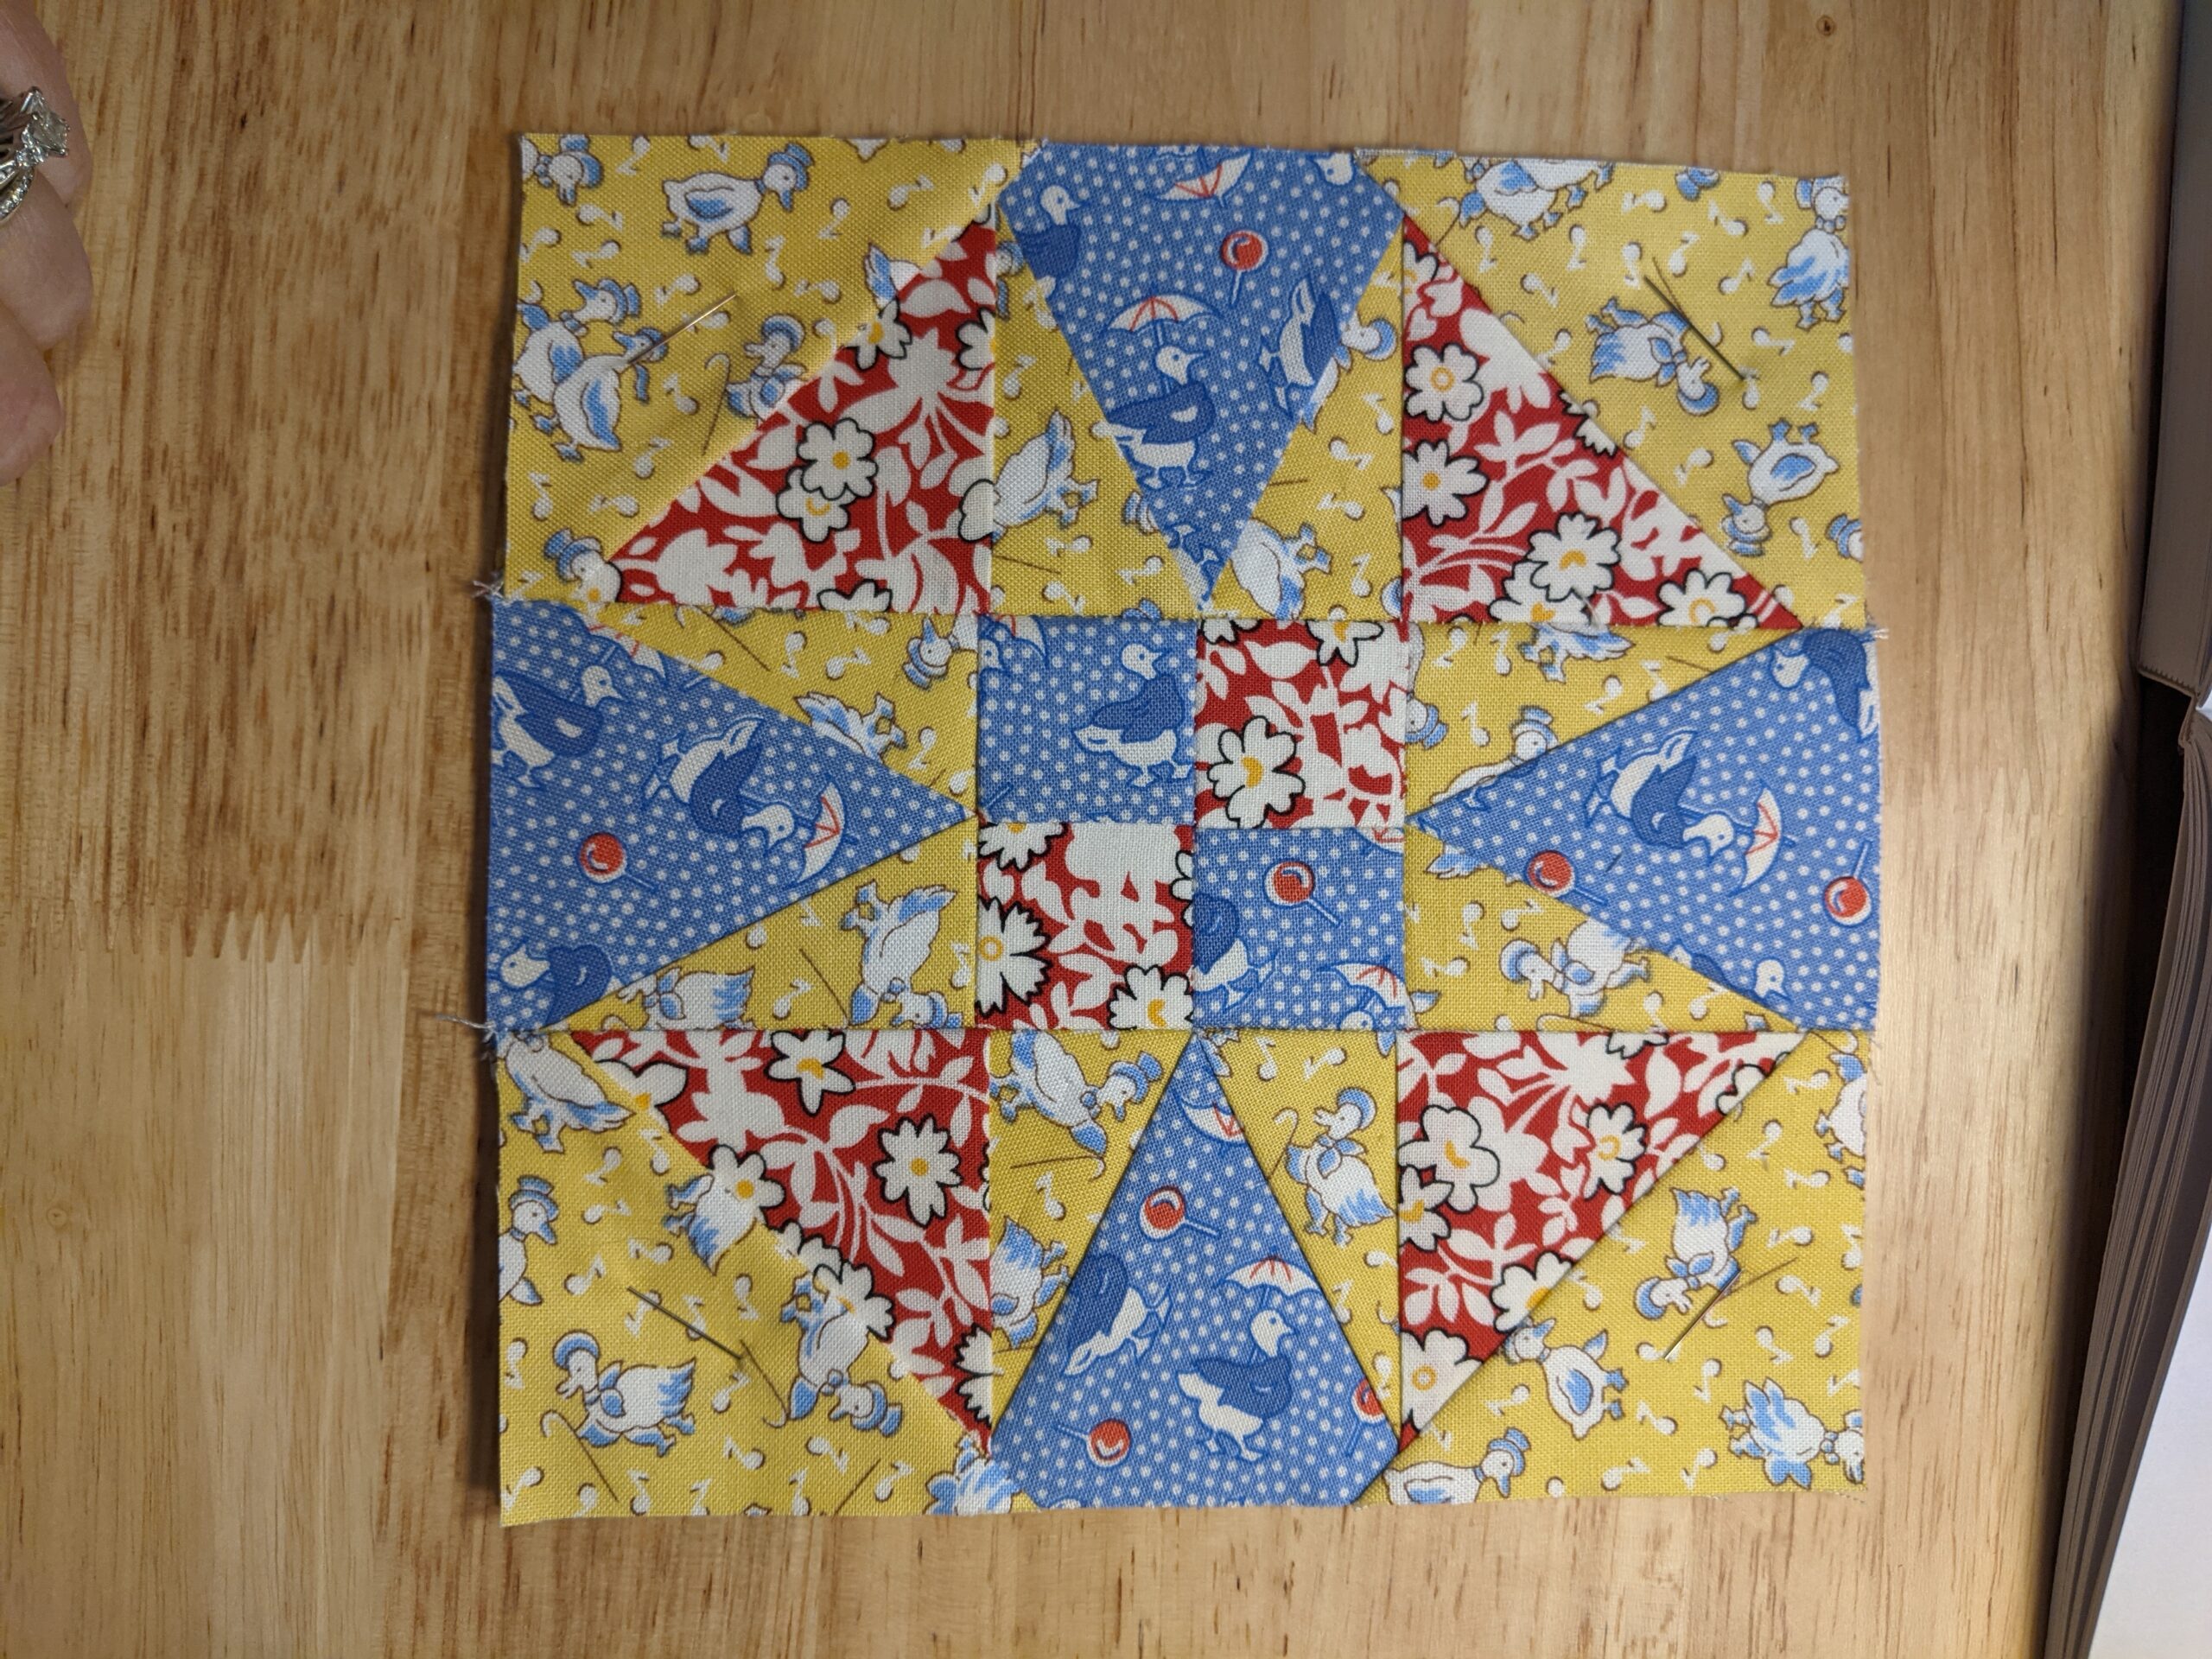
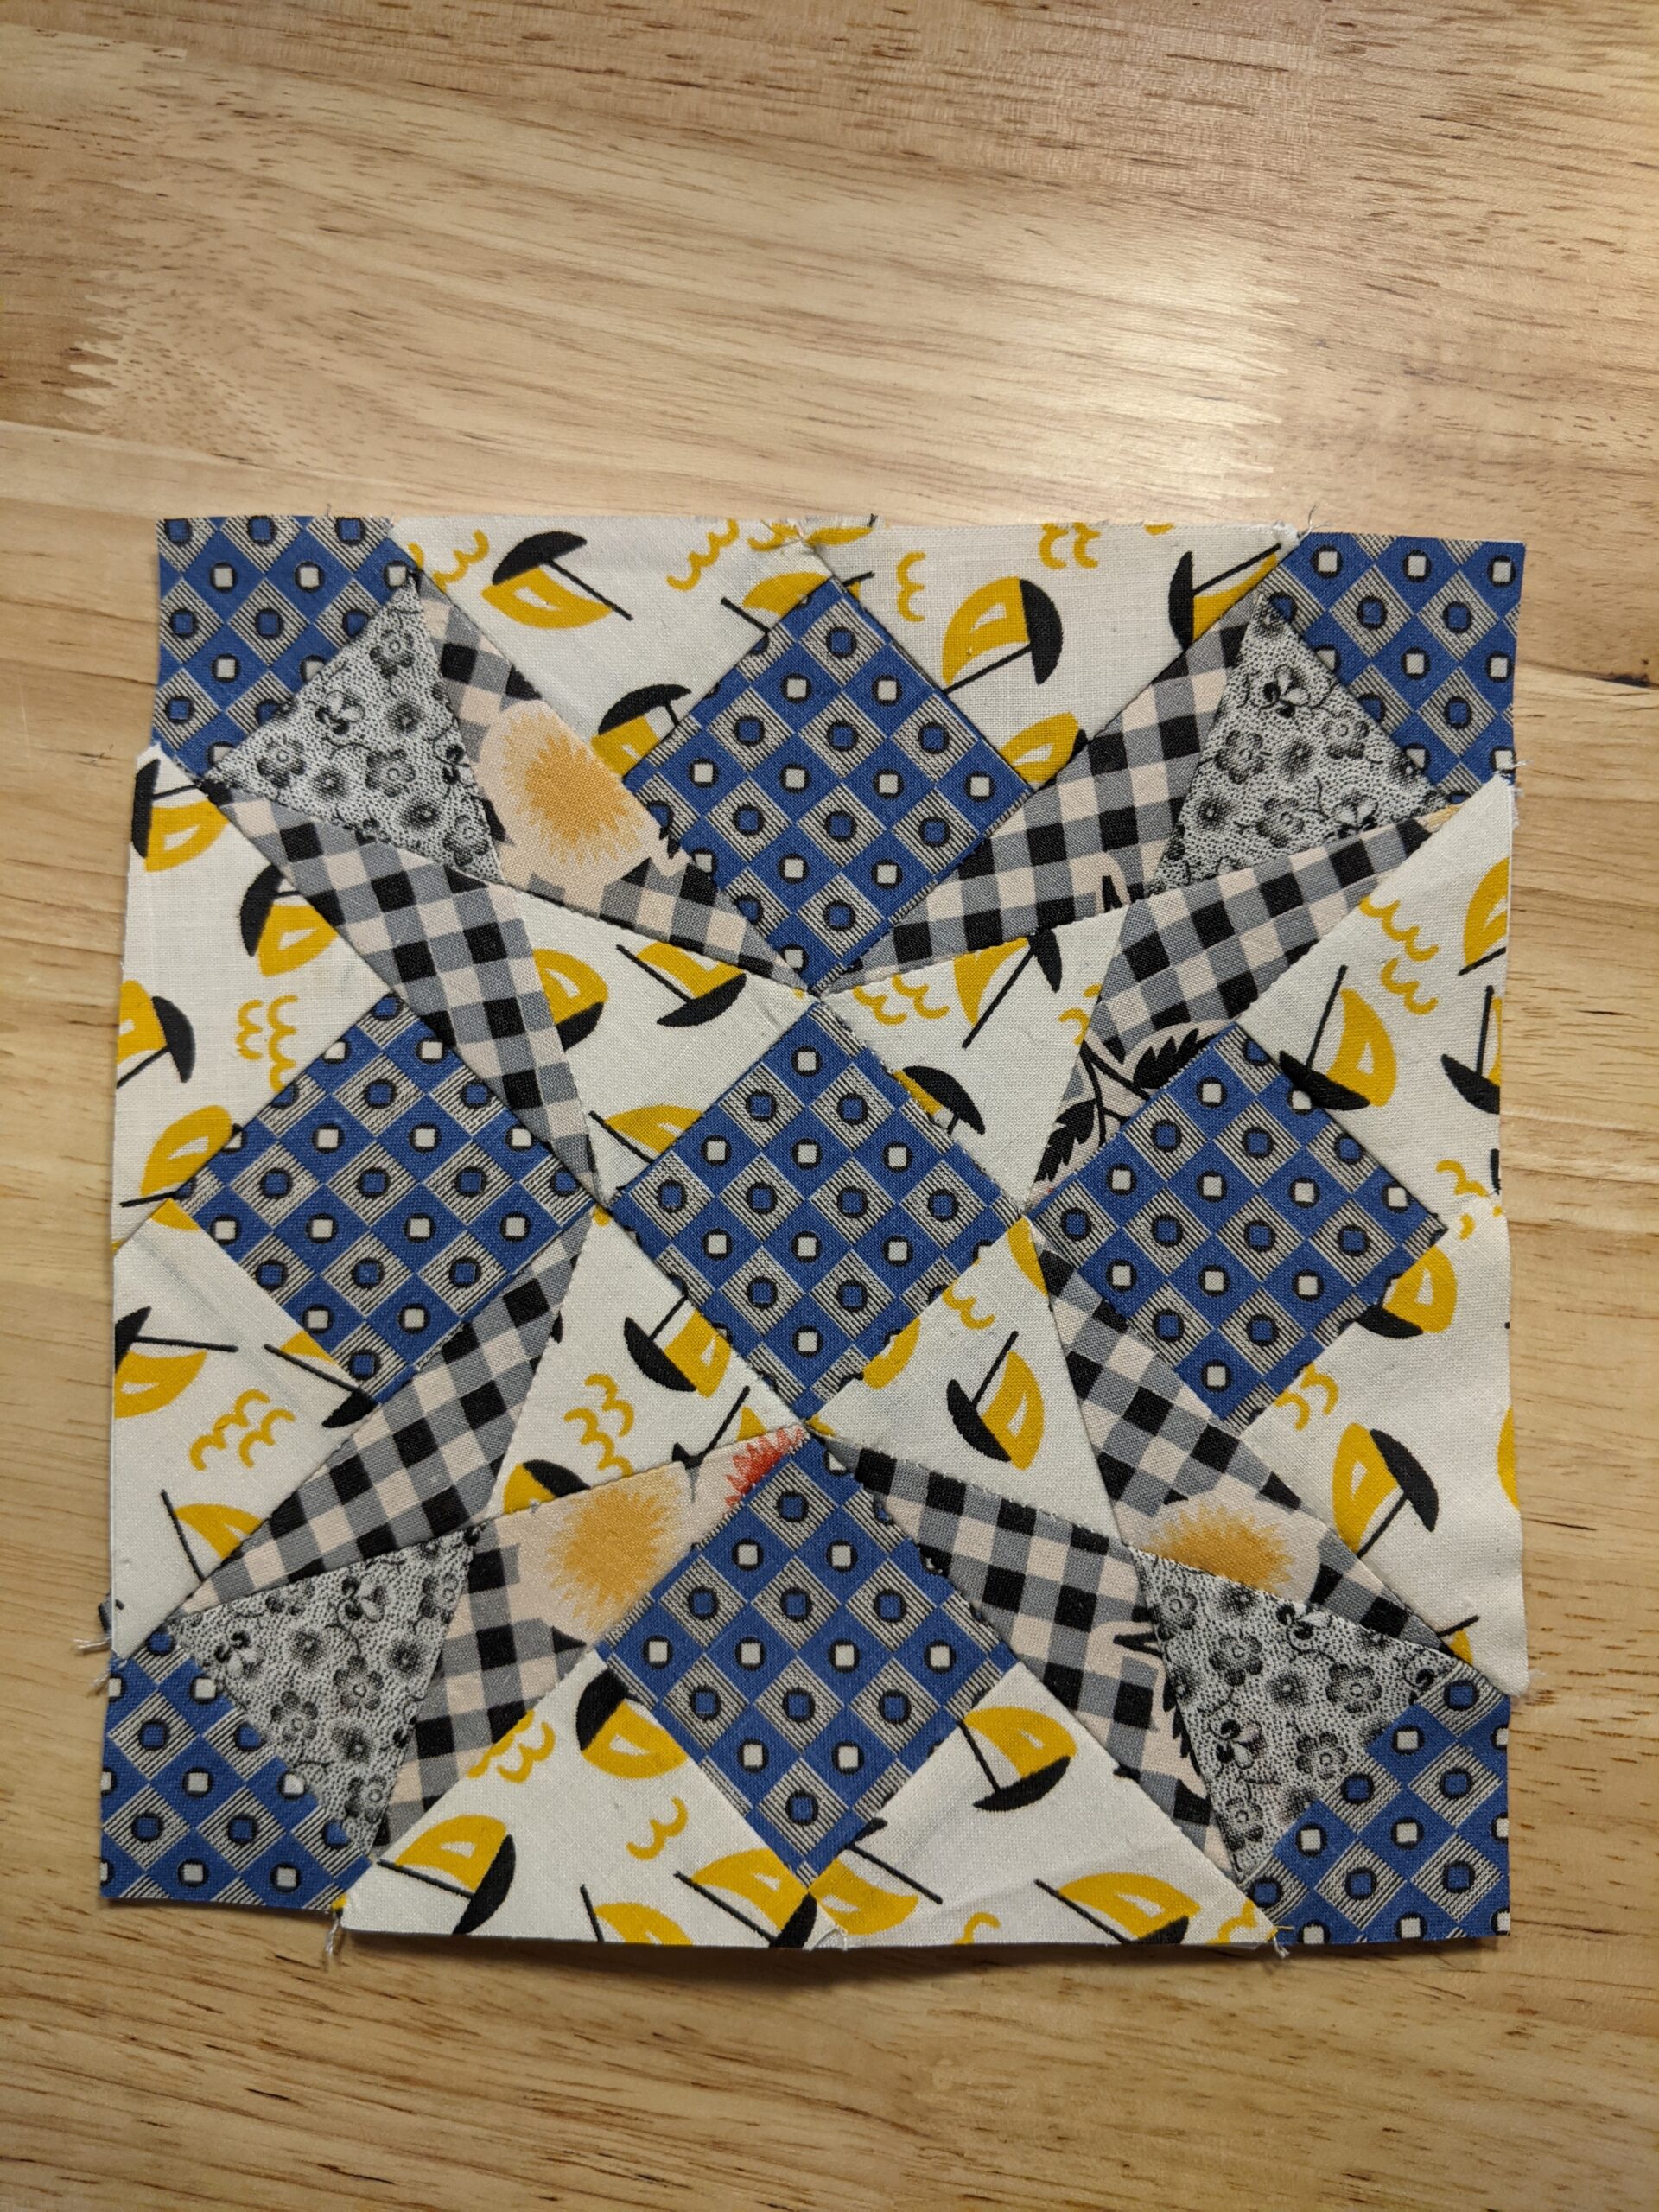
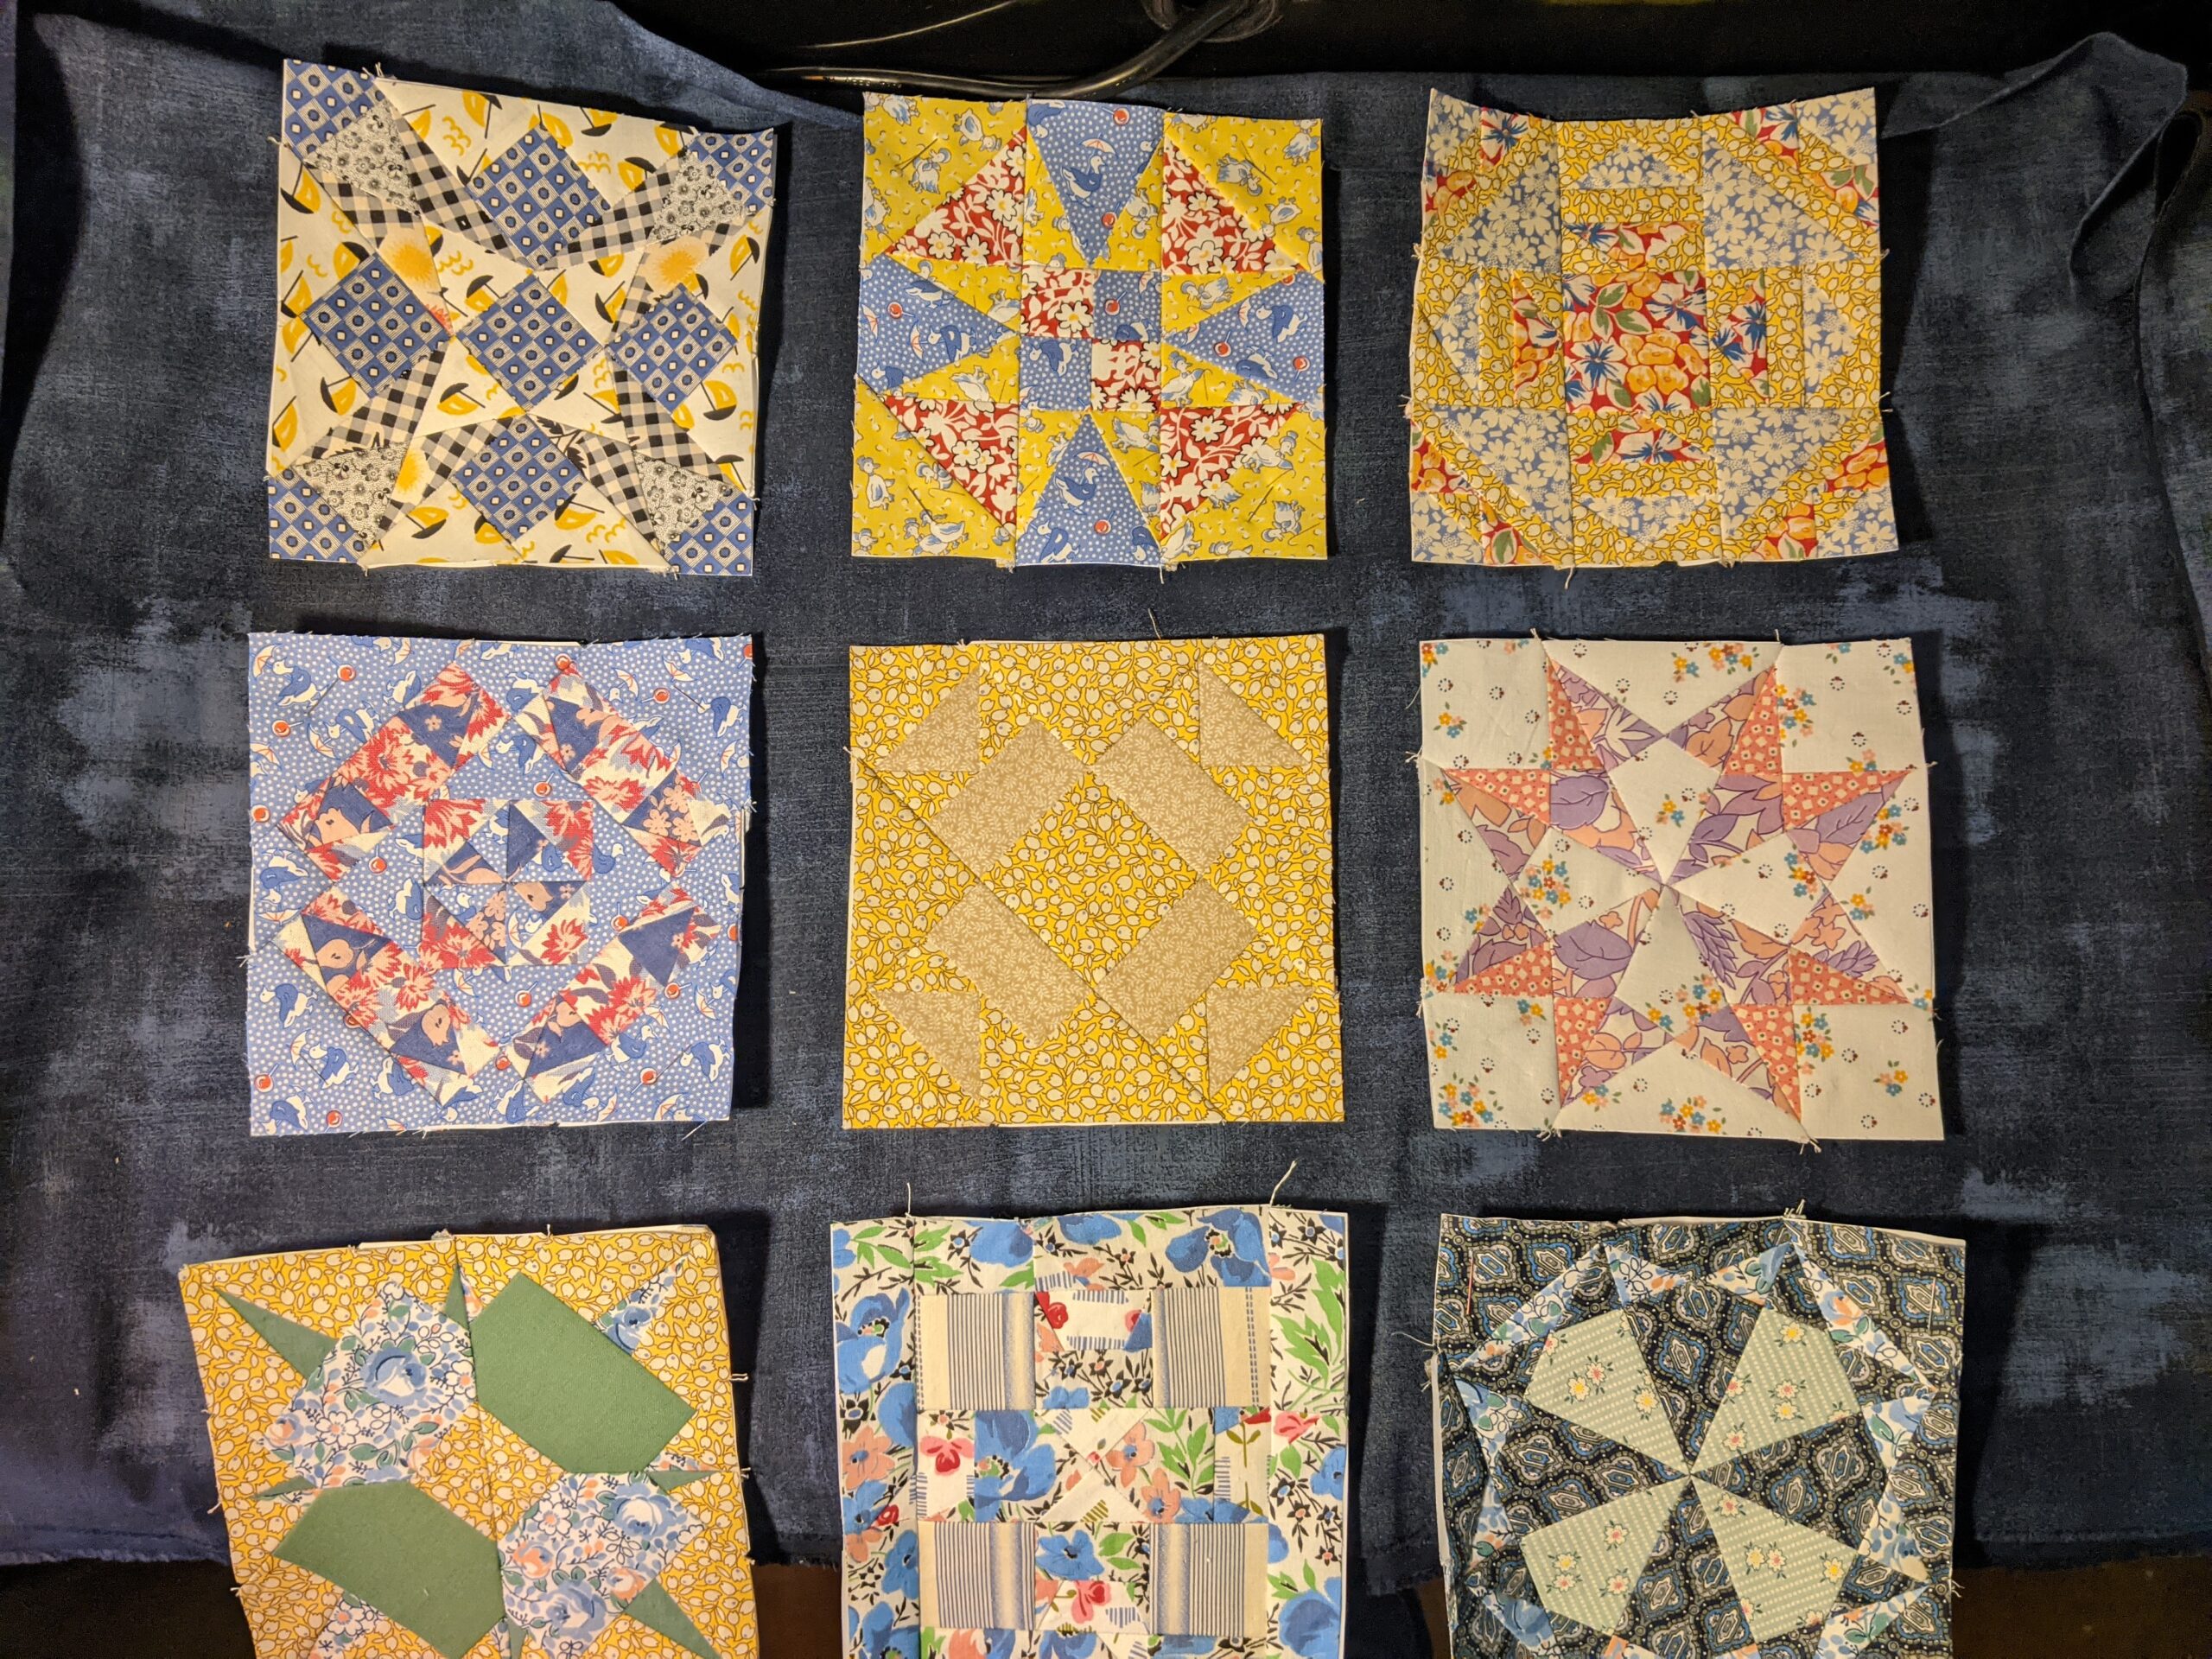
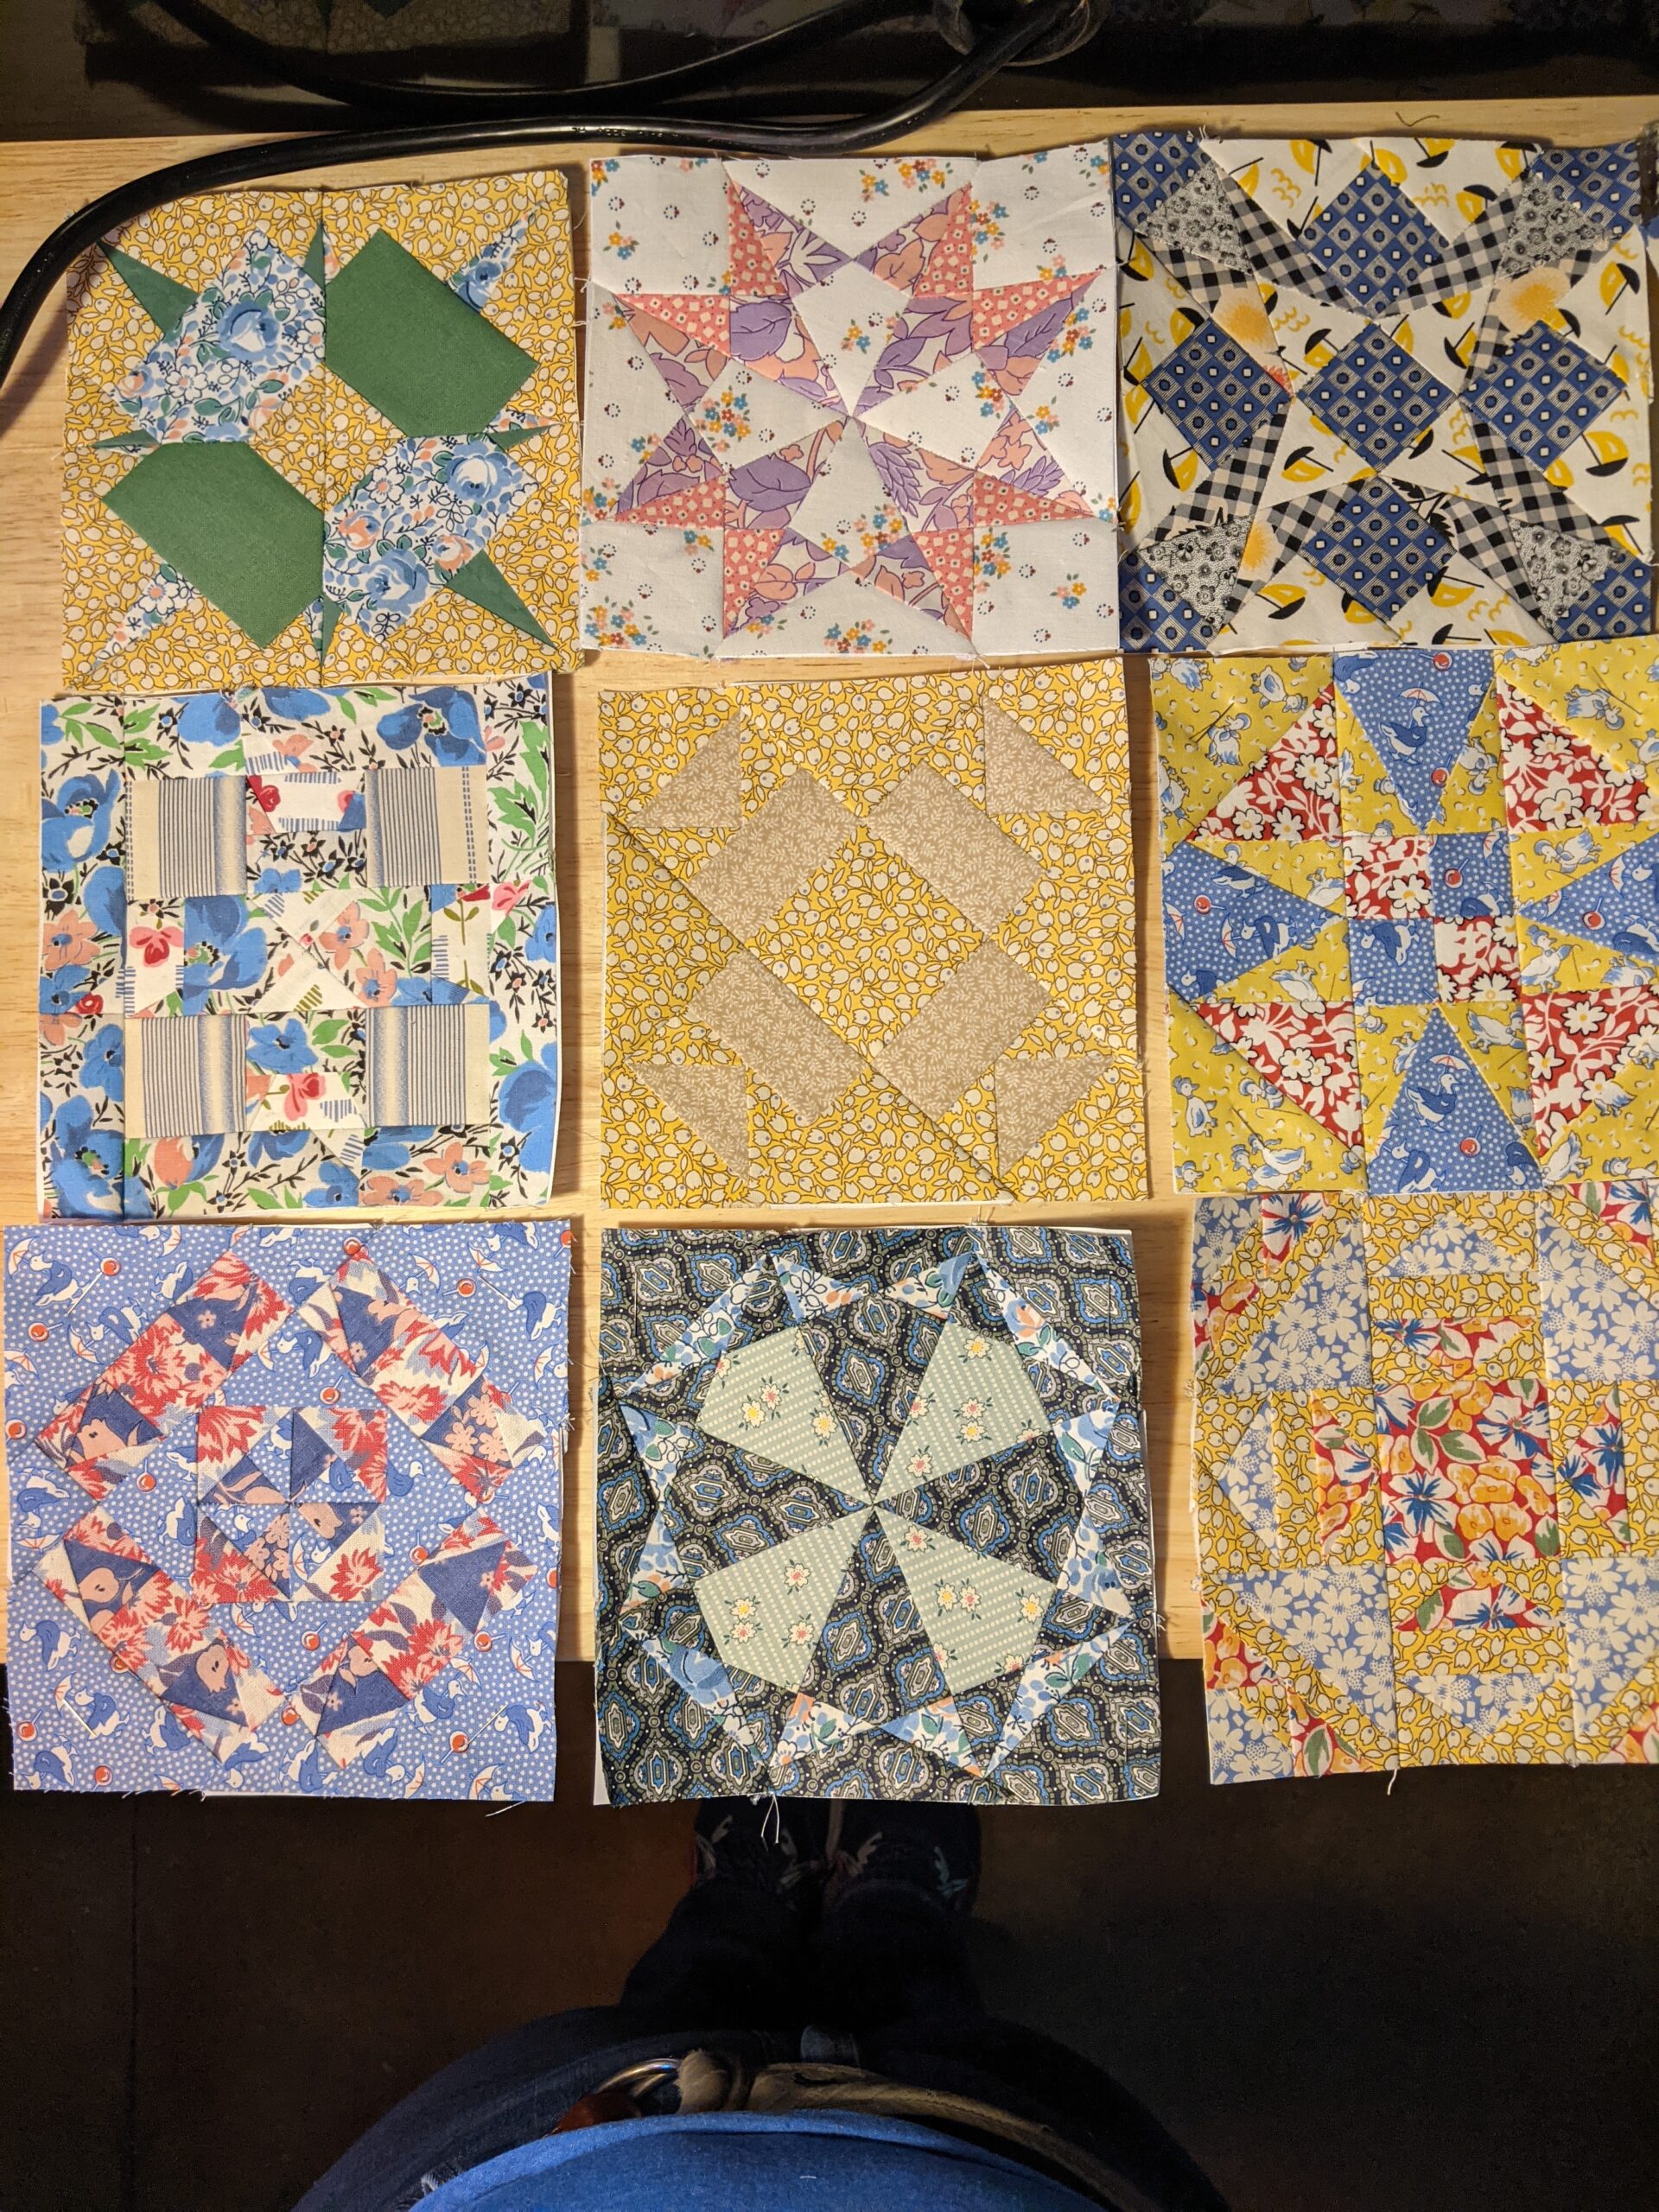
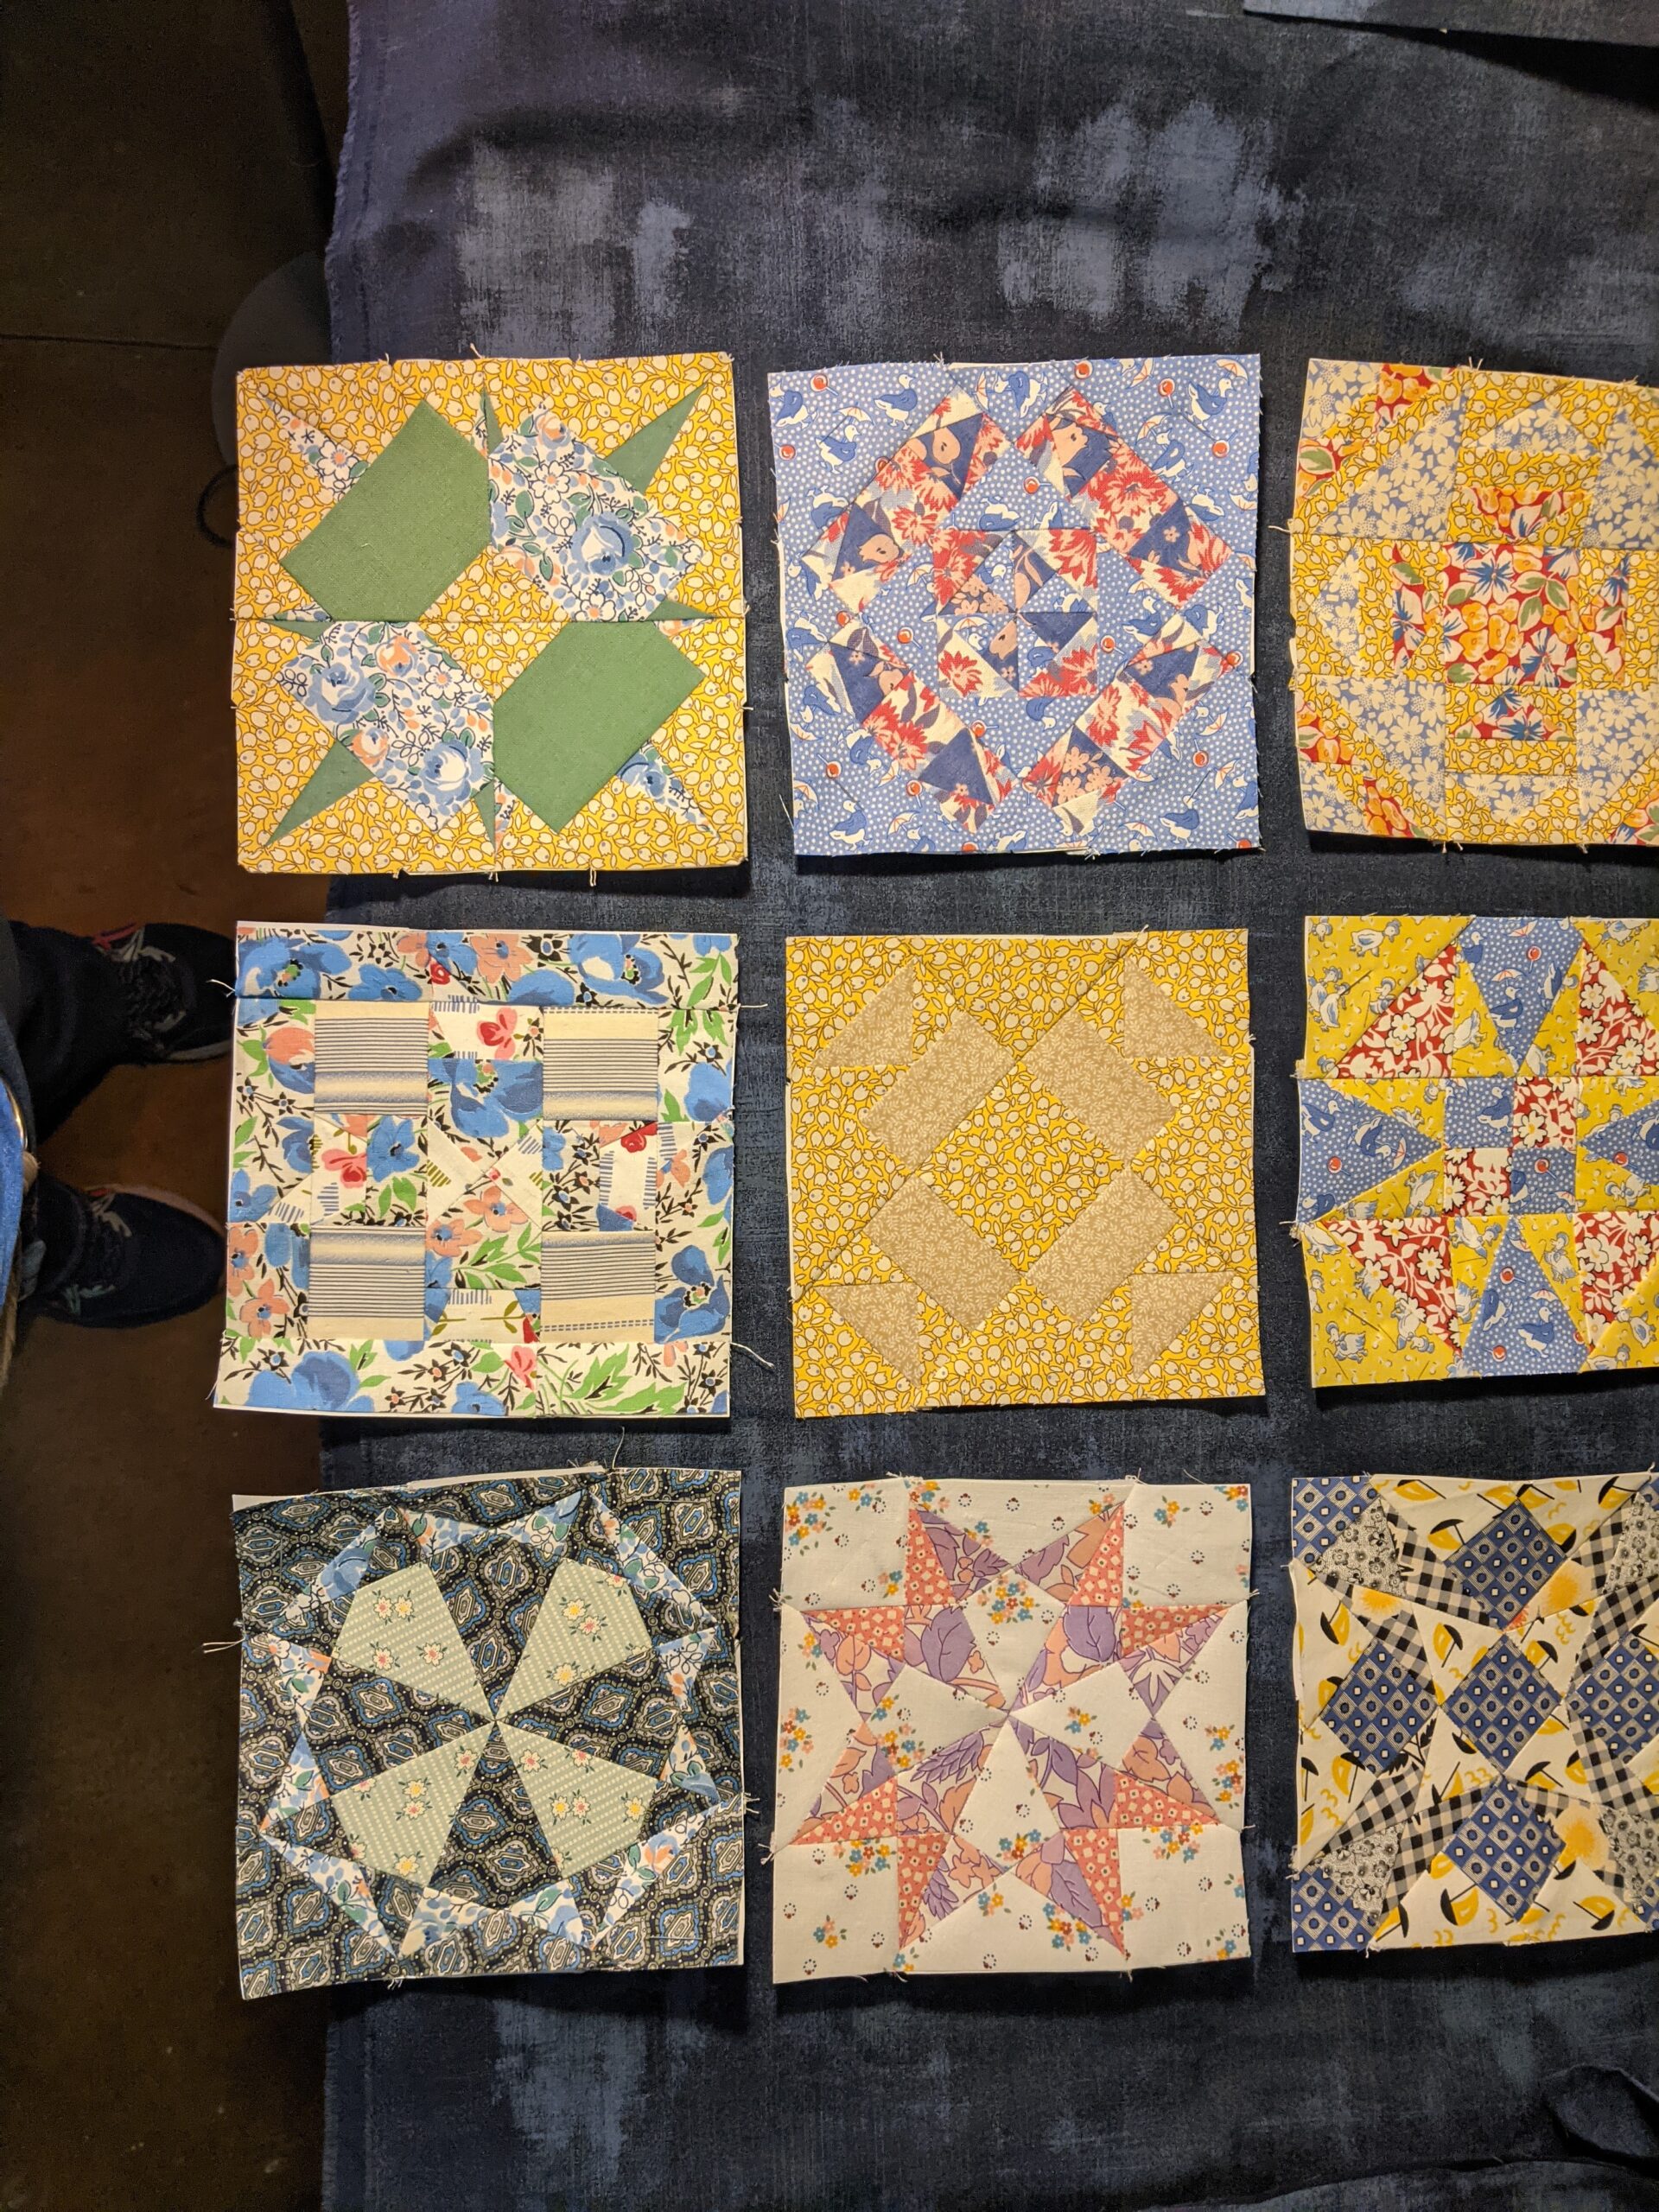
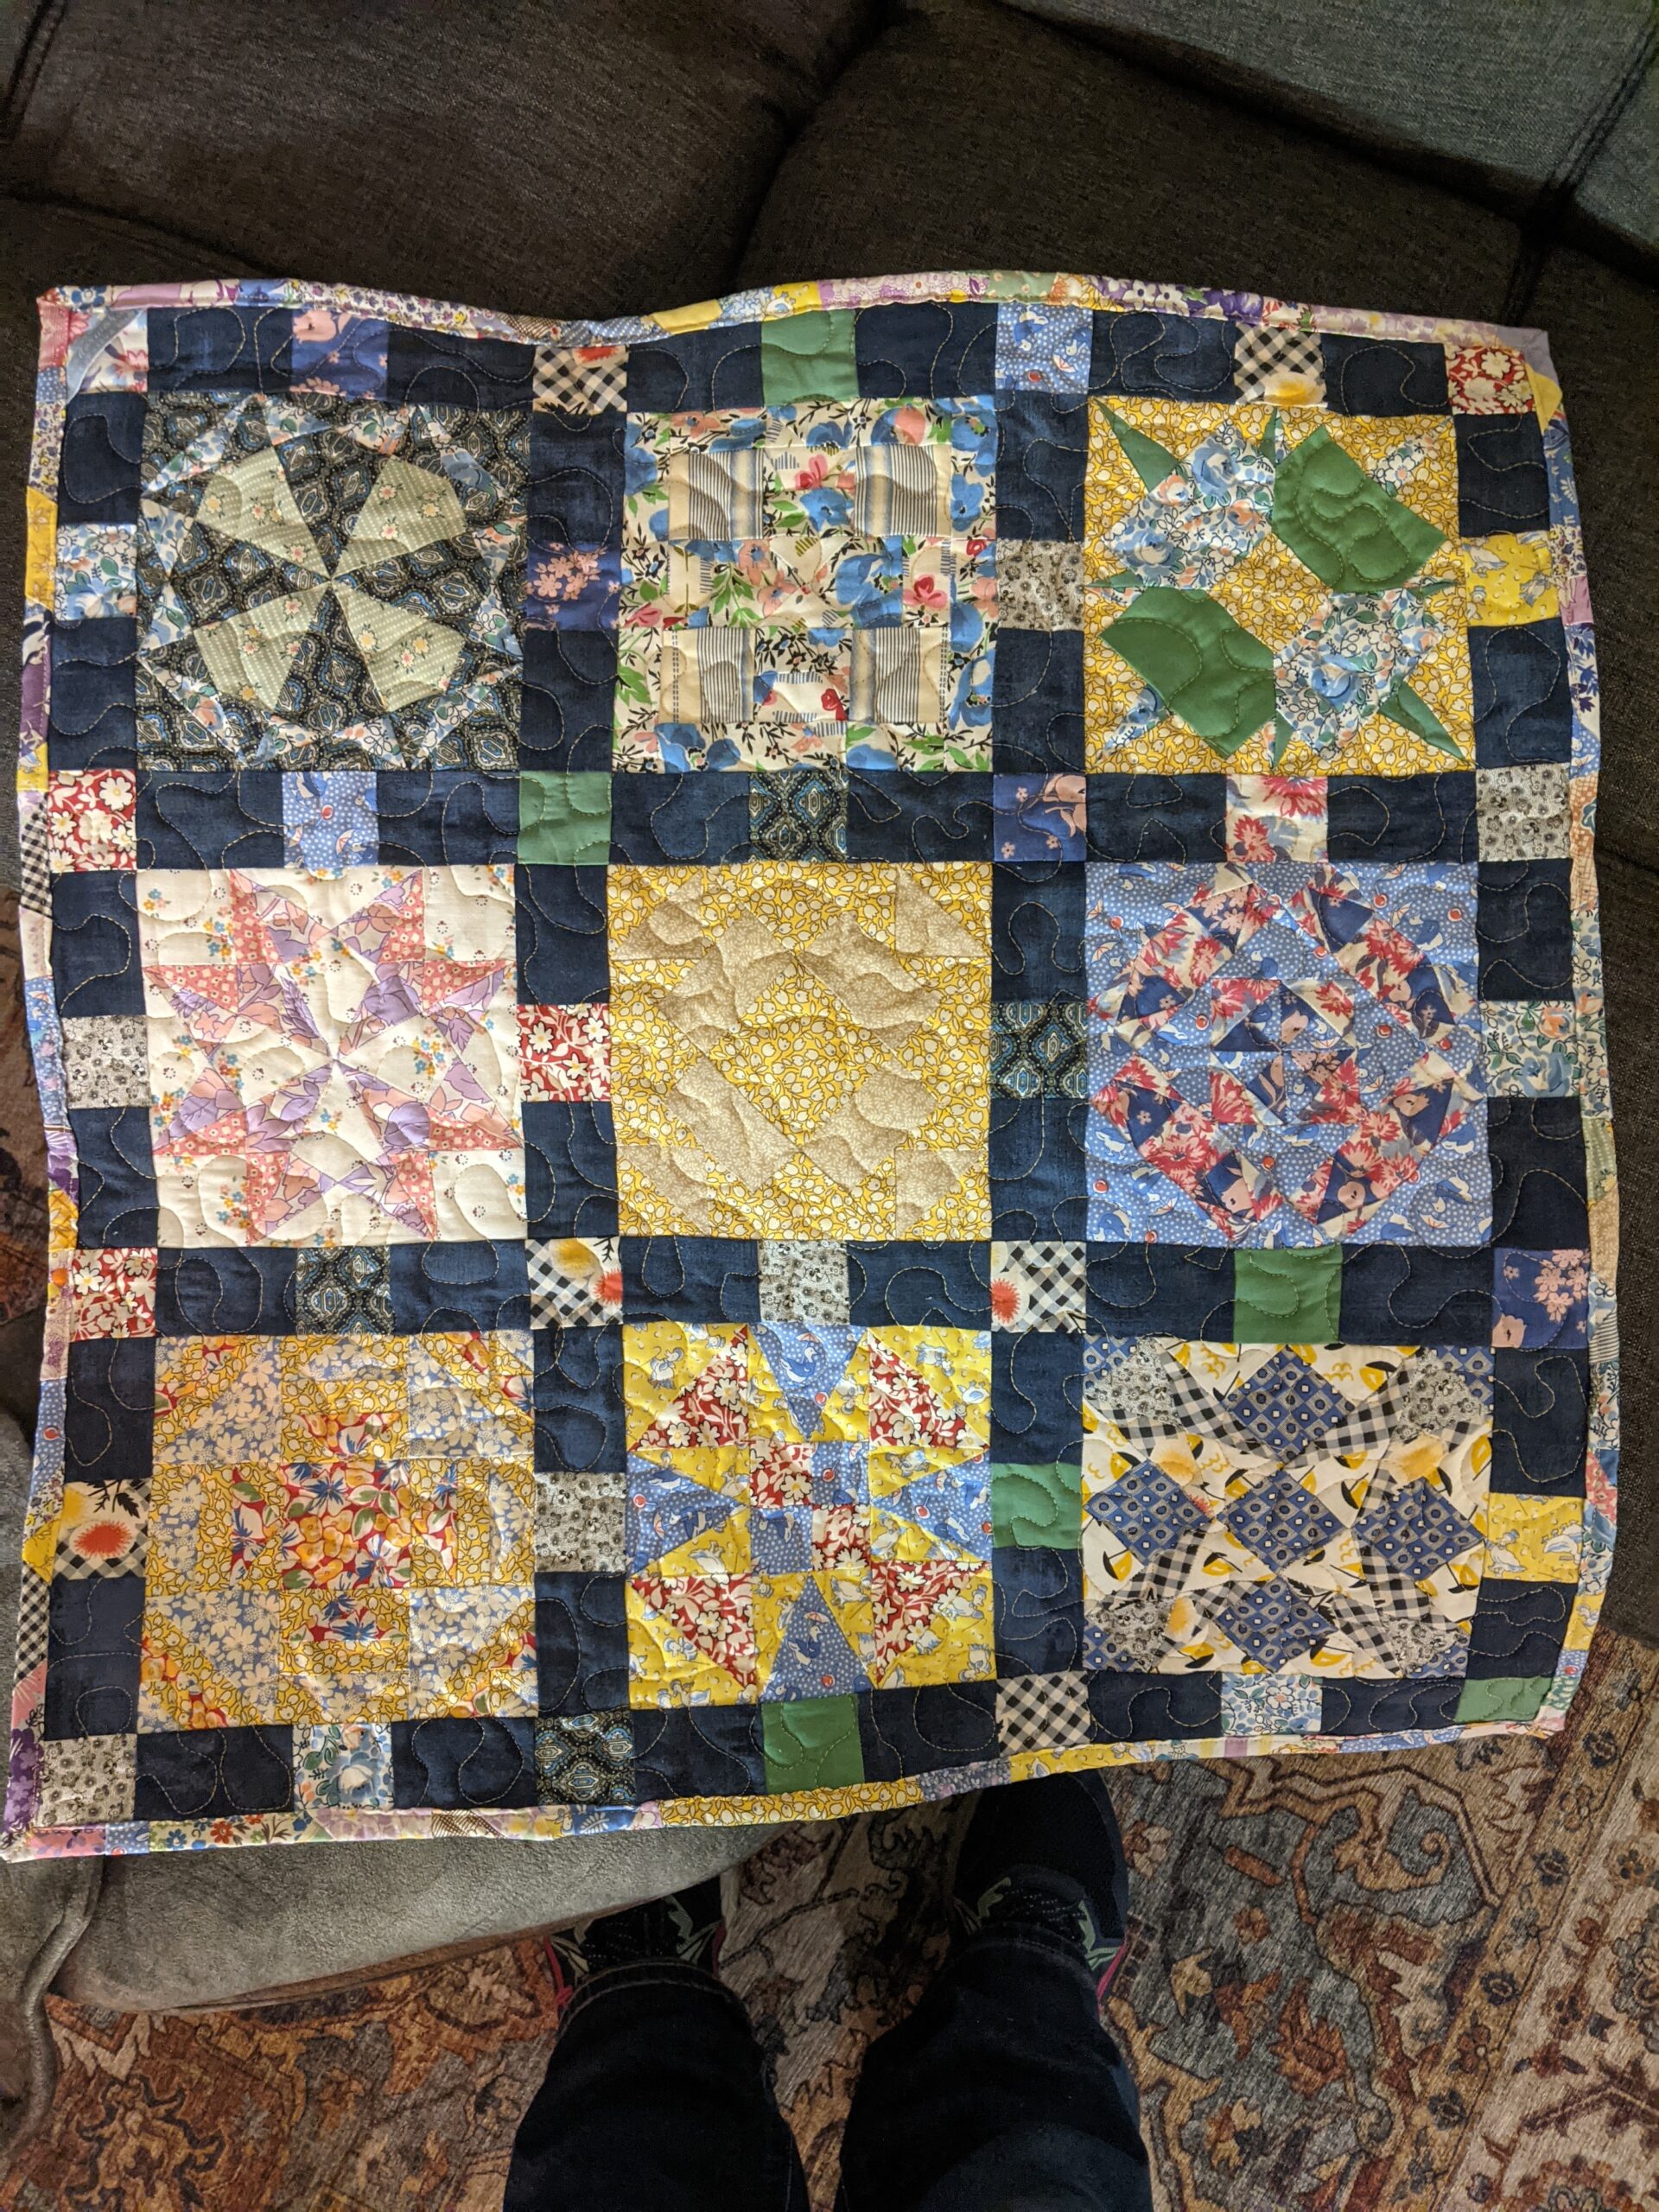
Each of these blocks are named from these wives’ letters, so here’s some close-ups for you to peruse. This is six of the nine blocks:
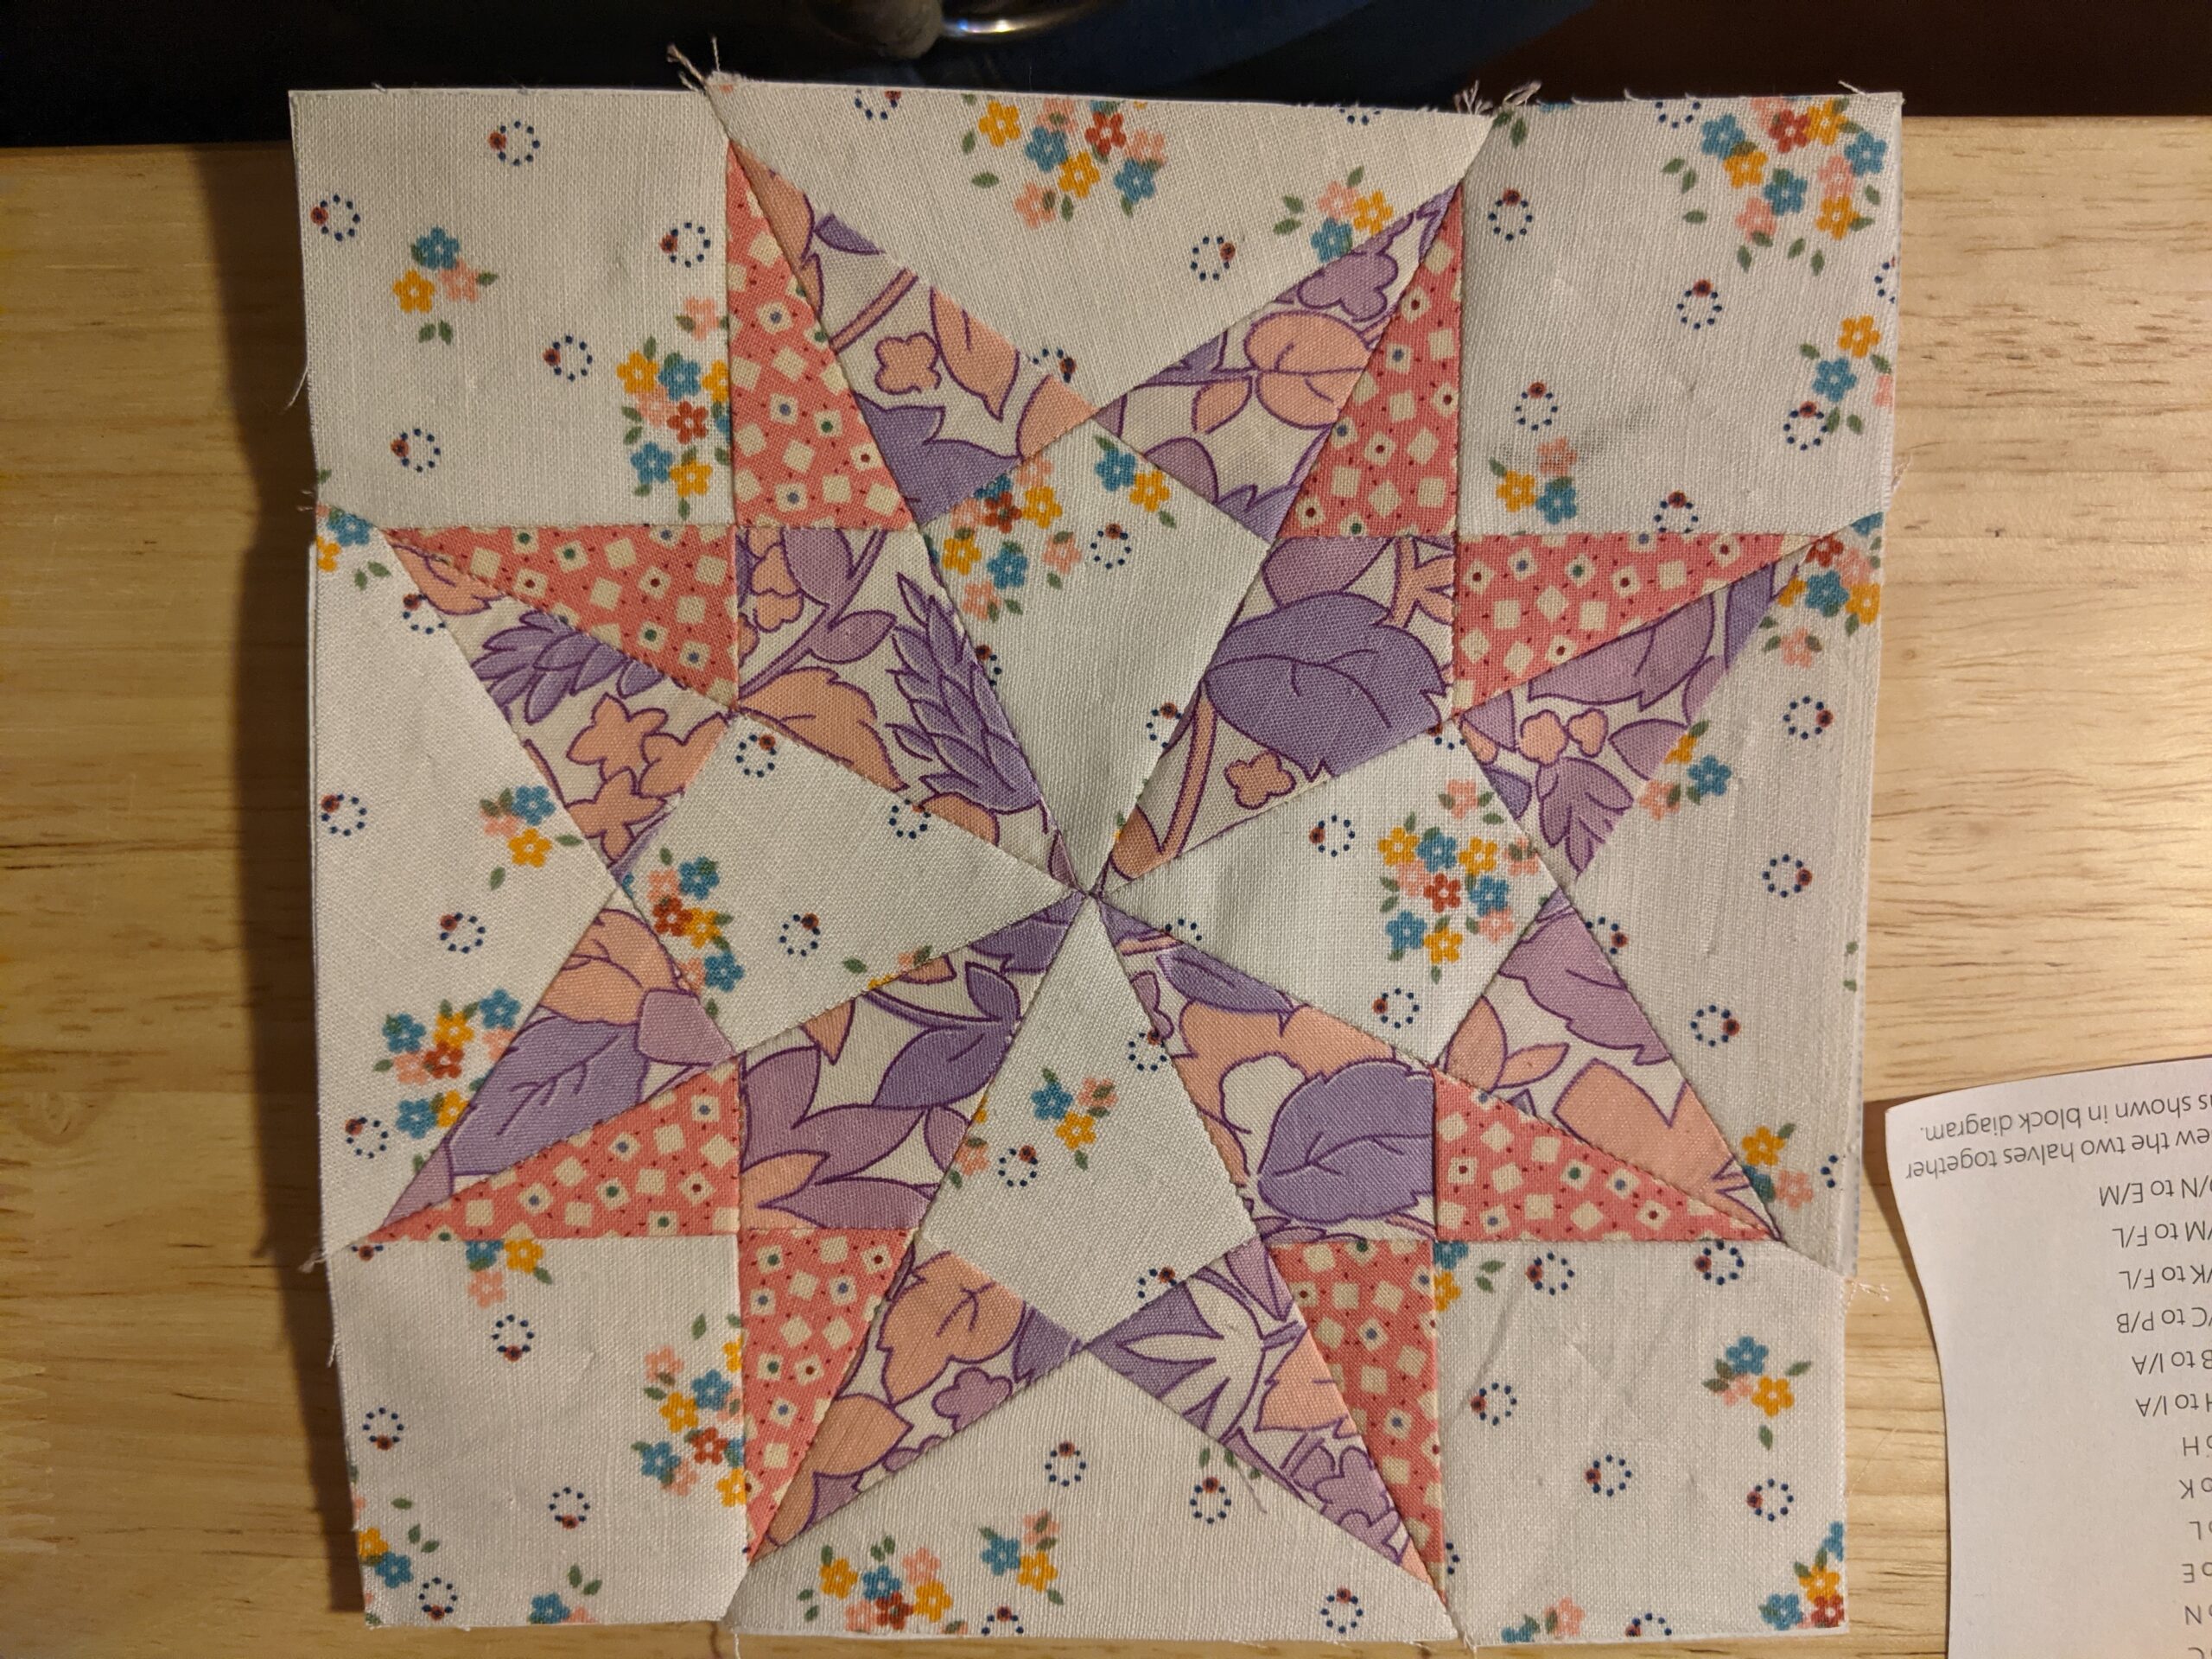
I actually Foundation Paper Pieced the blocks. The Farmer’s Wife book has a link to electronic files where you can get Foundation Paper Piecing papers as well as templates for hand quilting, etc. I thought this would be the most efficient way to get accurate piecing.
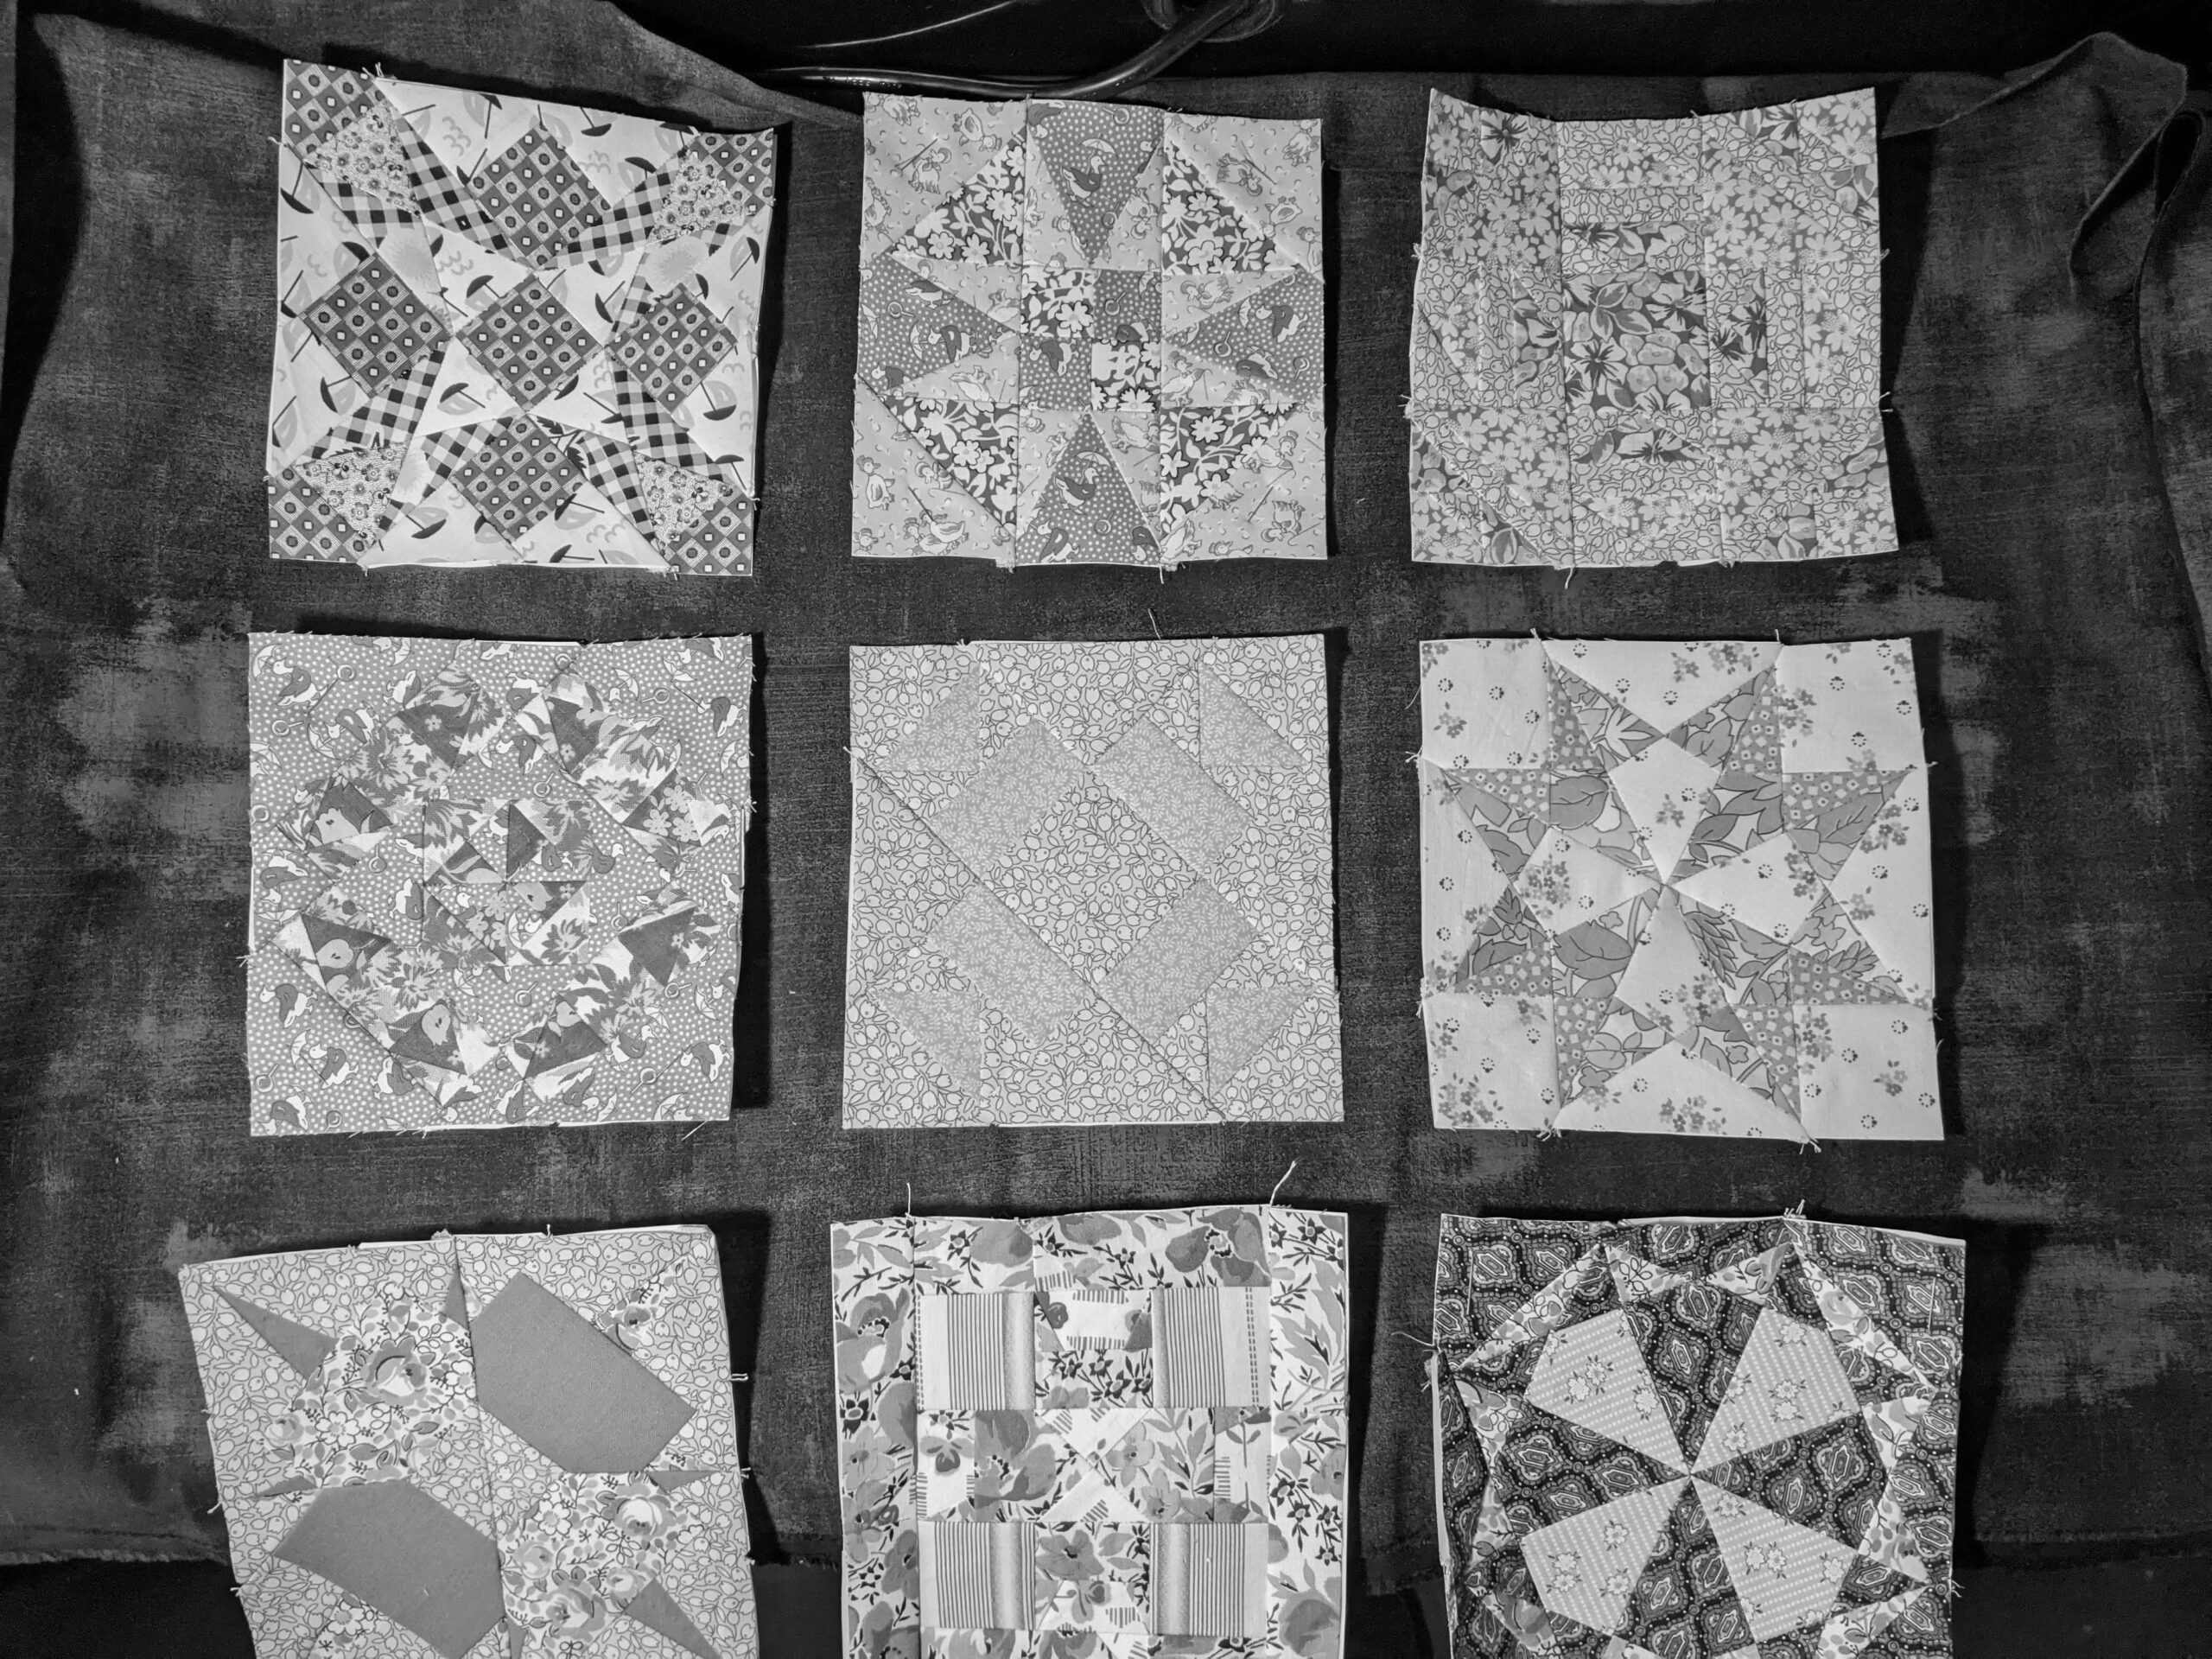
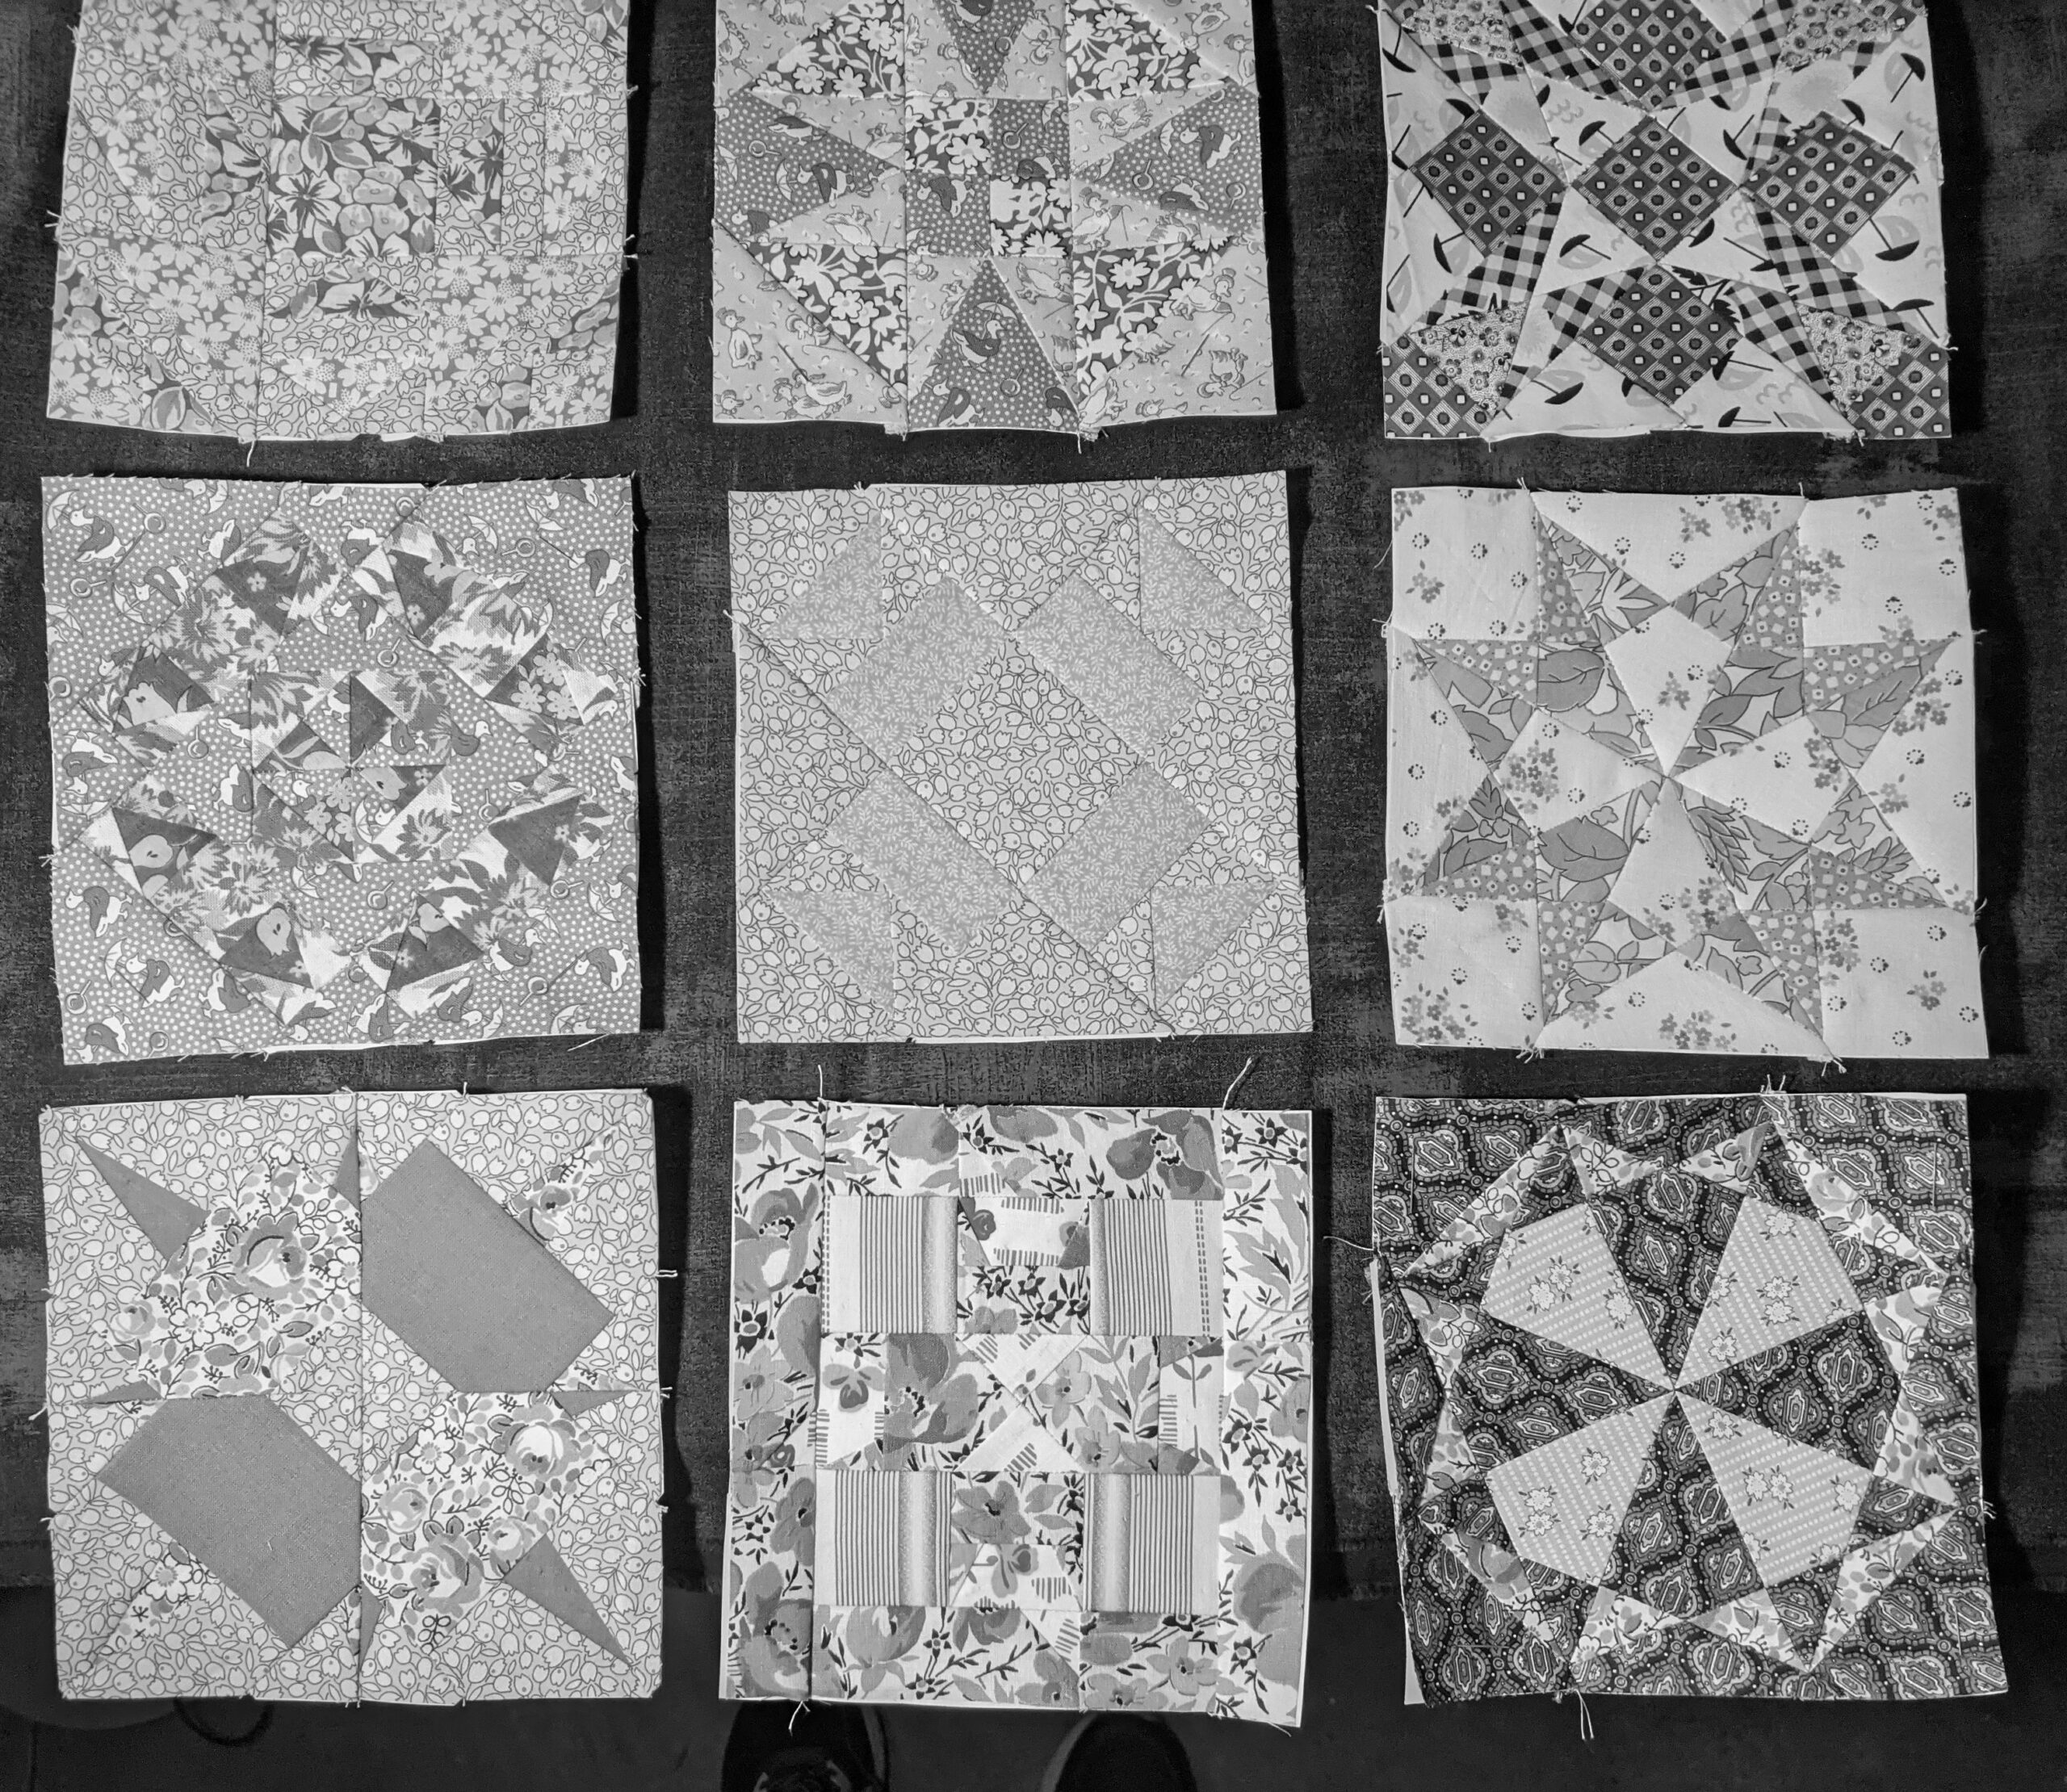
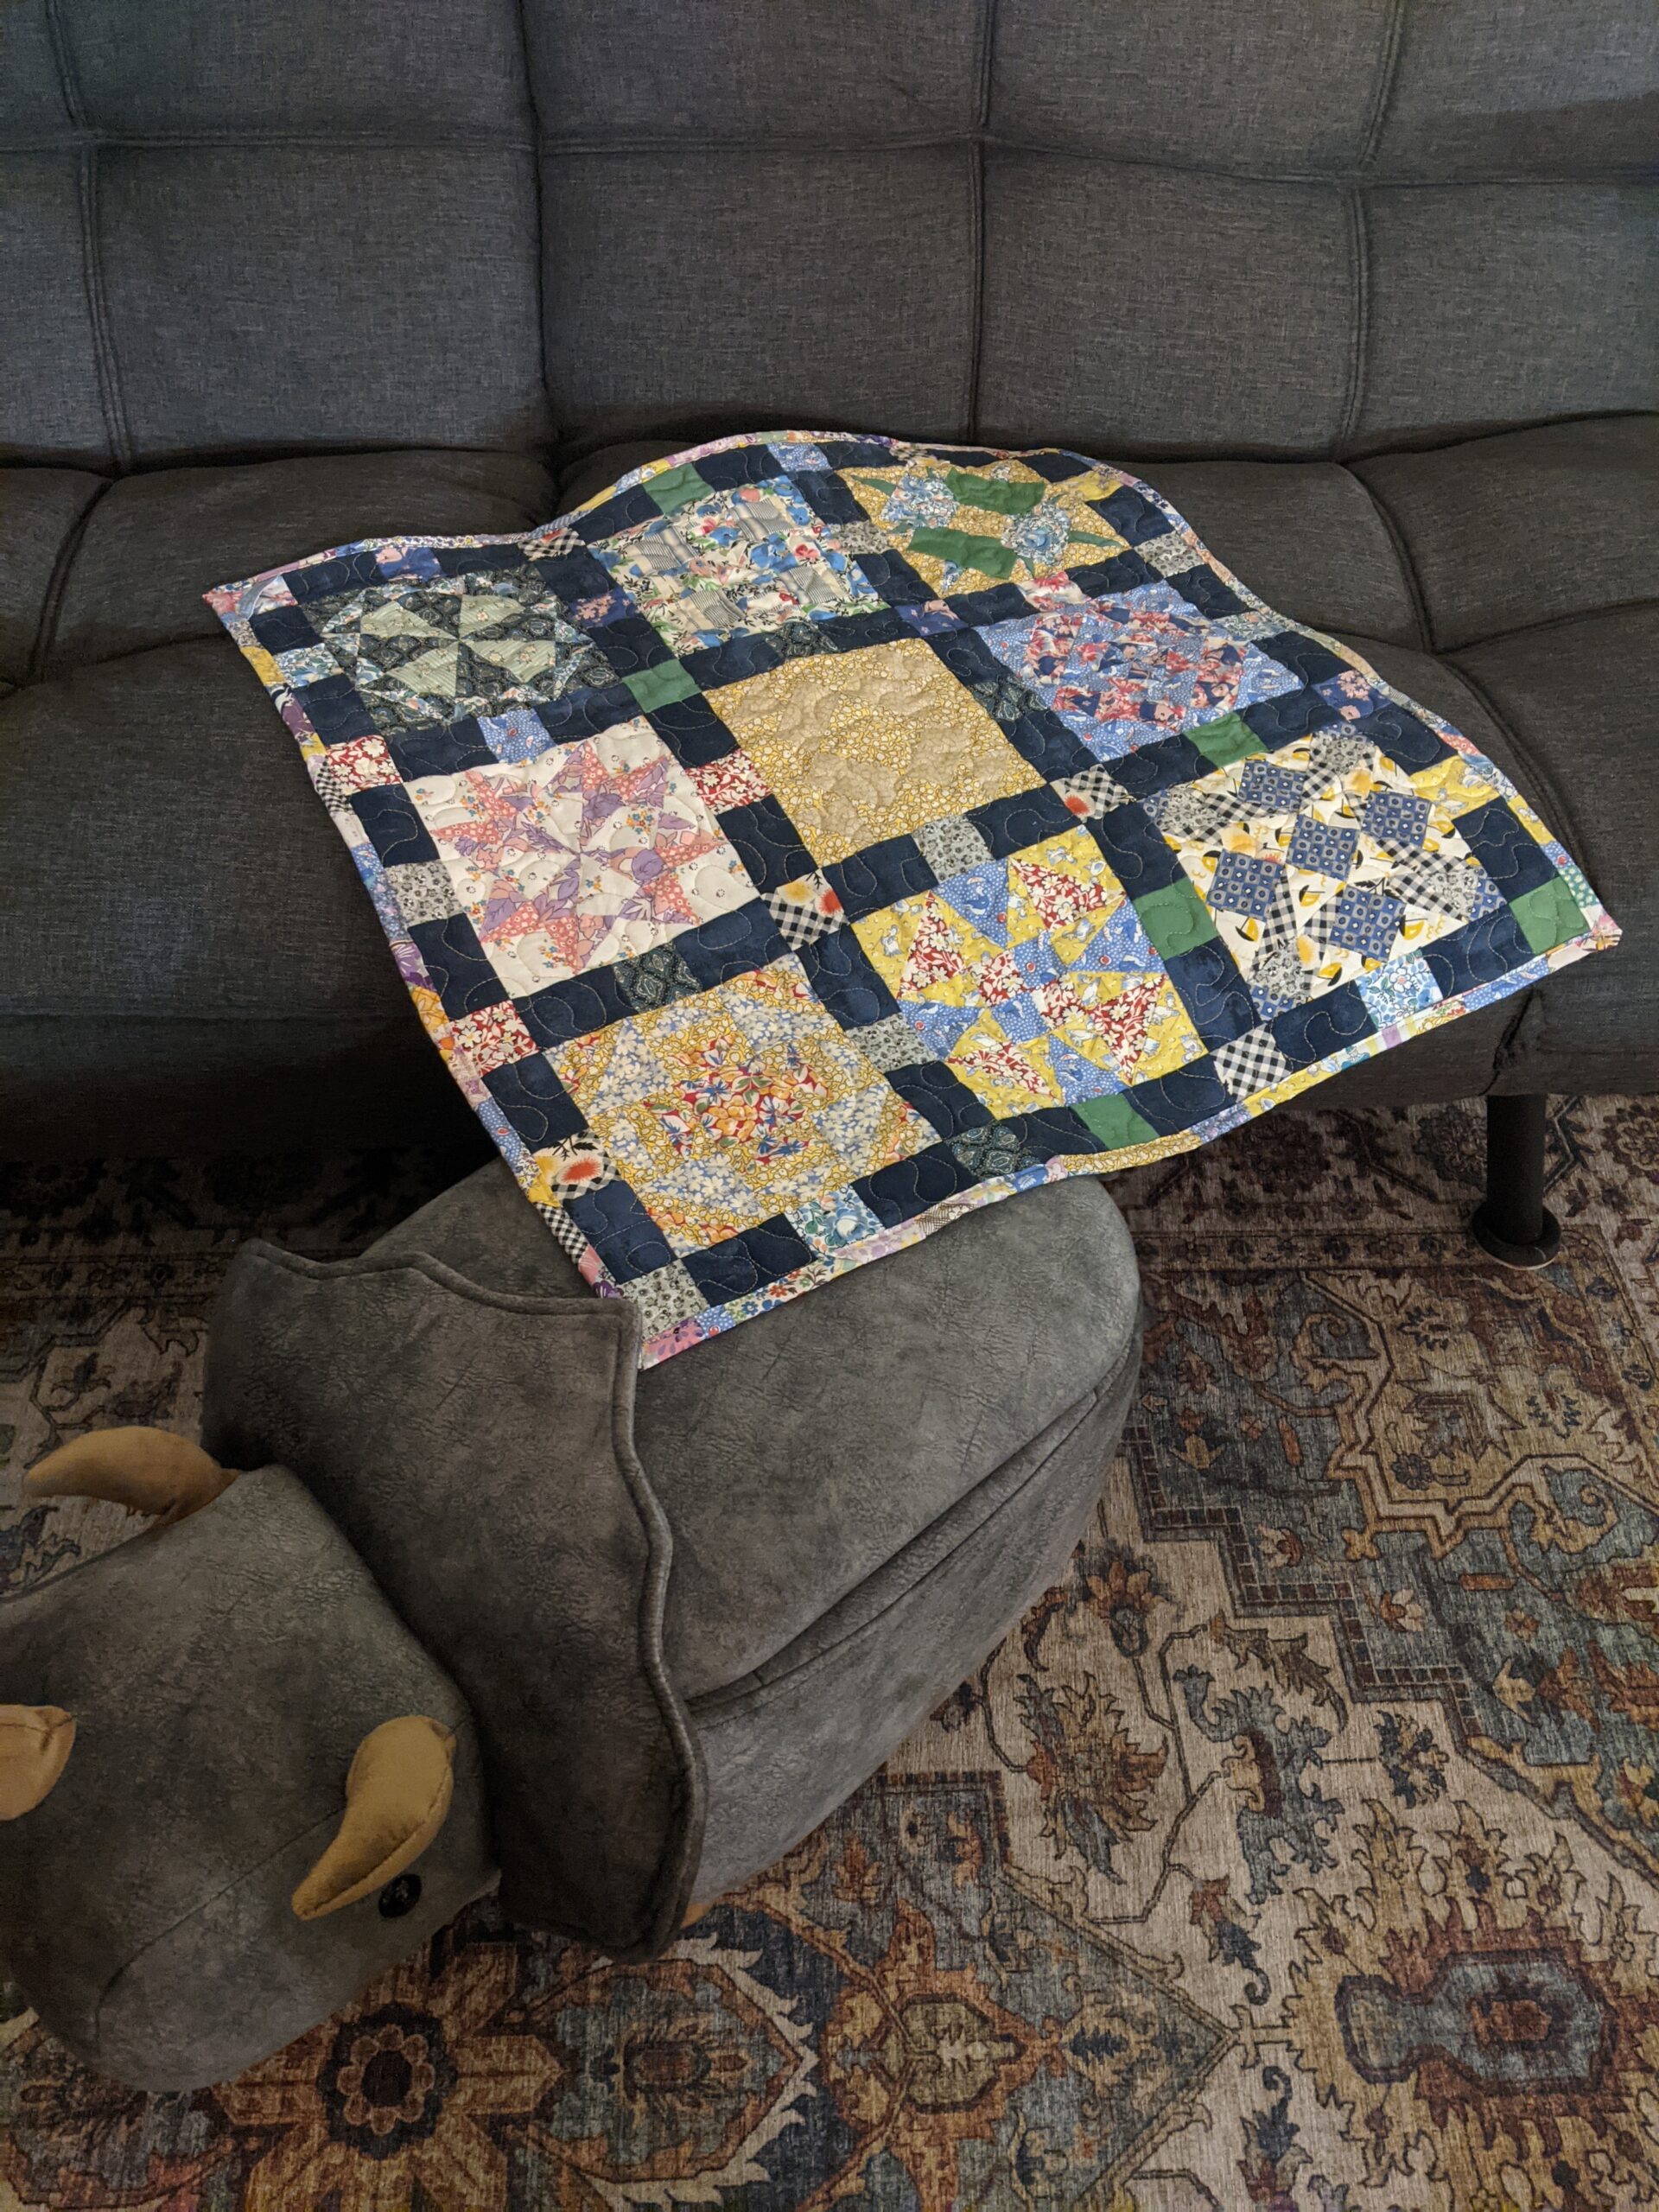
I definitely had some contrast issues with this quilt. You can see it in the pictures. I was trying to go for some monochromatic blocks and ended up losing a lot of the design. I probably should have redone those blocks with other colors, but time was very much not on my side and I needed to trudge through.
I used a fun trick to help me with this. If you ever need to check the volume of your quilt, snap a picture of it with your phone and then pull the saturation to zero. It turns your photo into black and white so that you can look at just the volume of the fabrics without the colors distracting you. This is the quickest and easiest way to check your volume. I use this trick all the time. Check it out below, as I was auditioning layouts and sashing fabric:

I decided to use a very dark inky grunge fabric for the sashing to help with the contrast issues and then I fussy-pieced the “cornerstones” to ensure that the sashing lined up as perfectly as I could get it to.
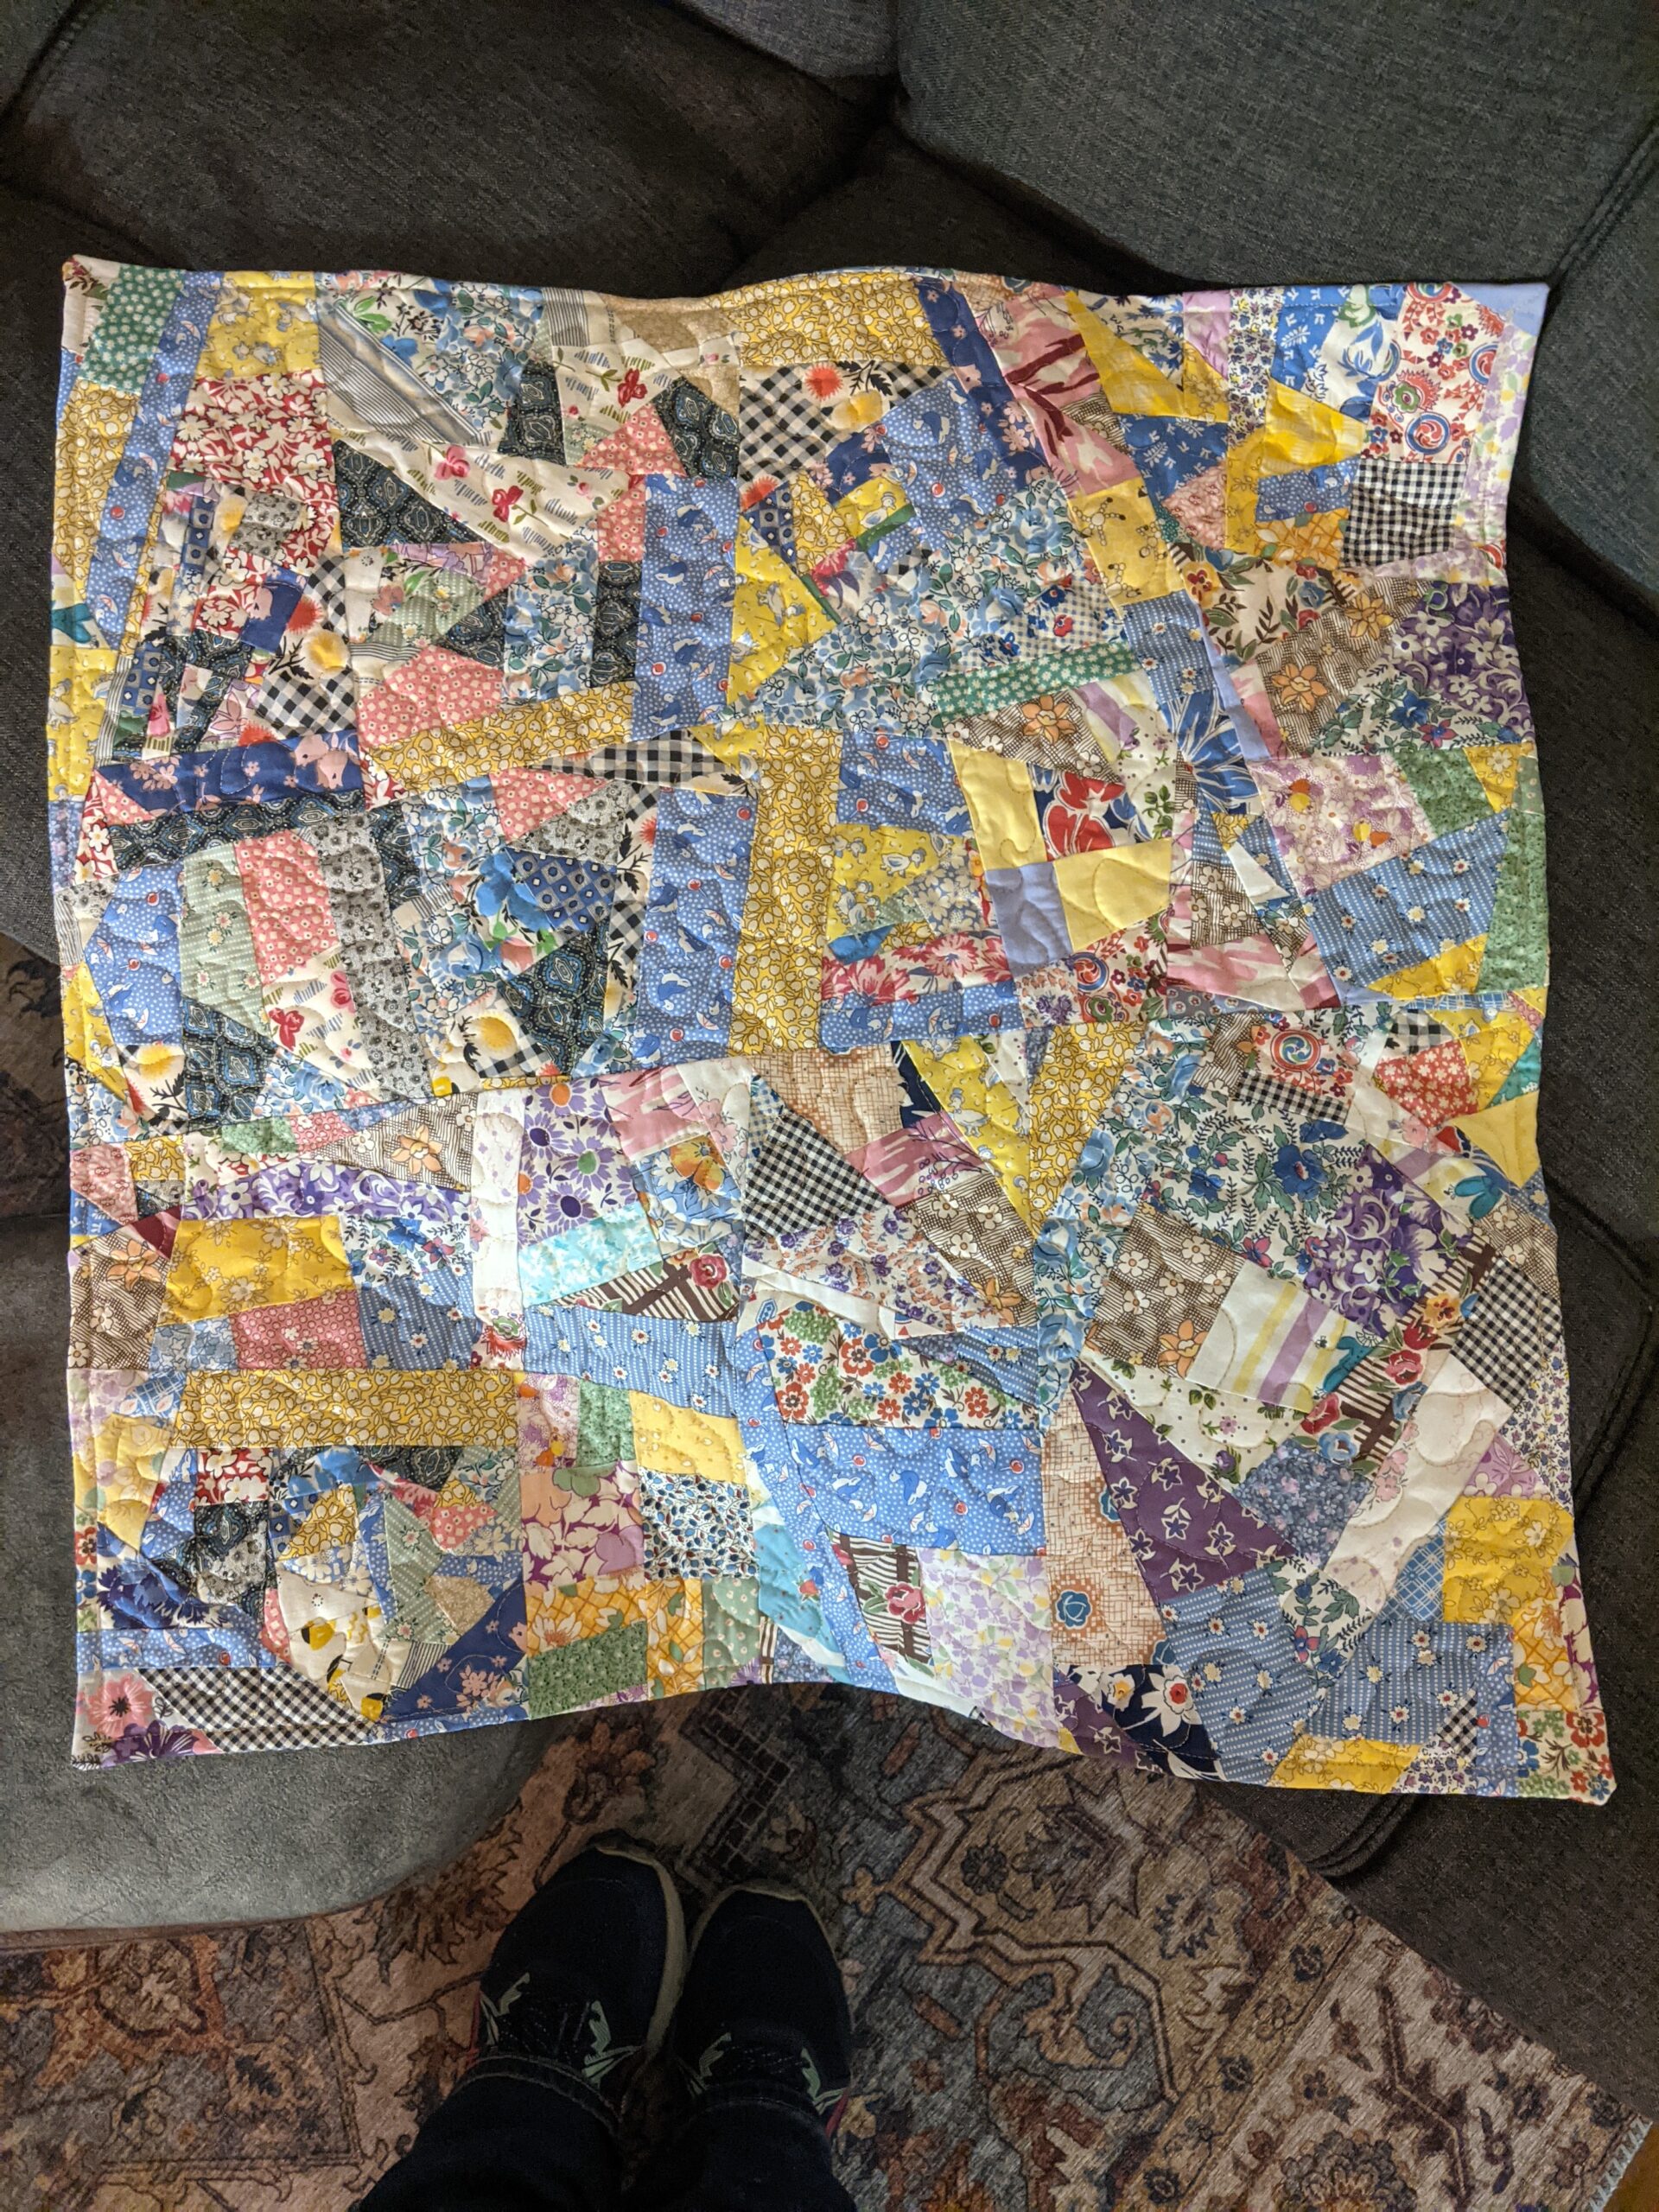
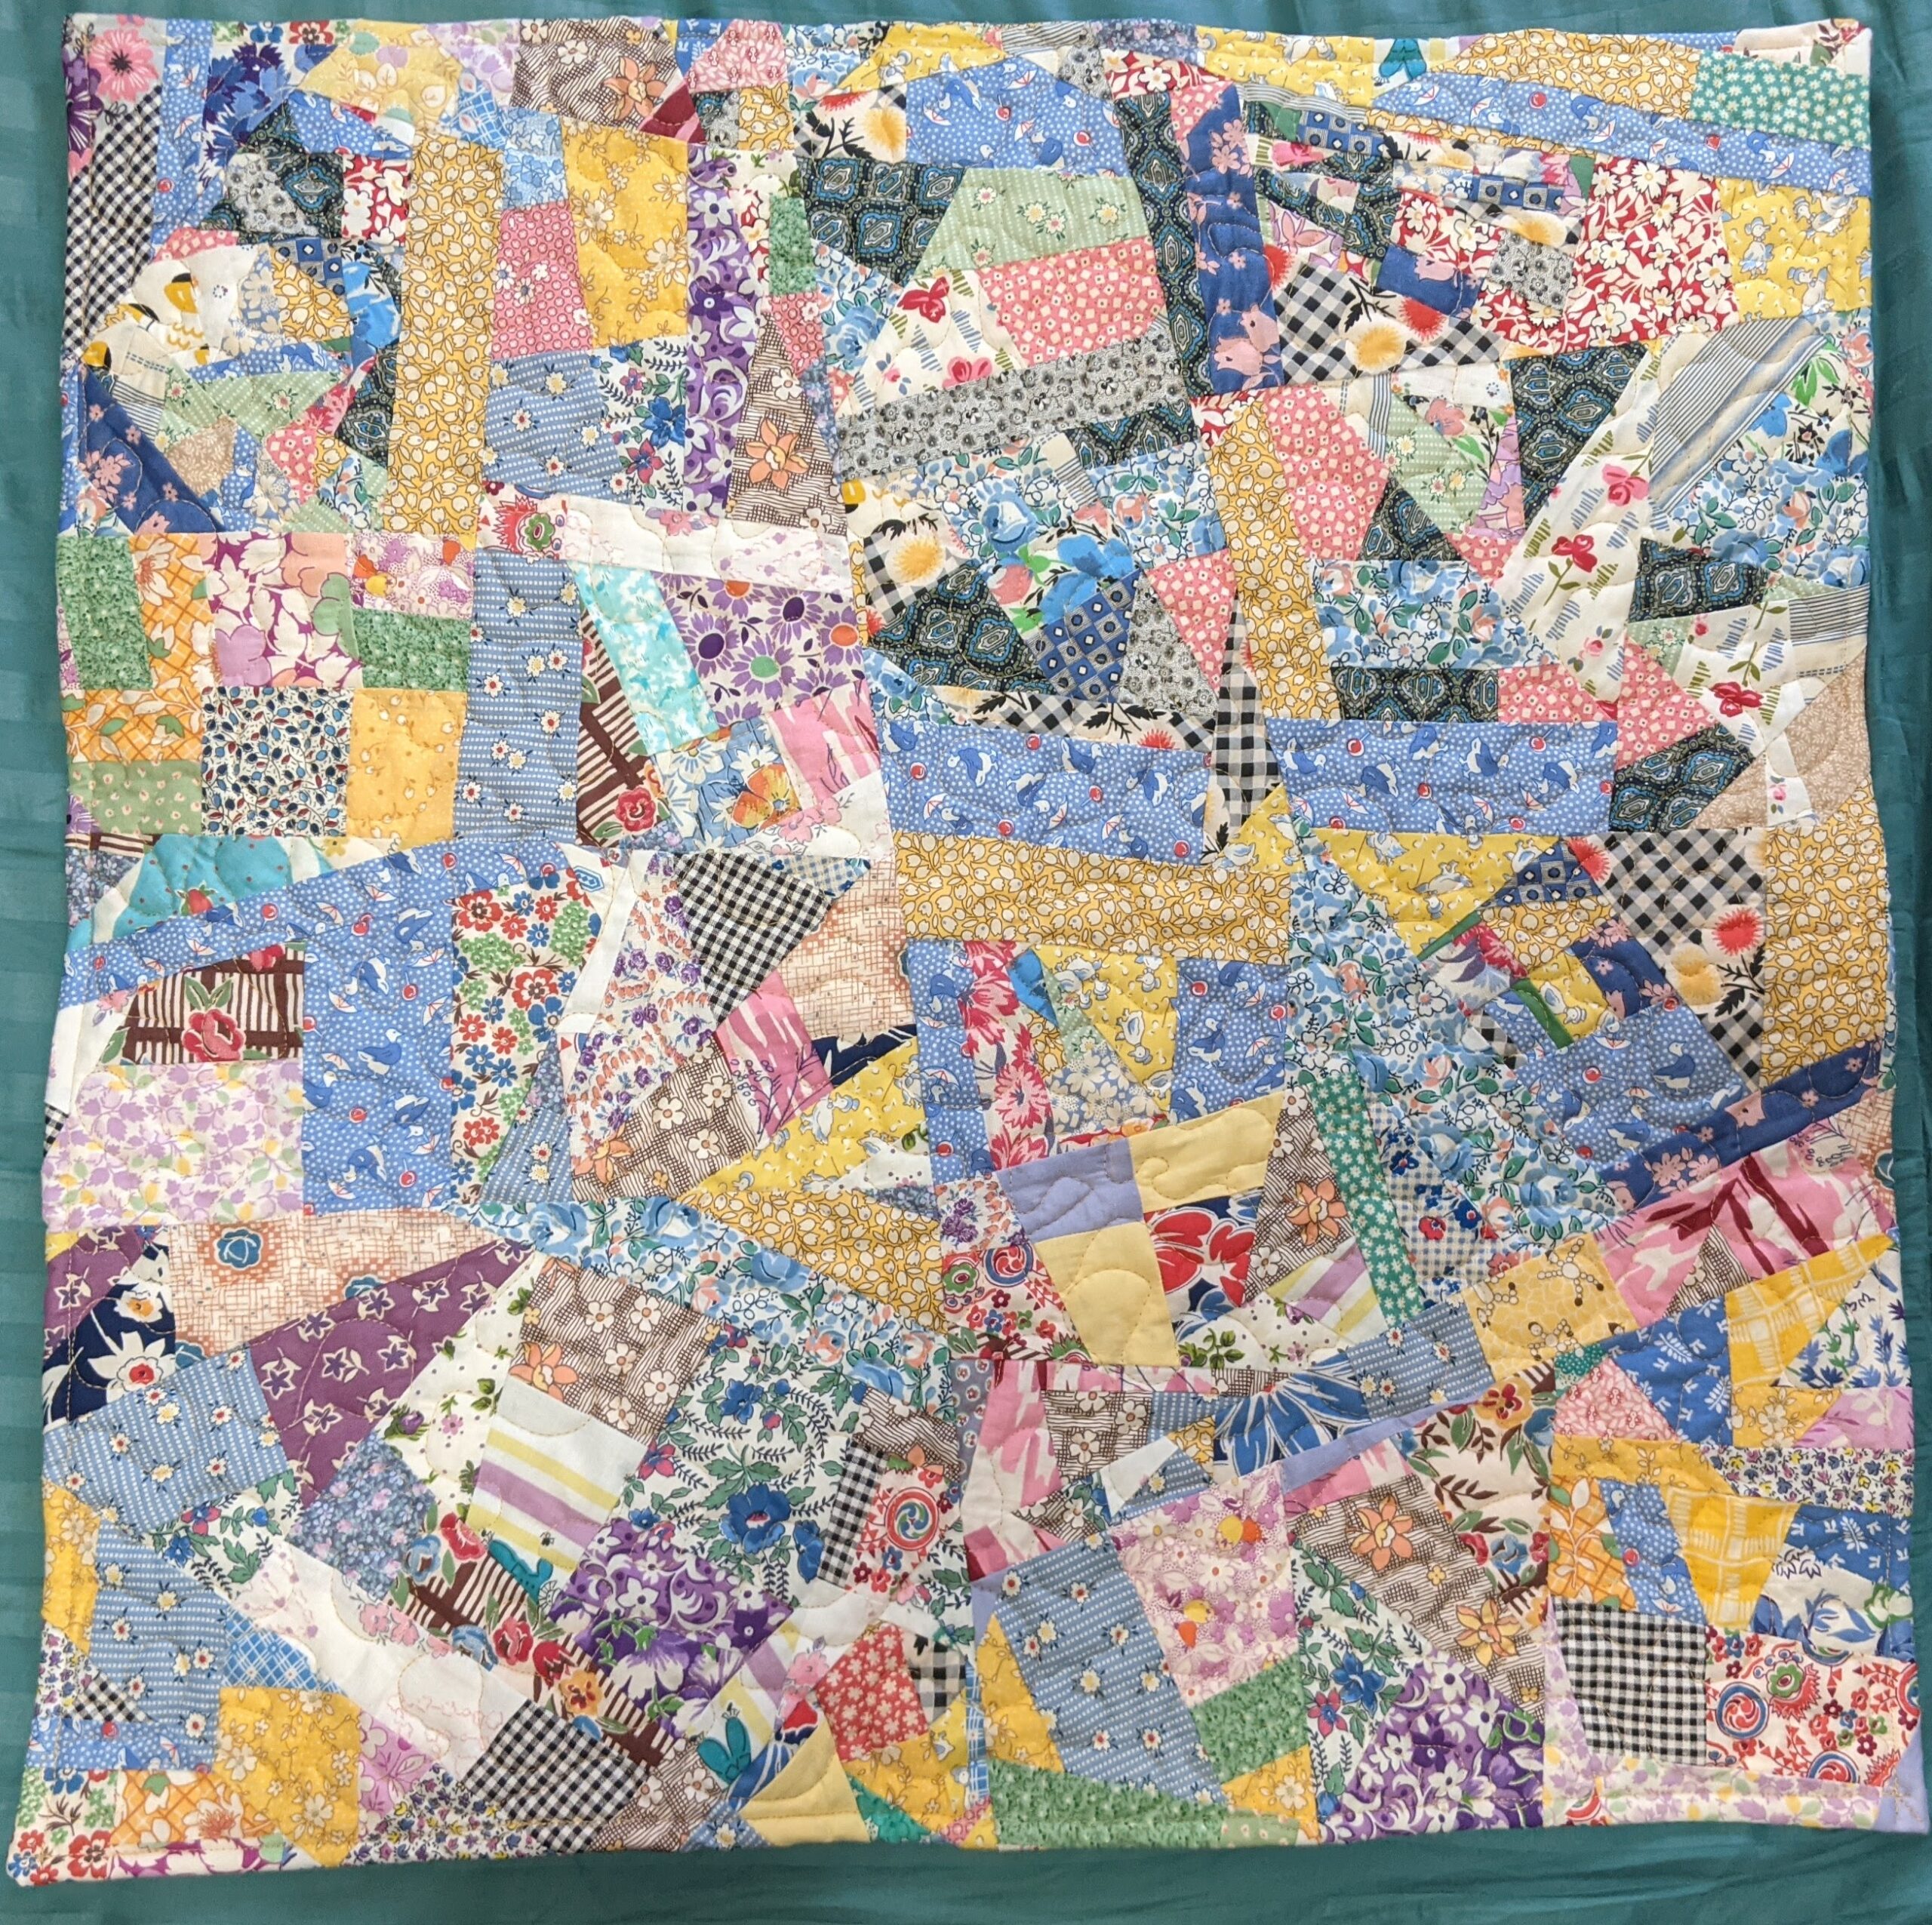
For the back, like I said before, I am a glutton for punishment, so I decided to piece the entire back with scraps ensuring that not a single piece of fabric was larger than 9 square inches. I put it together as a Crazy Quilt….so the back is probably just as intricate as the front (if not more so).
To do this, I started a pile of scraps and then sorted the scraps by edge sizes. Basically, if one edge of a scrap of fabric was about two inches wide, they all went in one pile. This way, as I continued on to the next step, I already had pieced that I could stack right sides together and just run through my machine.
From the piles, I used all of these scraps as my Leaders and Enders as I was working on the front. Instead of stitching on a scrap piece of fabric in between chain piecing to prevent bird’s nests/thread puke, I just grabbed two scraps out of the same pile with similar edge sizes, smushed them right sides together and ran them through the machine, then went back to my regularly scheduled piecing. When I snipped all my chain piecing apart, I would put the scraps in a different pile. When I needed to press something for the front, I would also grab the now-pieced scrap pile and press those, too.
Then those scraps would get put back into piles with their new similar edge sizes and the whole process would repeat. With this Leader and Ender method, by the end of piecing the front, I had pieced together most of the back, too.
I also made a paper template (see picture below) that was the size I needed the back to be to ensure that I had enough “fabric” to back my quilt top and be able to wrap it around to the front to be the binding as well. Every once in a while, I would just slice a large crazy quilted piece in half, and then attach it to somewhere else to keep the scraps as blended as possible. I LOVE how the back came out.

This Quilt did not win any prizes in the competition, but did receive a pretty decent technical score, so I was happy with that. Better luck next year!
Here’s the details on this un-named Miniature Quilt
Title: Miniature Quilt
Pattern: The Blocks are from “The Farmer’s Wife 1930s Sampler Quilt: Inspiring Letters from Farm Women of the Great Depression and 99 Quilt Blocks That Honor Them,” Book by Laurie Aaron Hird. The sashing and back are original designs.
Size: Miniature, finished ~24″ x 24″
Fabric: A 1930’s grab bag of Scraps, some repro 1930’s fabrics and some navy Grunge, all from the stash!
Piecing: Machine stitched mostly on Mavis, the Bernina 770
Cutting: rotary cut
Quilting: Stipple Quilted by me on Mavis using her BSR.
Backing: Completely pieced as a Crazy Quilt
Label: none but my Bookerworx tag (I know, shame on me)
Batting: Warm and Natural, by The Warm Company
Finished Date: May 2023
Total Hours: Did not track (I’m terrible, I know)