With Every Stitch a Story: An Entire Quilt From Start to Finish, Part 2: Quilt Math
I realize as I type this, that Part 1 of this Instruction was started in November (ooooh boy) and this Quilt’s deadline is May 13th.
I’d love to say that I’m just behind on the blogging part, but no….this quilt hasn’t been worked on since November. That’s okay. It’s being worked on now.
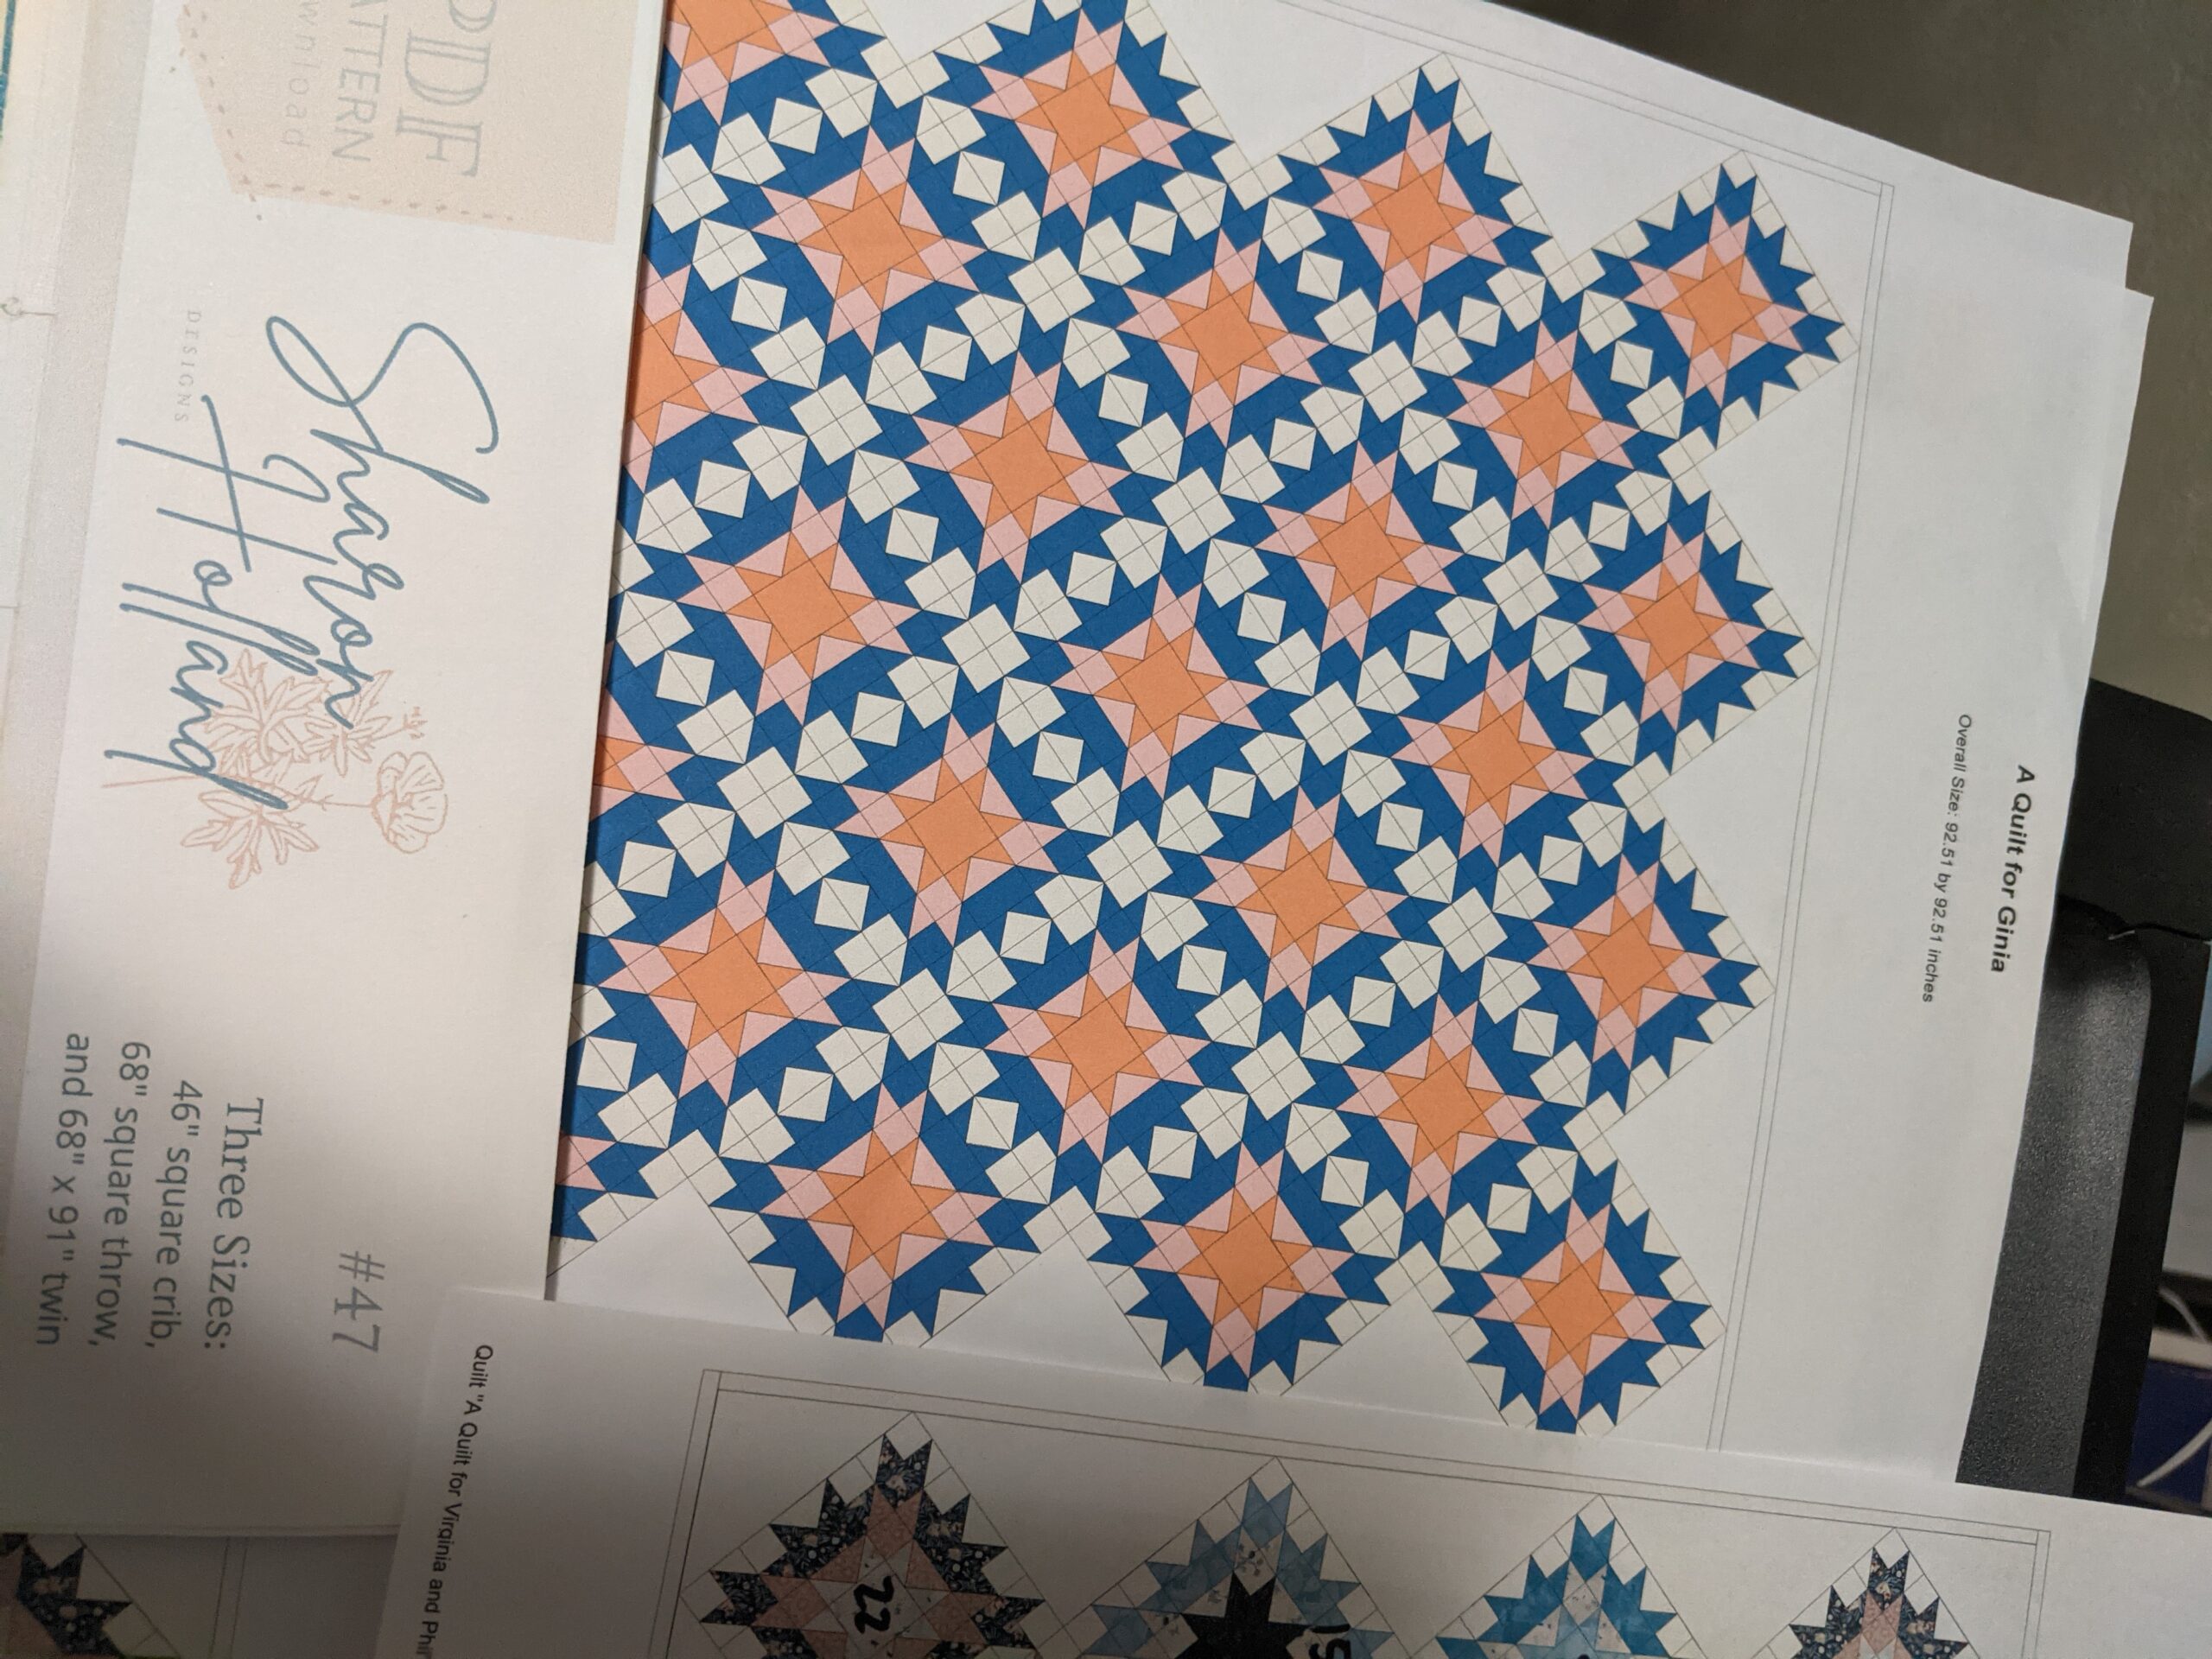
Ok, let’s talk Quilt Math!! I am a very visual and analytical person. I needs lists, spreadsheets and things to be visually laid out. As I told you earlier, this quilt is being made from a purchased pattern called “Firelight” by Sharon Holland. This pattern includes quilts in three sizes: 46″ square crib, 68″ square throw and 68″x91″twin. …well…this is for a Wedding. I need AT LEAST a Queen sized quilt. Let’s do some math!
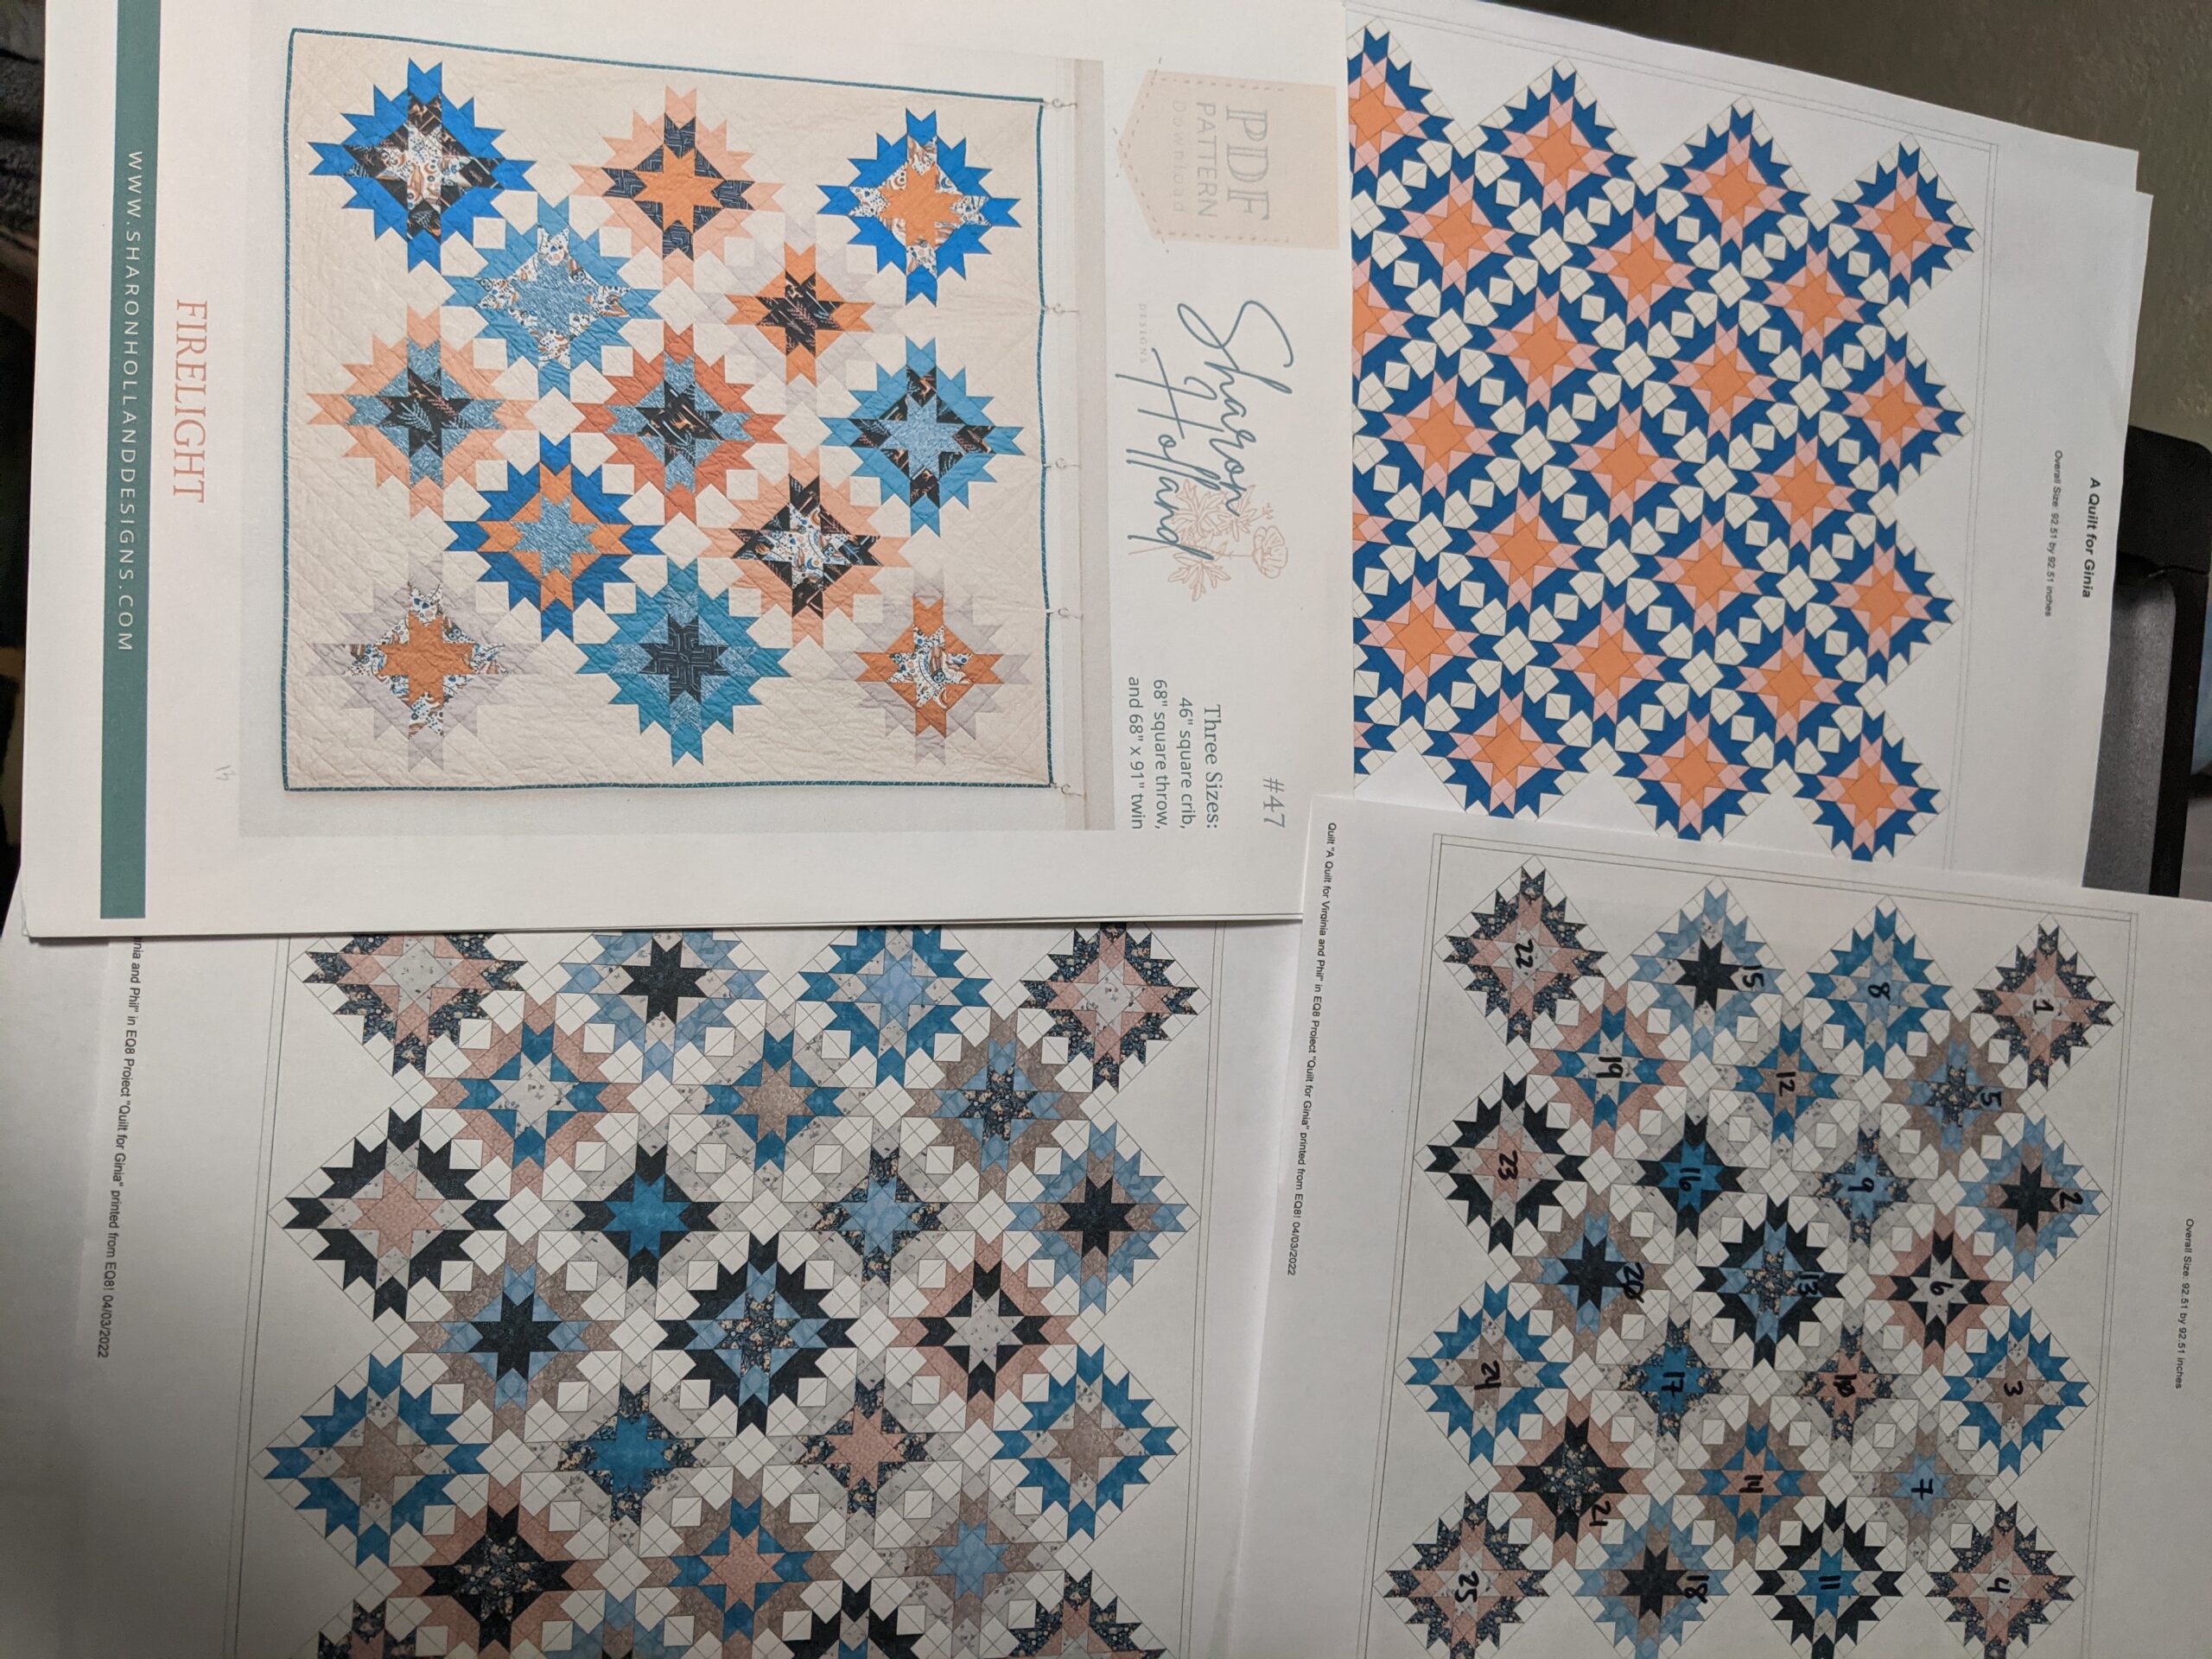
When calculating yardage, I actually went with the twin sized quilt and doubled it. My initial layout (center photo above) has 25 blocks. The Twin layout from the pattern has 13 blocks. I doubled all of the required yardage and deemed that would be sufficient for my needs.
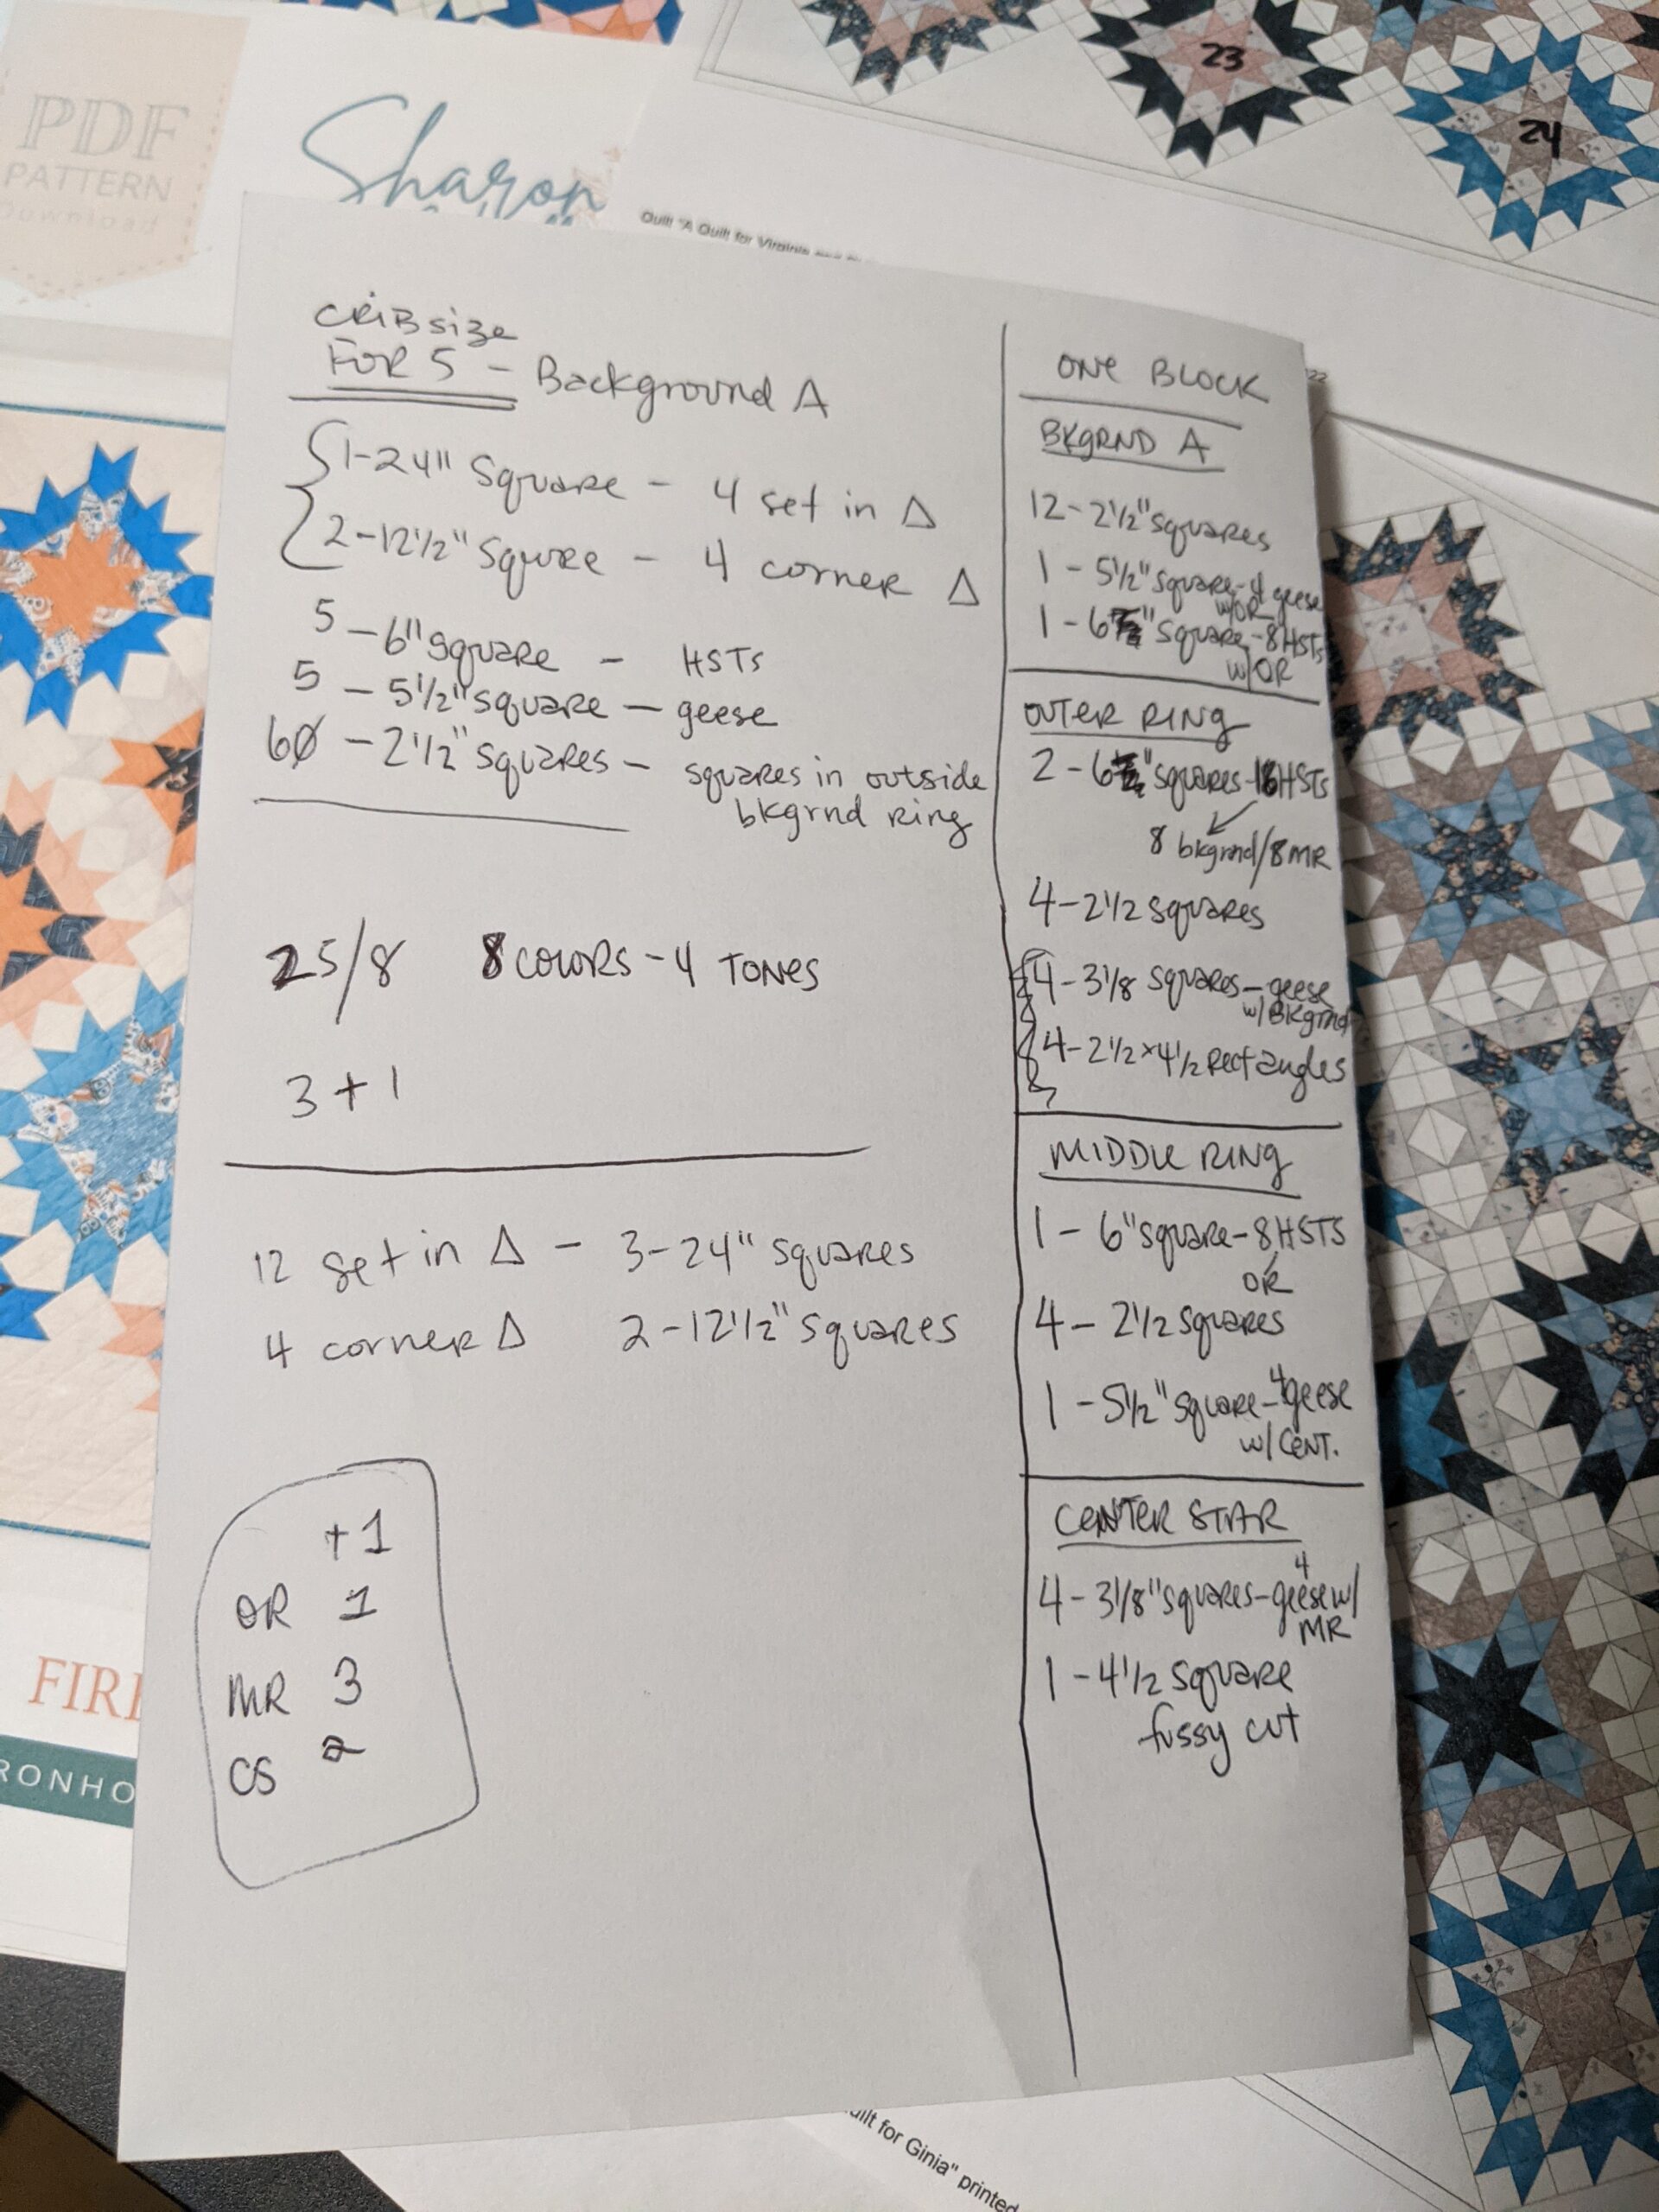
To calculate what I actually needed to cut, it was a bit more involved. I used the Crib size layout (five blocks) and used the pattern to figure out exactly what went in to just one block. (left photo below) After I figured all that out, I realized I couldn’t make an actual cut sheet until I figured out what fabrics were going into which blocks.
At this point, I needed to roll up my sleeves and commit to what fabric went where. I photographed my fabrics and put them into EQ8 and then scaled the photos and added them into my fabric Library. From there, I took the initial layout and started placing fabrics. Of course, 8 fabrics do not divide into 25 blocks easily. Each block is also made up of three parts, the outer ring, middle ring and center star. I decided to ensure that each of my 8 fabrics end up as three outer rings, three middle rings and three center stars–giving me 24 blocks. Then I decided to “feature” three different fabrics to be the extra outer ring, middle ring and center star.
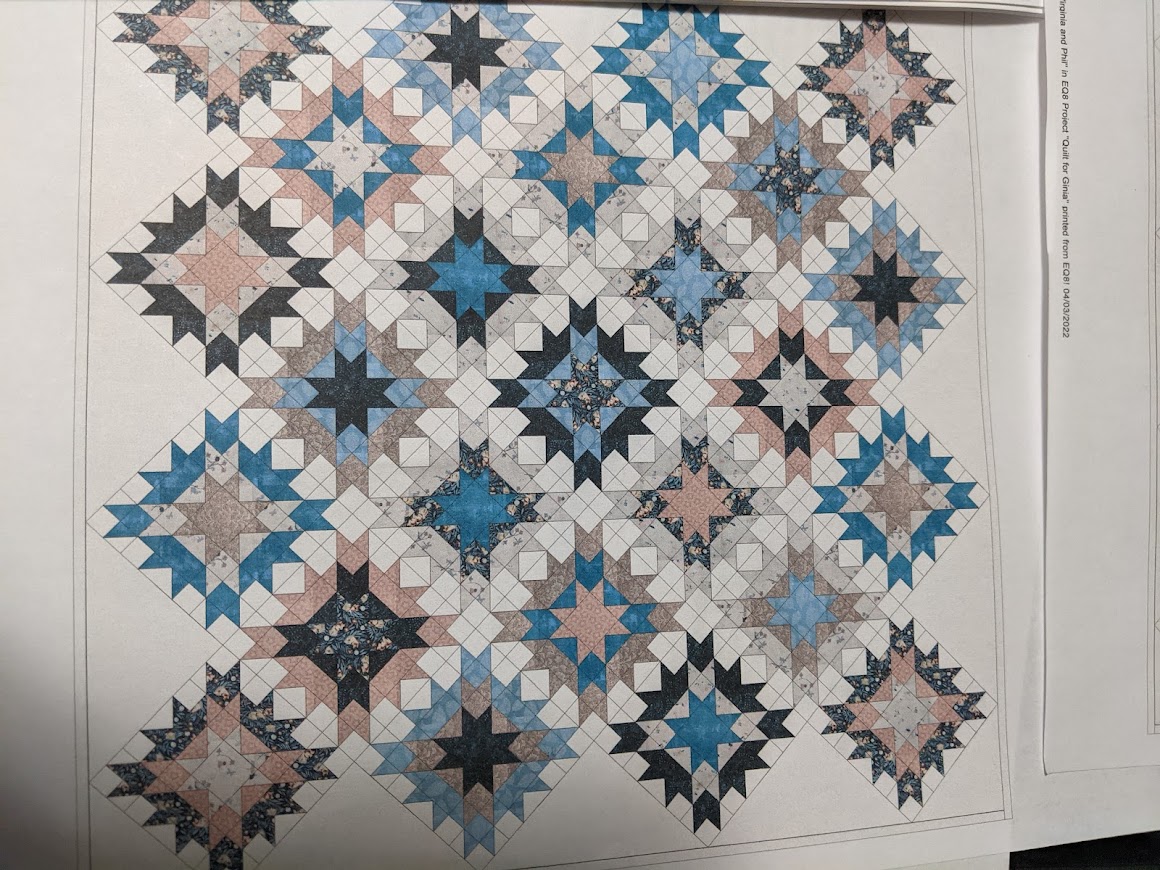
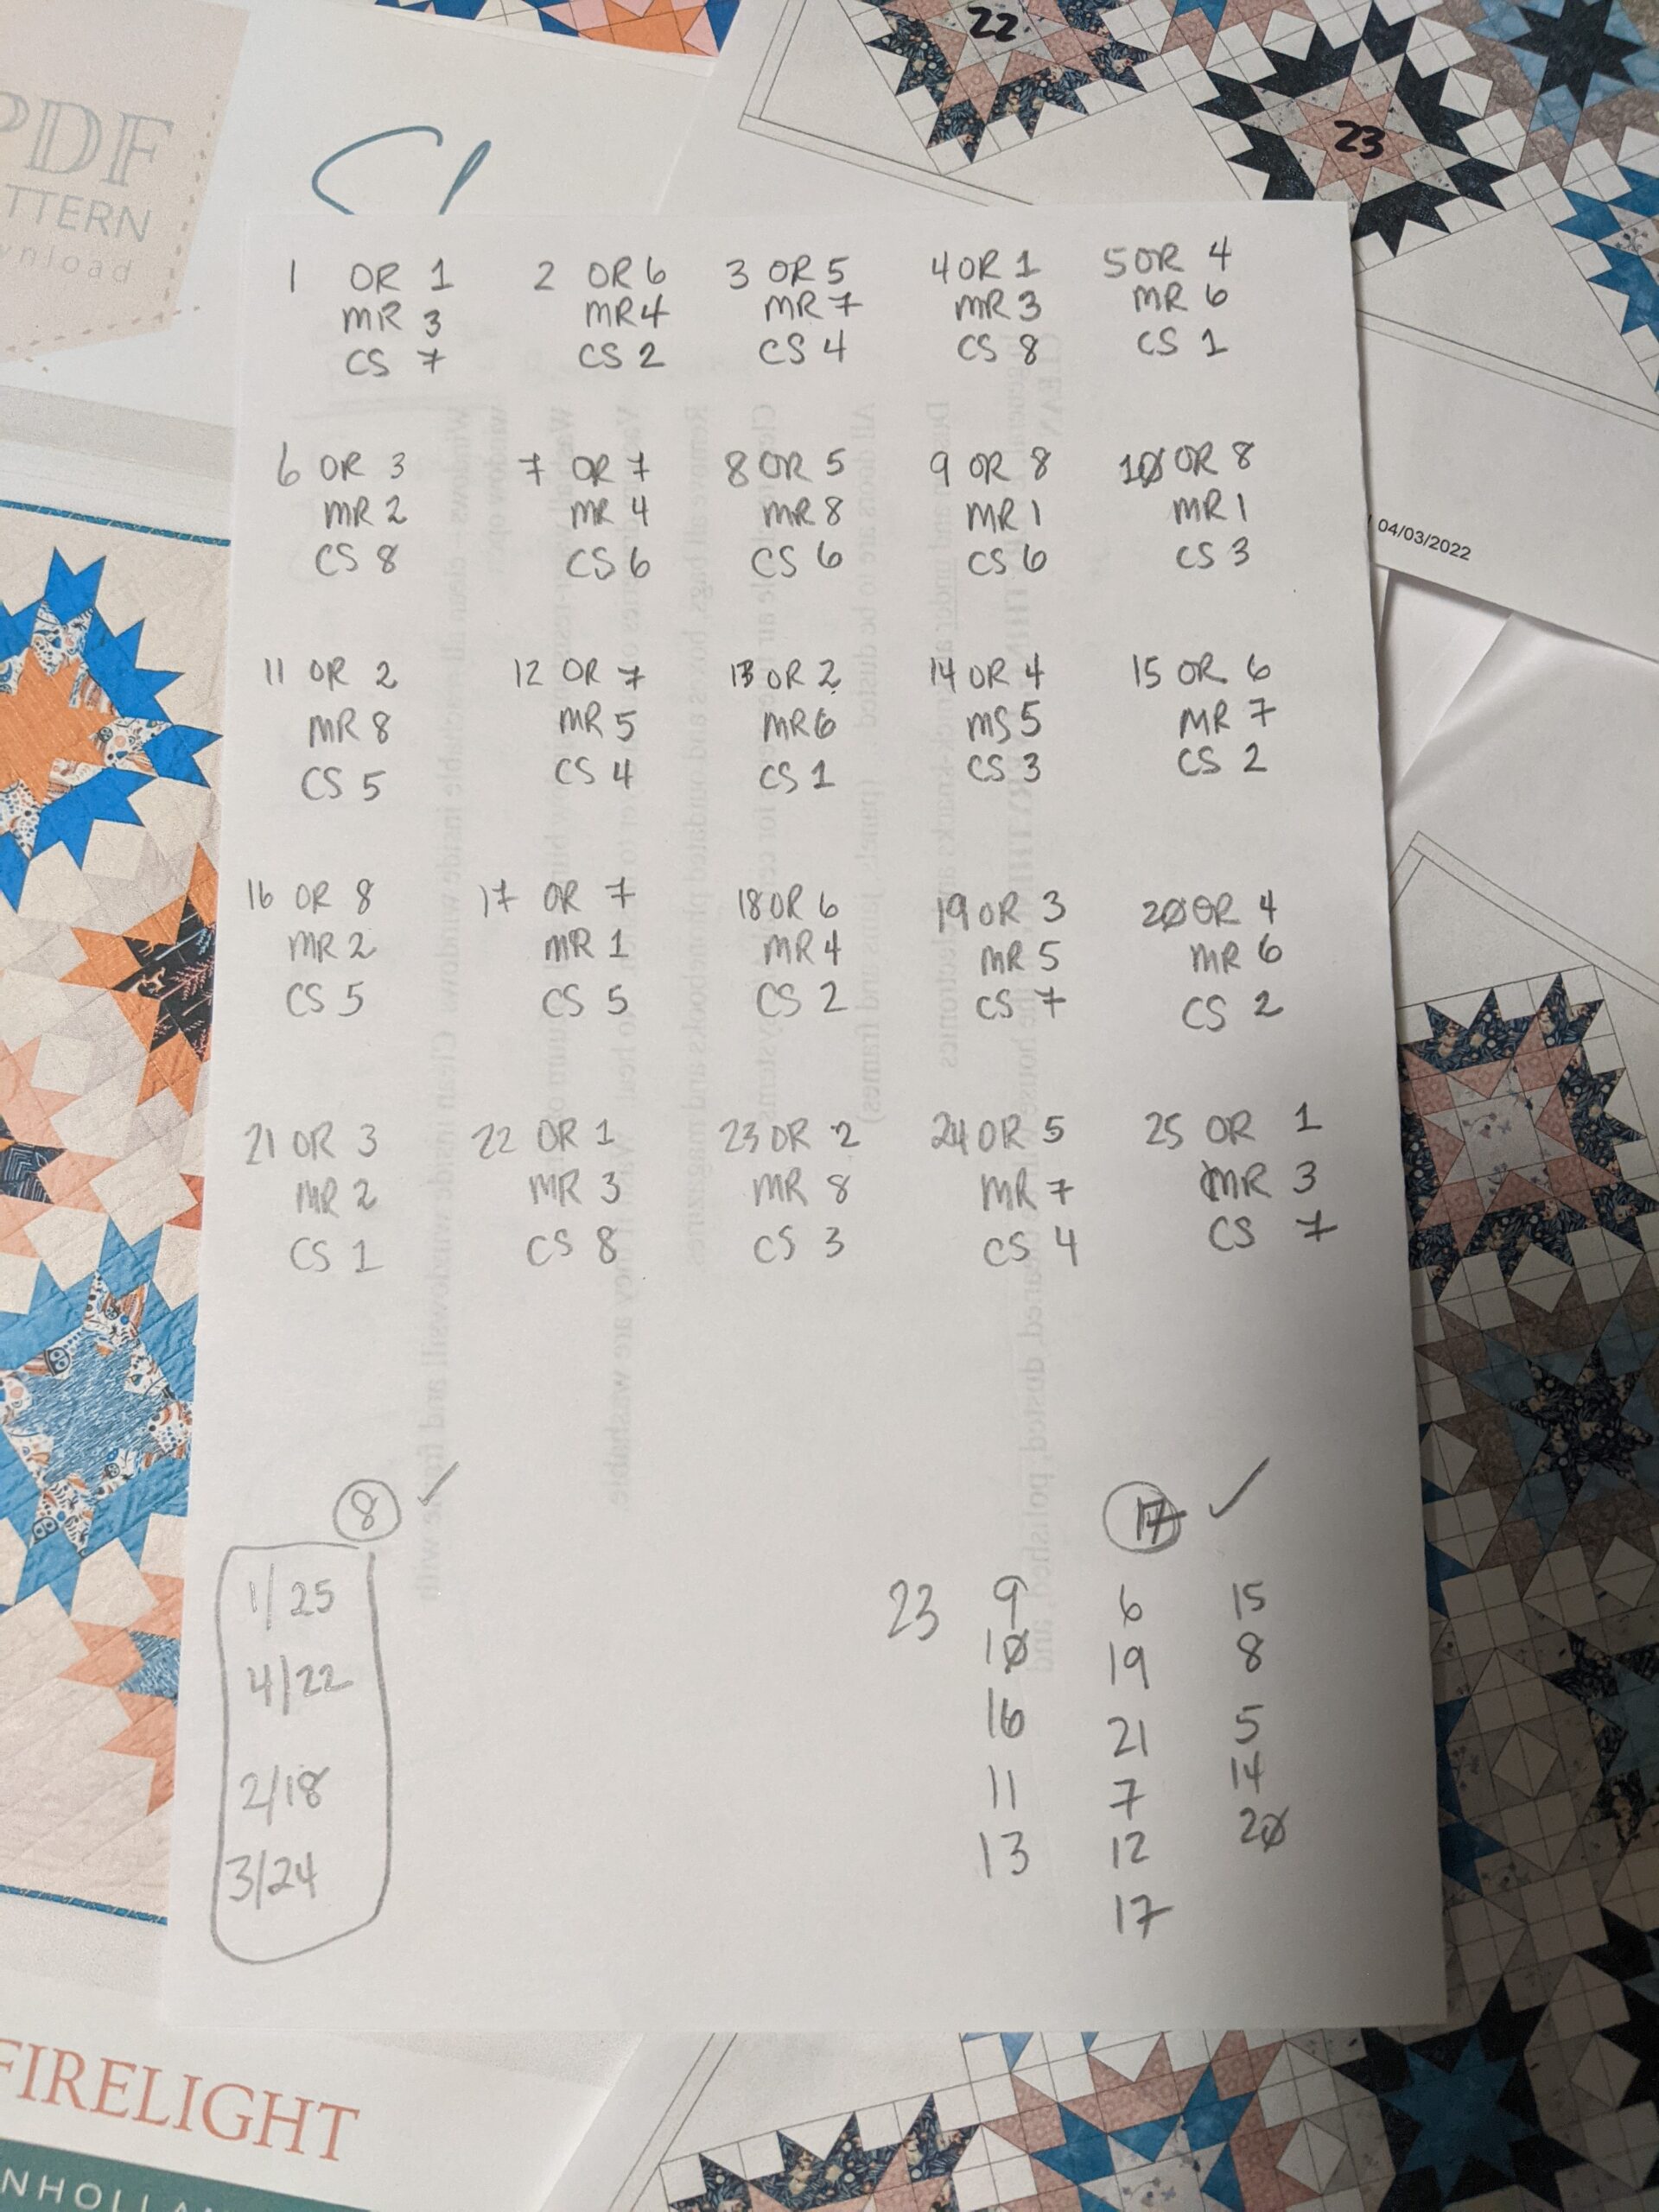
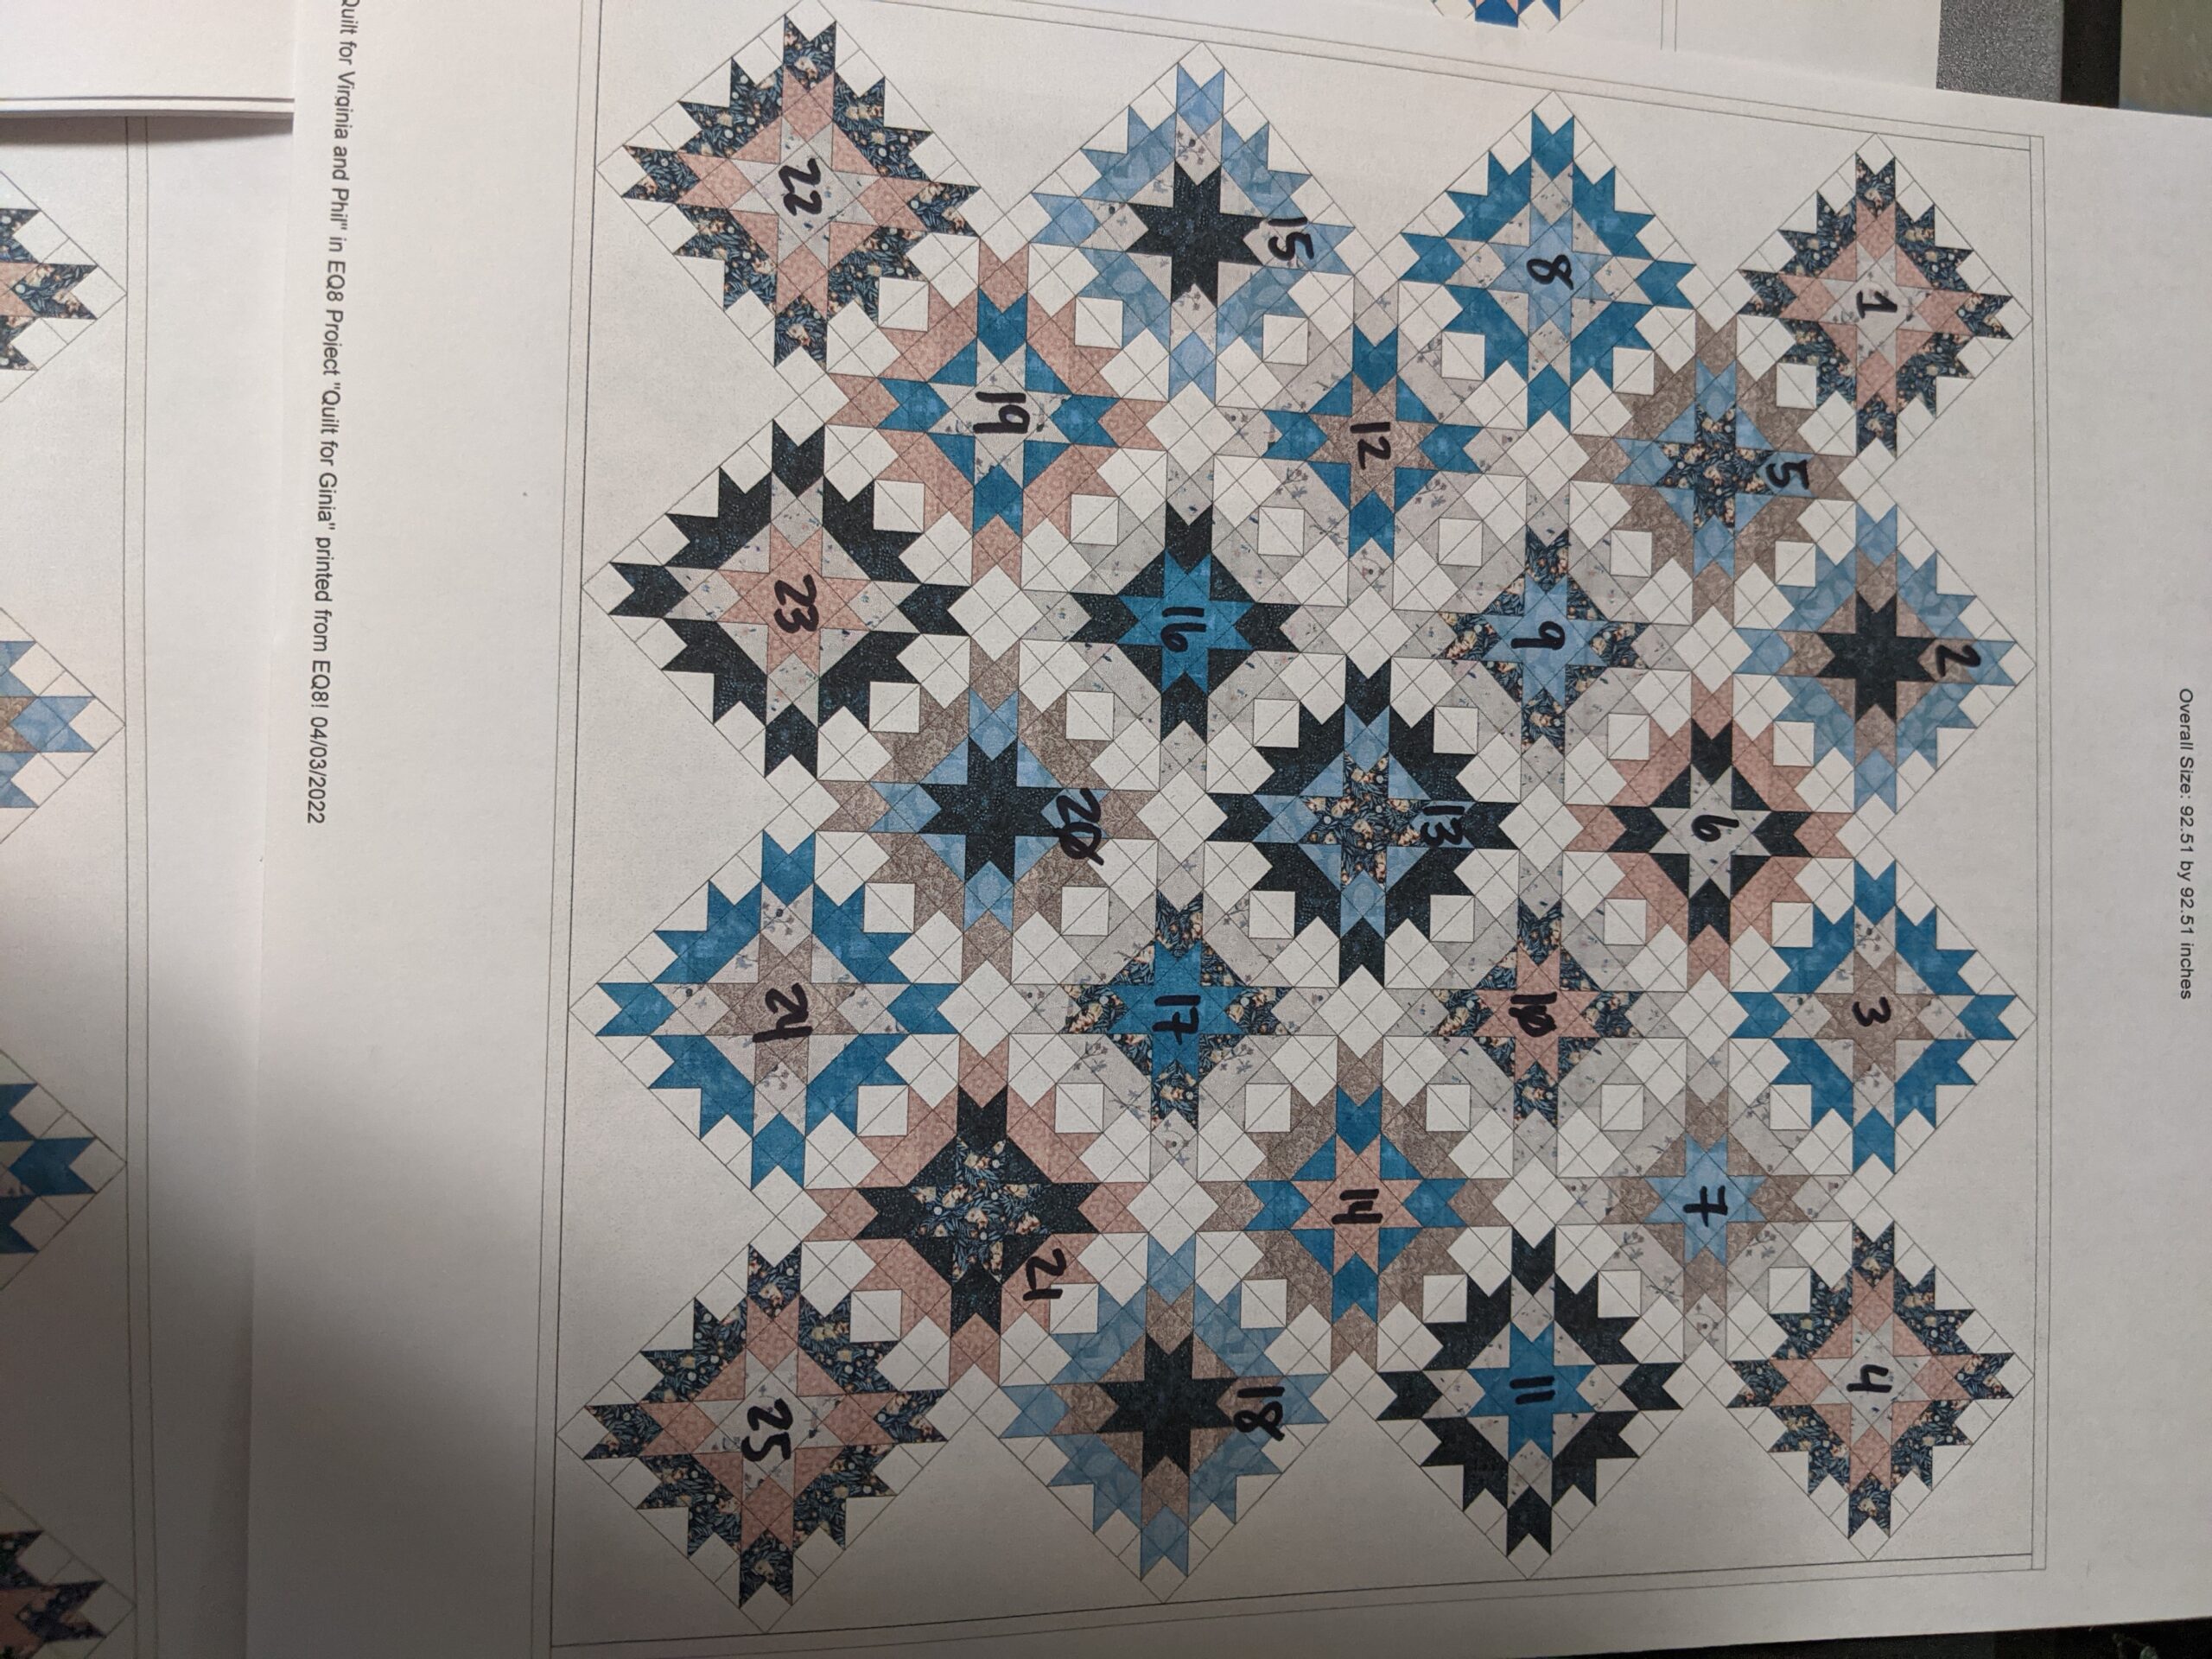
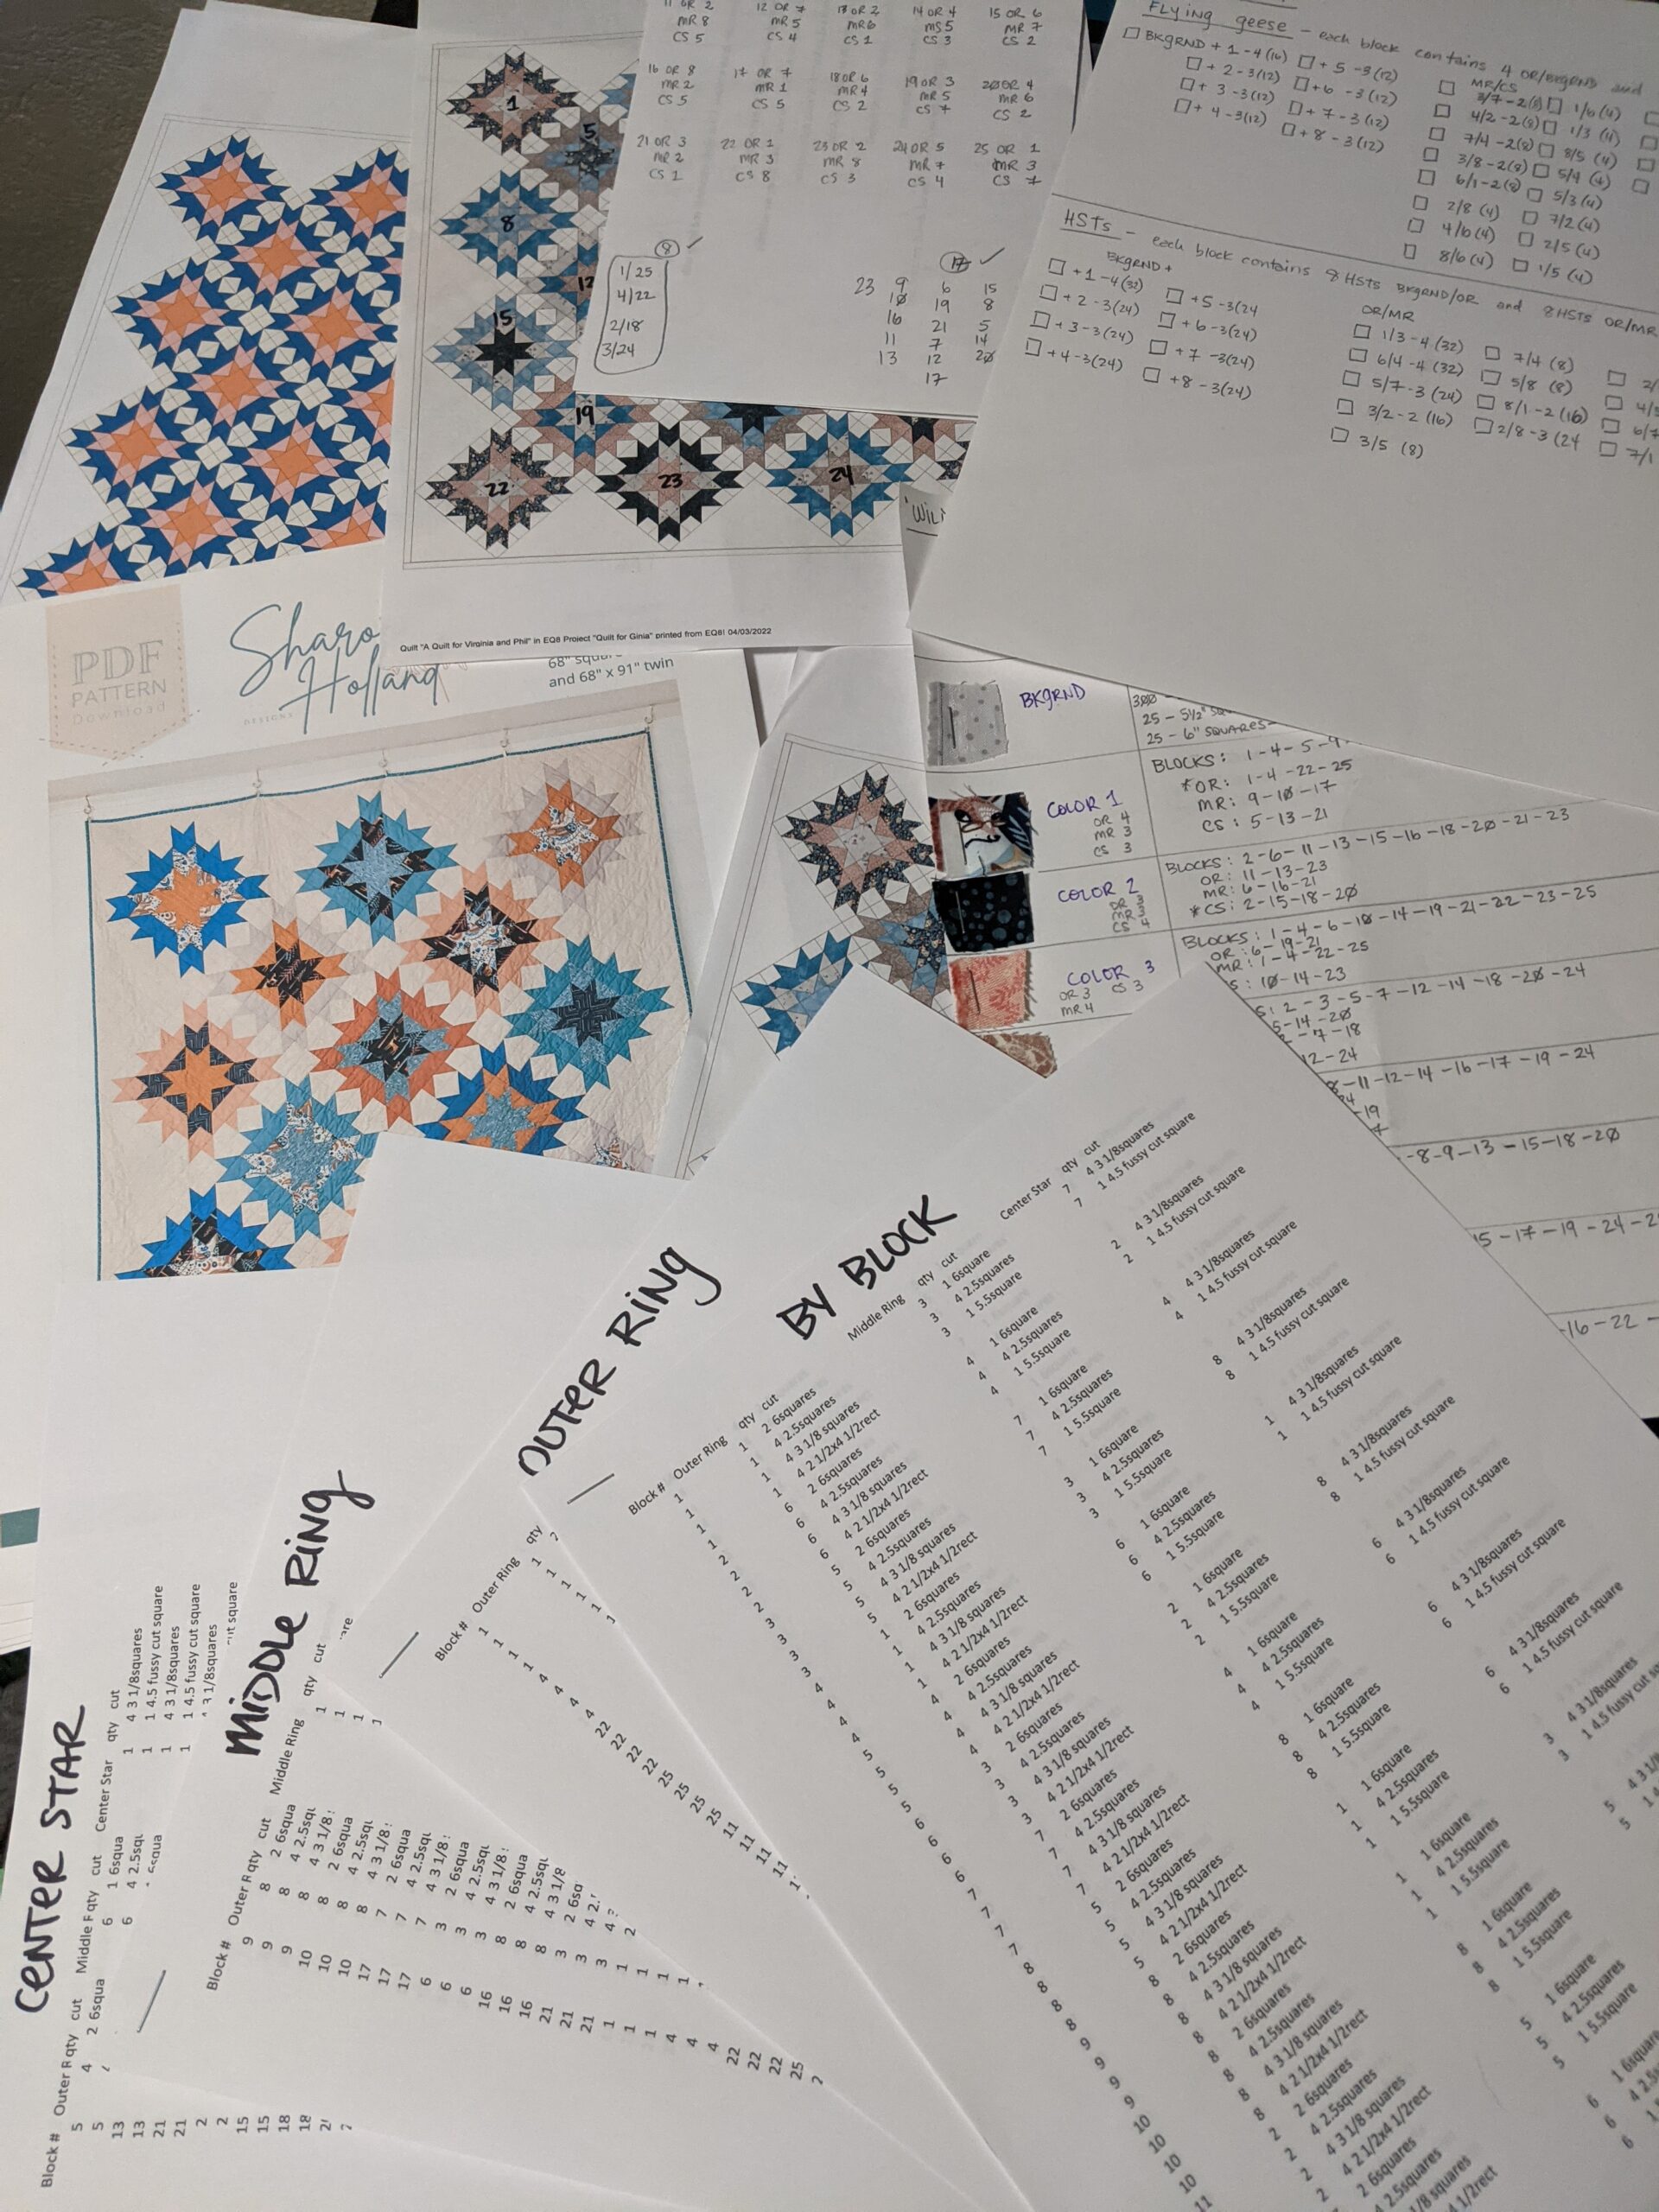
Once the fabric was laid out in EQ8 (right photo above), I started on my cut sheet. It was then that I realized it would be easier if I knew what each blocks color combo was. SO….I printed another copy of the Layout and then numbered the blocks from 1 to 25 with a Sharpie (right photo below). I then set out to make that list of block color combos. (center photo below)
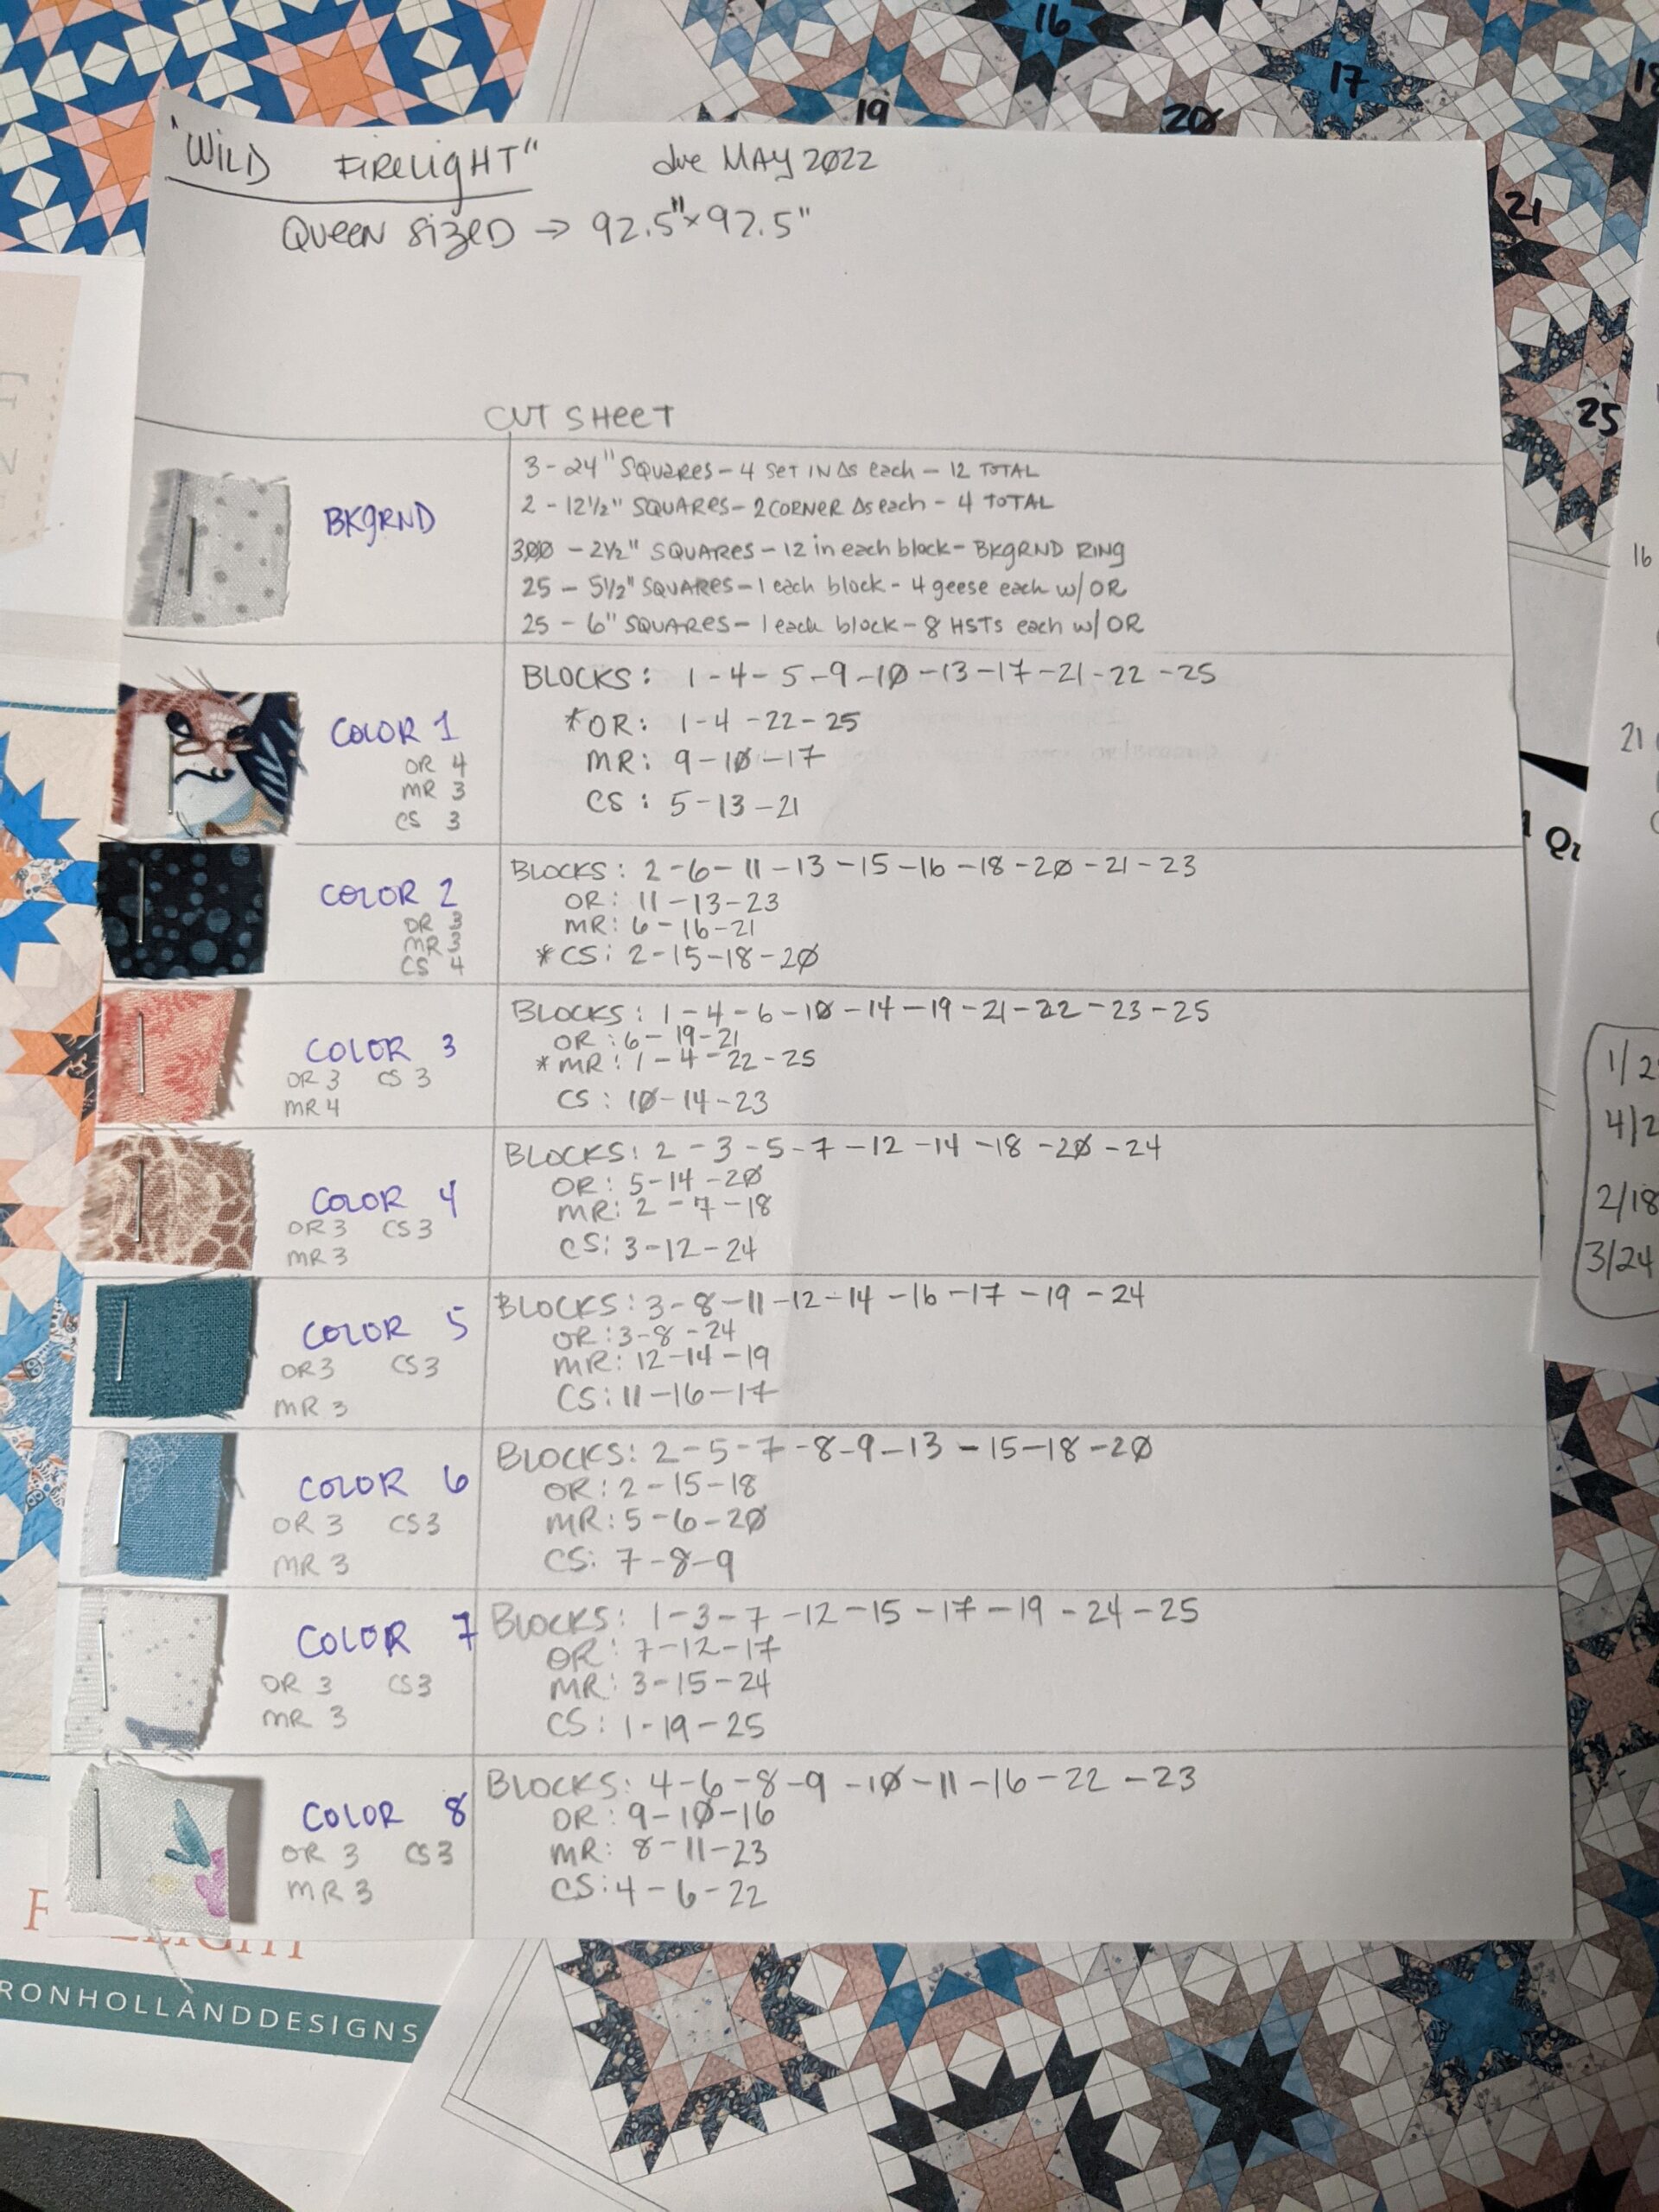
Once that was all done, I made my Fabric Cheat Sheet. (large photo below I take a small swatch of each fabric and staple it to a piece of card stock and label the fabrics. This always helps me keep my fabrics straight and helps me notate a pattern. I do this with almost every quilt I make….I think my only exceptions are scrappy quilts. I find this really helps my thought process and also ends up being a great record to keep after the Quilt is out of my hands. I should get better about writing the fabric details down as well. On this particular Fabric Cheat Sheet, I also wrote out what blocks the fabric is in, and where in the block it goes (Outer Ring, Middle Ring or center star).
Definitely try to make a Fabric Cheat Sheet for the next quilt you are working on. I include it many of my patterns and highly, highly recommend the process.
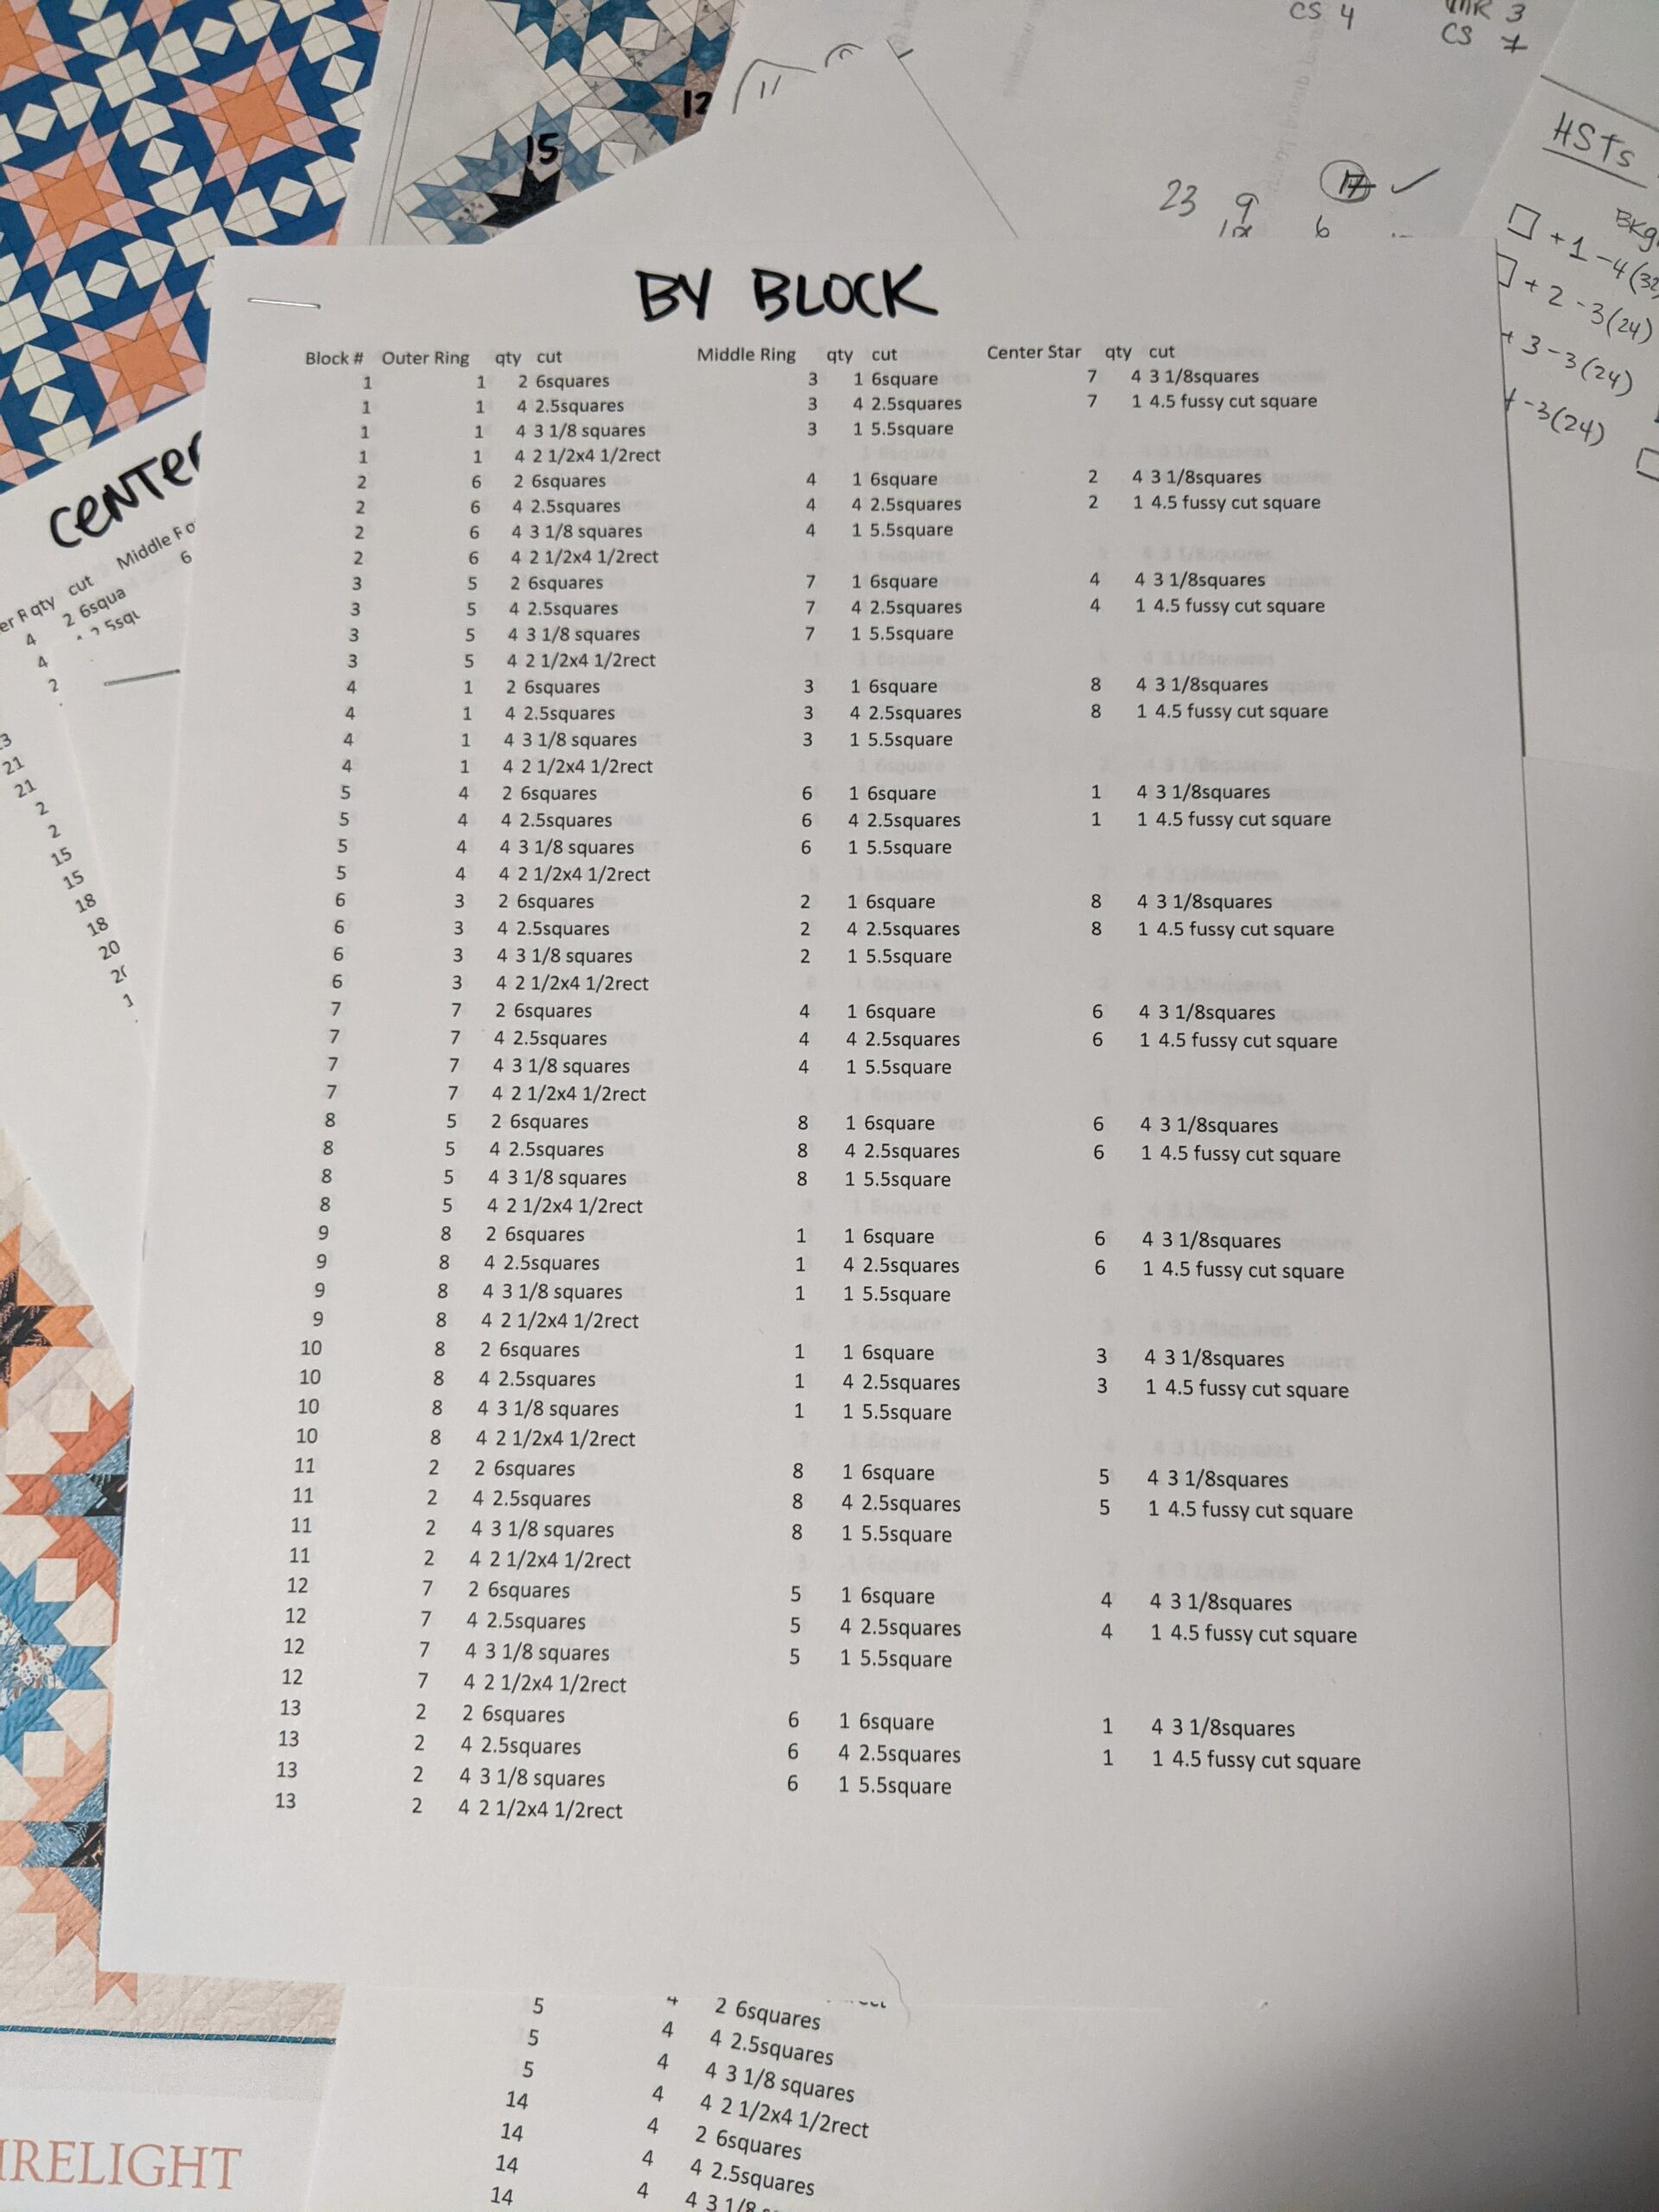
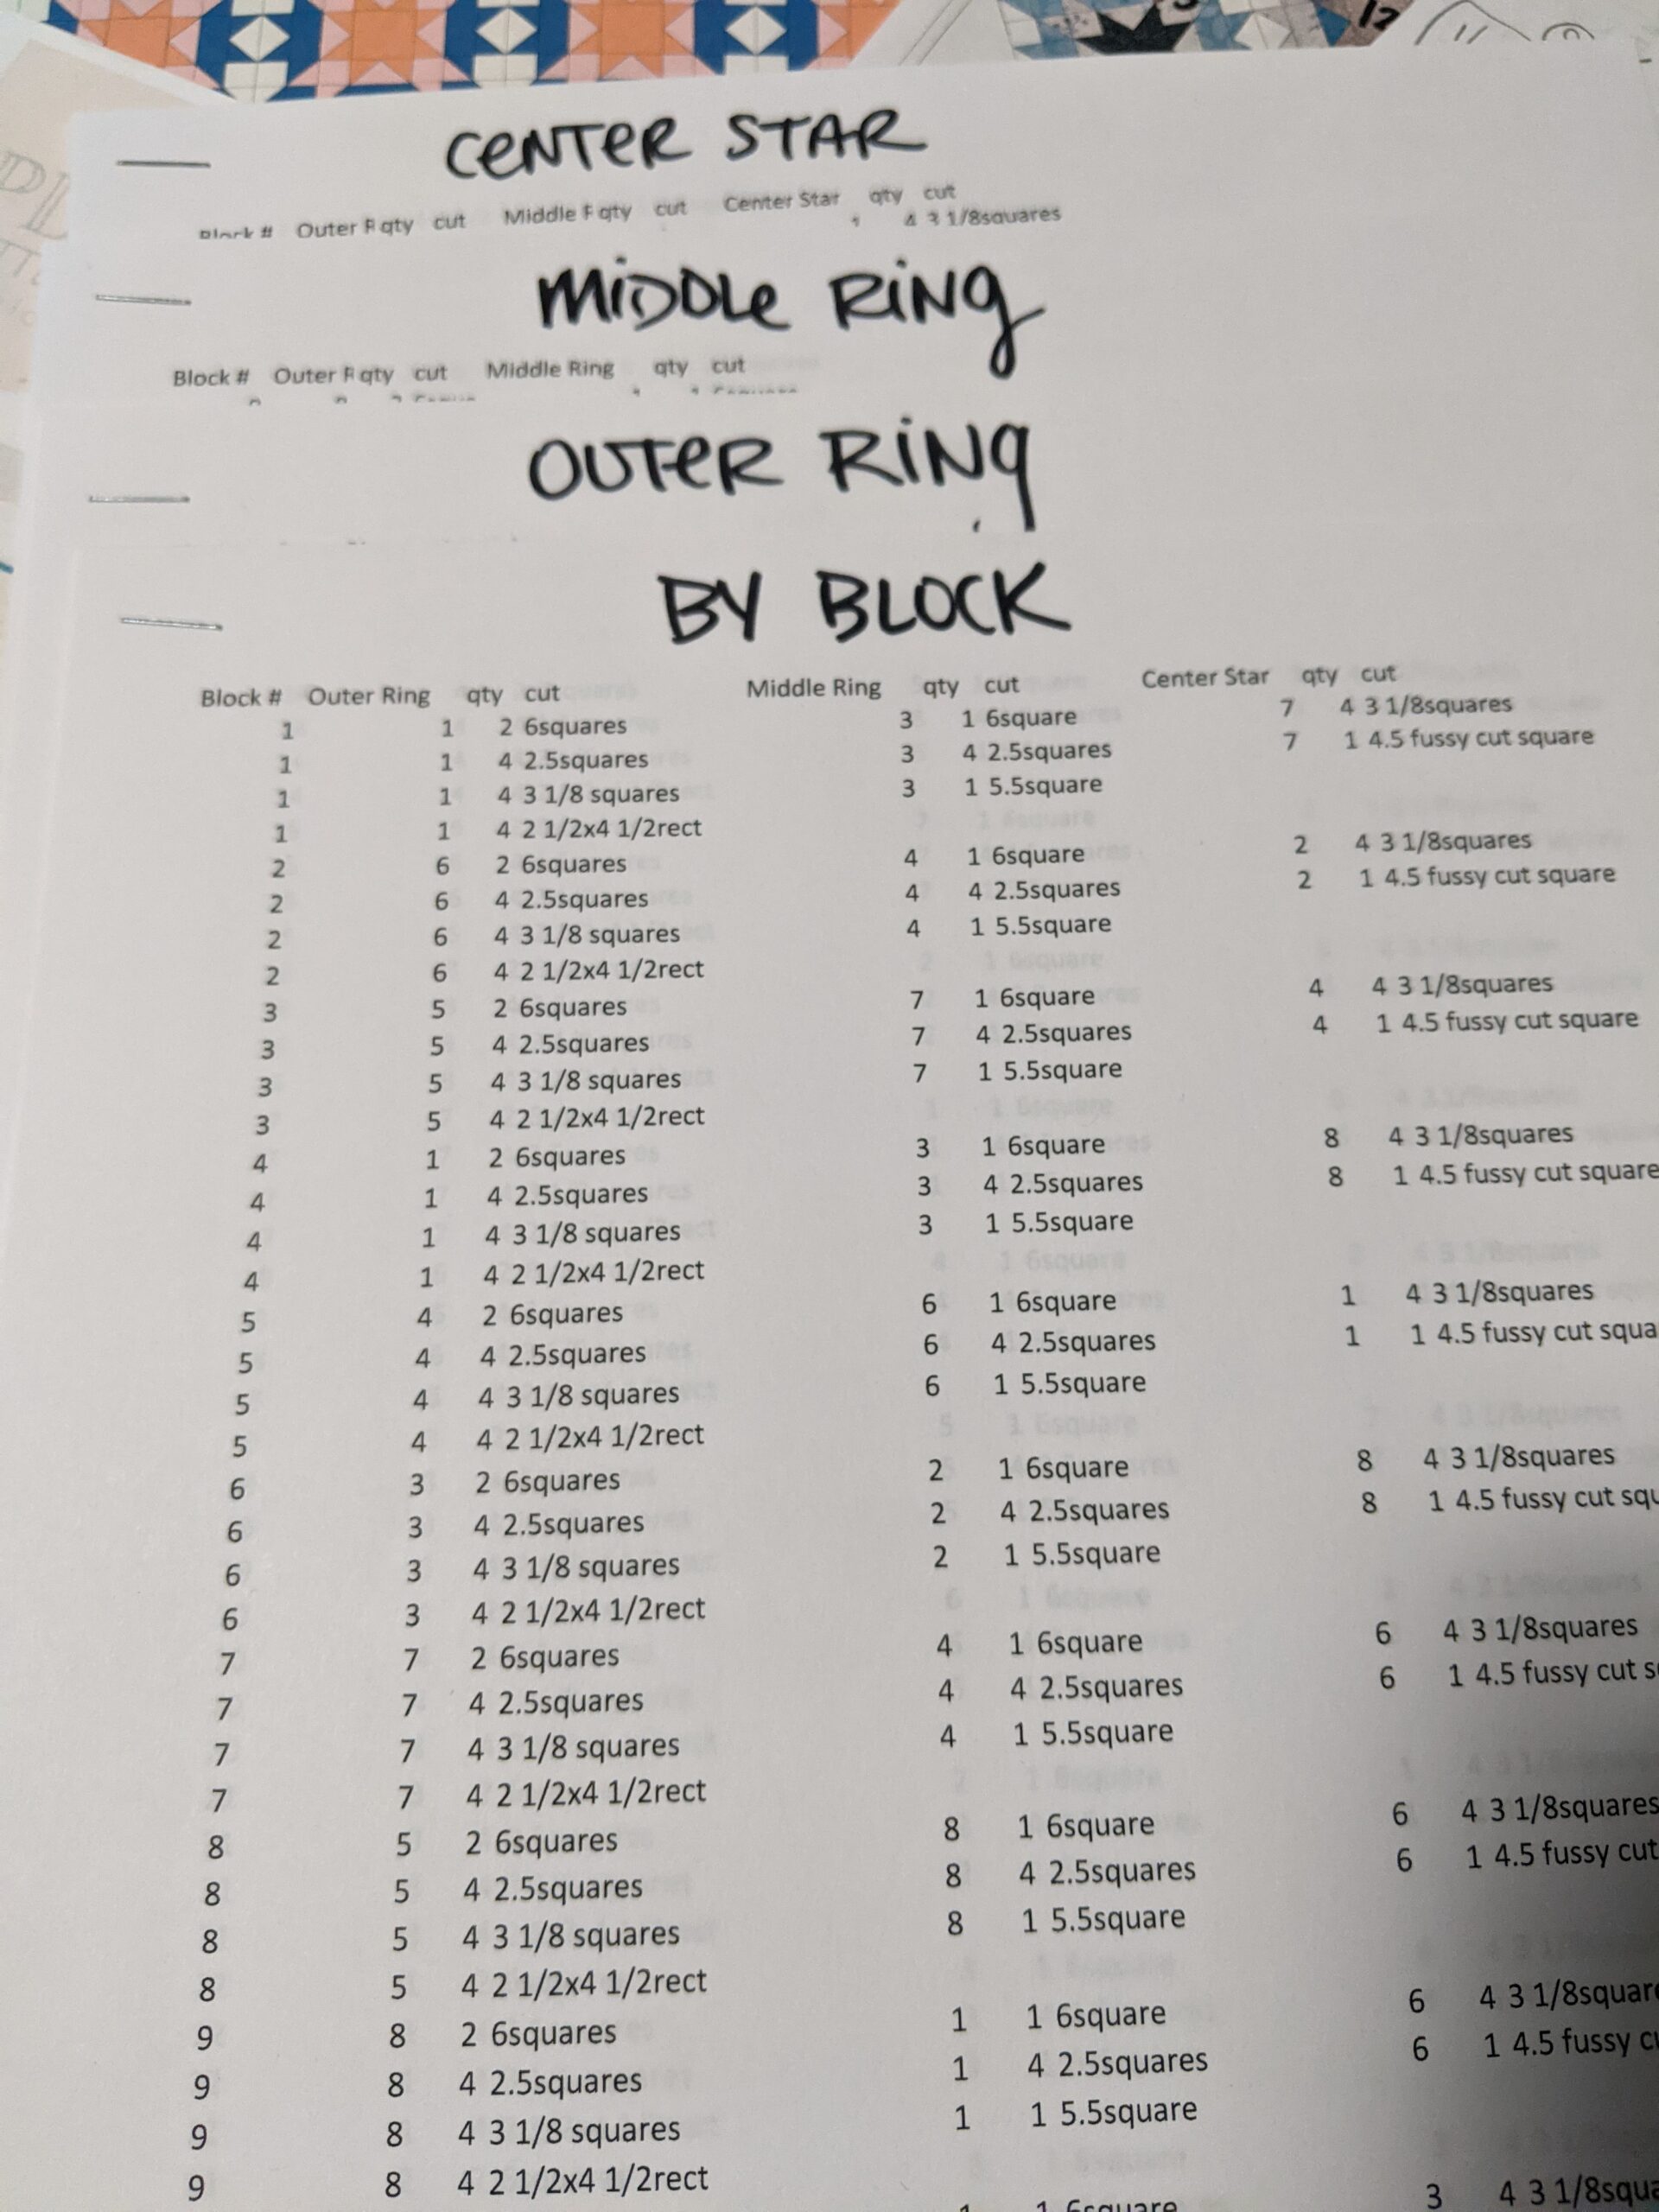
Once all that was squared away, I realized that there is a ton of little pieces in each of these blocks, and writing it all out was going to stink. This calls for a Spreadsheet!! I opened Excel and created a quick spreadsheet that included my block number, the outer ring fabric color, what size and quantity needed to be cut for it, the middle ring fabric color, what size and quantity needed to be cut for it, the center star fabric color, and what size and quantity needed to be cut for that. I printed that out (center photo above) and then sorted my spreadsheet by fabric color for each of the three sections (outer, middle, center star) and printed those out, quickly making cut sheets for each fabric color. After finishing that, I opted to make one more List for myself: Each block in this quilt contains two different flying geese units, one with the outer ring fabric and background fabric and the second with middle ring and center star fabrics. Each block also contains two sets of Half Square Triangles, one with the outer ring and background fabrics and the other with outer and middle ring fabrics. (right photo above)
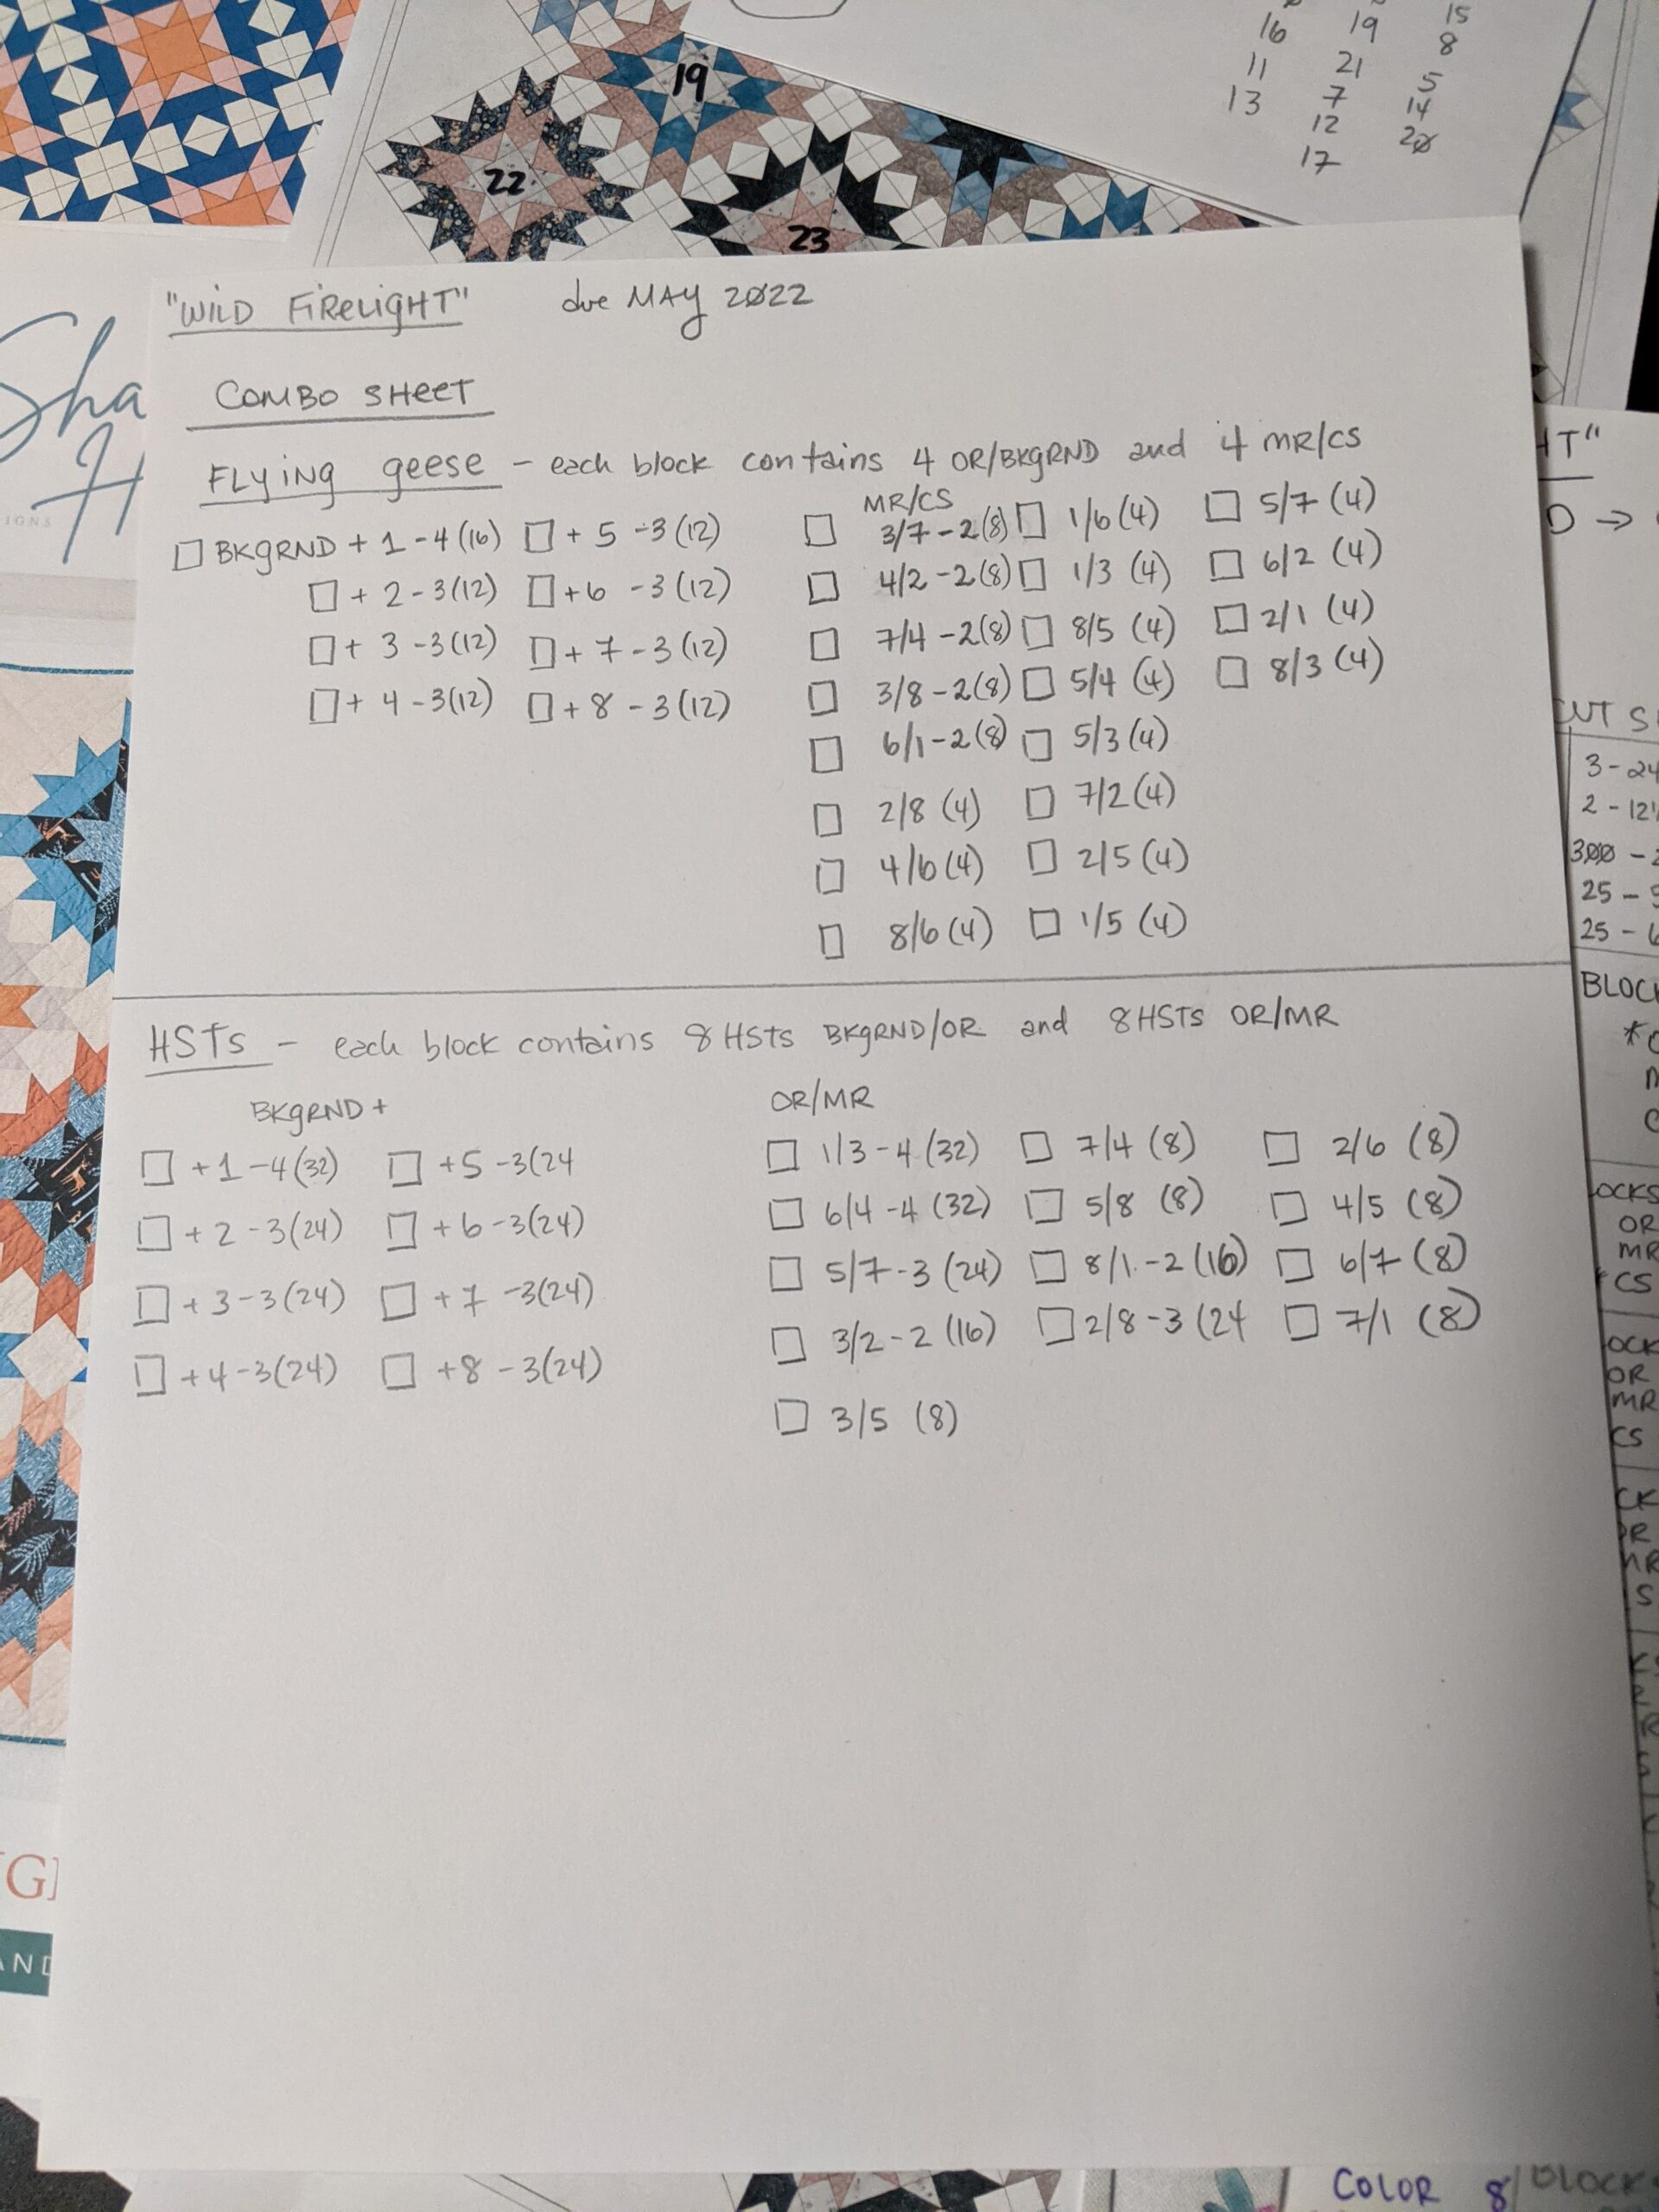
Because some block color combos repeat, I felt it would be most efficient to have these combos listed so that when I cut and sort my fabrics, I can put these color combos together more quickly. This particular pattern does 4 at a time flying geese and 8 at a time Half Square Triangles, so once I cut everything out, I can use this Combo Sheet (left photo above) to quickly sort those.
All of this work took me three hours. I sat down in one session to do it all. I find when you do this kind of calculating, it’s best to do as much as you can in one session, because if you have to get up from it, it takes you twenty minutes to figure out where you left off to get started again. Why spend the time on this? Well, this three hours spent here means I don’t have to spend ANY time figuring out color combos, using a design wall to “play” with my fabrics or figure out what fabric to cut what size. It’s all been done now. I’m not knocking a design wall at all, but this particular quilt would take WAY TOO MUCH time to do that way….time I do not have. All this Quilt Math also means I can cut in more than one session if I need to…which is good, because this quilt has a lot of cutting.
So, this is all the Quilt Math for this quilt….now named “Wild Firelight.” Next step: Cutting. All the Cutting. Did I mention it’s a LOT of cutting? And then Sorting…..all those Combos and blocks need to be organized so that sewing can happen in assembly line fashion. My plan? Make Block #1 fully to ensure all is correct, and then move forward with an assembly line that would make Mr. Ford himself proud.
Hour Count:
Previous Hours: 10
Breaking down Pattern and Adjusting Size, Color Charting, Cut Charts, Fabric Layout, Quilt Math: 3 hours
Total Hours so far: 13
Next Step: Cutting and Sorting Combos and Blocks, “Test” Block #1